 Ask AI
Cloudinary Image Generation
Last updated: Oct-07-2026
Cloudinary Image Generation lets you generate images from a text prompt, optionally guided by one or more reference images, using a unified API that supports multiple best-in-class AI model families. Generated images are automatically available in your Cloudinary product environment for delivery, transformation, and optimization.
You can generate images in three ways: through the Cloudinary Console, by asking your AI agent through the Asset Management MCP server, or through the API.
Getting started
Before you can use the Cloudinary Image Generation add-on:
You must have a Cloudinary account. If you don't already have one, you can sign up for a free account.
Register for the add-on: make sure you're logged in to your account and then go to the Image Generation add-on page. For more information about add-on registrations, see Registering for add-ons.
When you generate your first image through the Cloudinary Console, you're automatically subscribed to the free plan. To increase your usage quota, upgrade your plan in the Cloudinary Console.
Generating images via the Console
You can generate images directly from the Cloudinary Console without writing any code.
- In the Cloudinary Console, go to Image > Image Generation.
- Enter a text description of the image you want to create.
- Optionally add up to four reference images to include in the generated image.
- Select a specific Model or let Cloudinary automatically decide which model to use.
- Optionally, expand Advanced Settings to configure aspect ratio and resolution.
- Click Generate with AI to generate the image.
The Preview panel displays the generated image. The Code panel on the right shows the equivalent API call in cURL so you can reproduce the result programmatically.
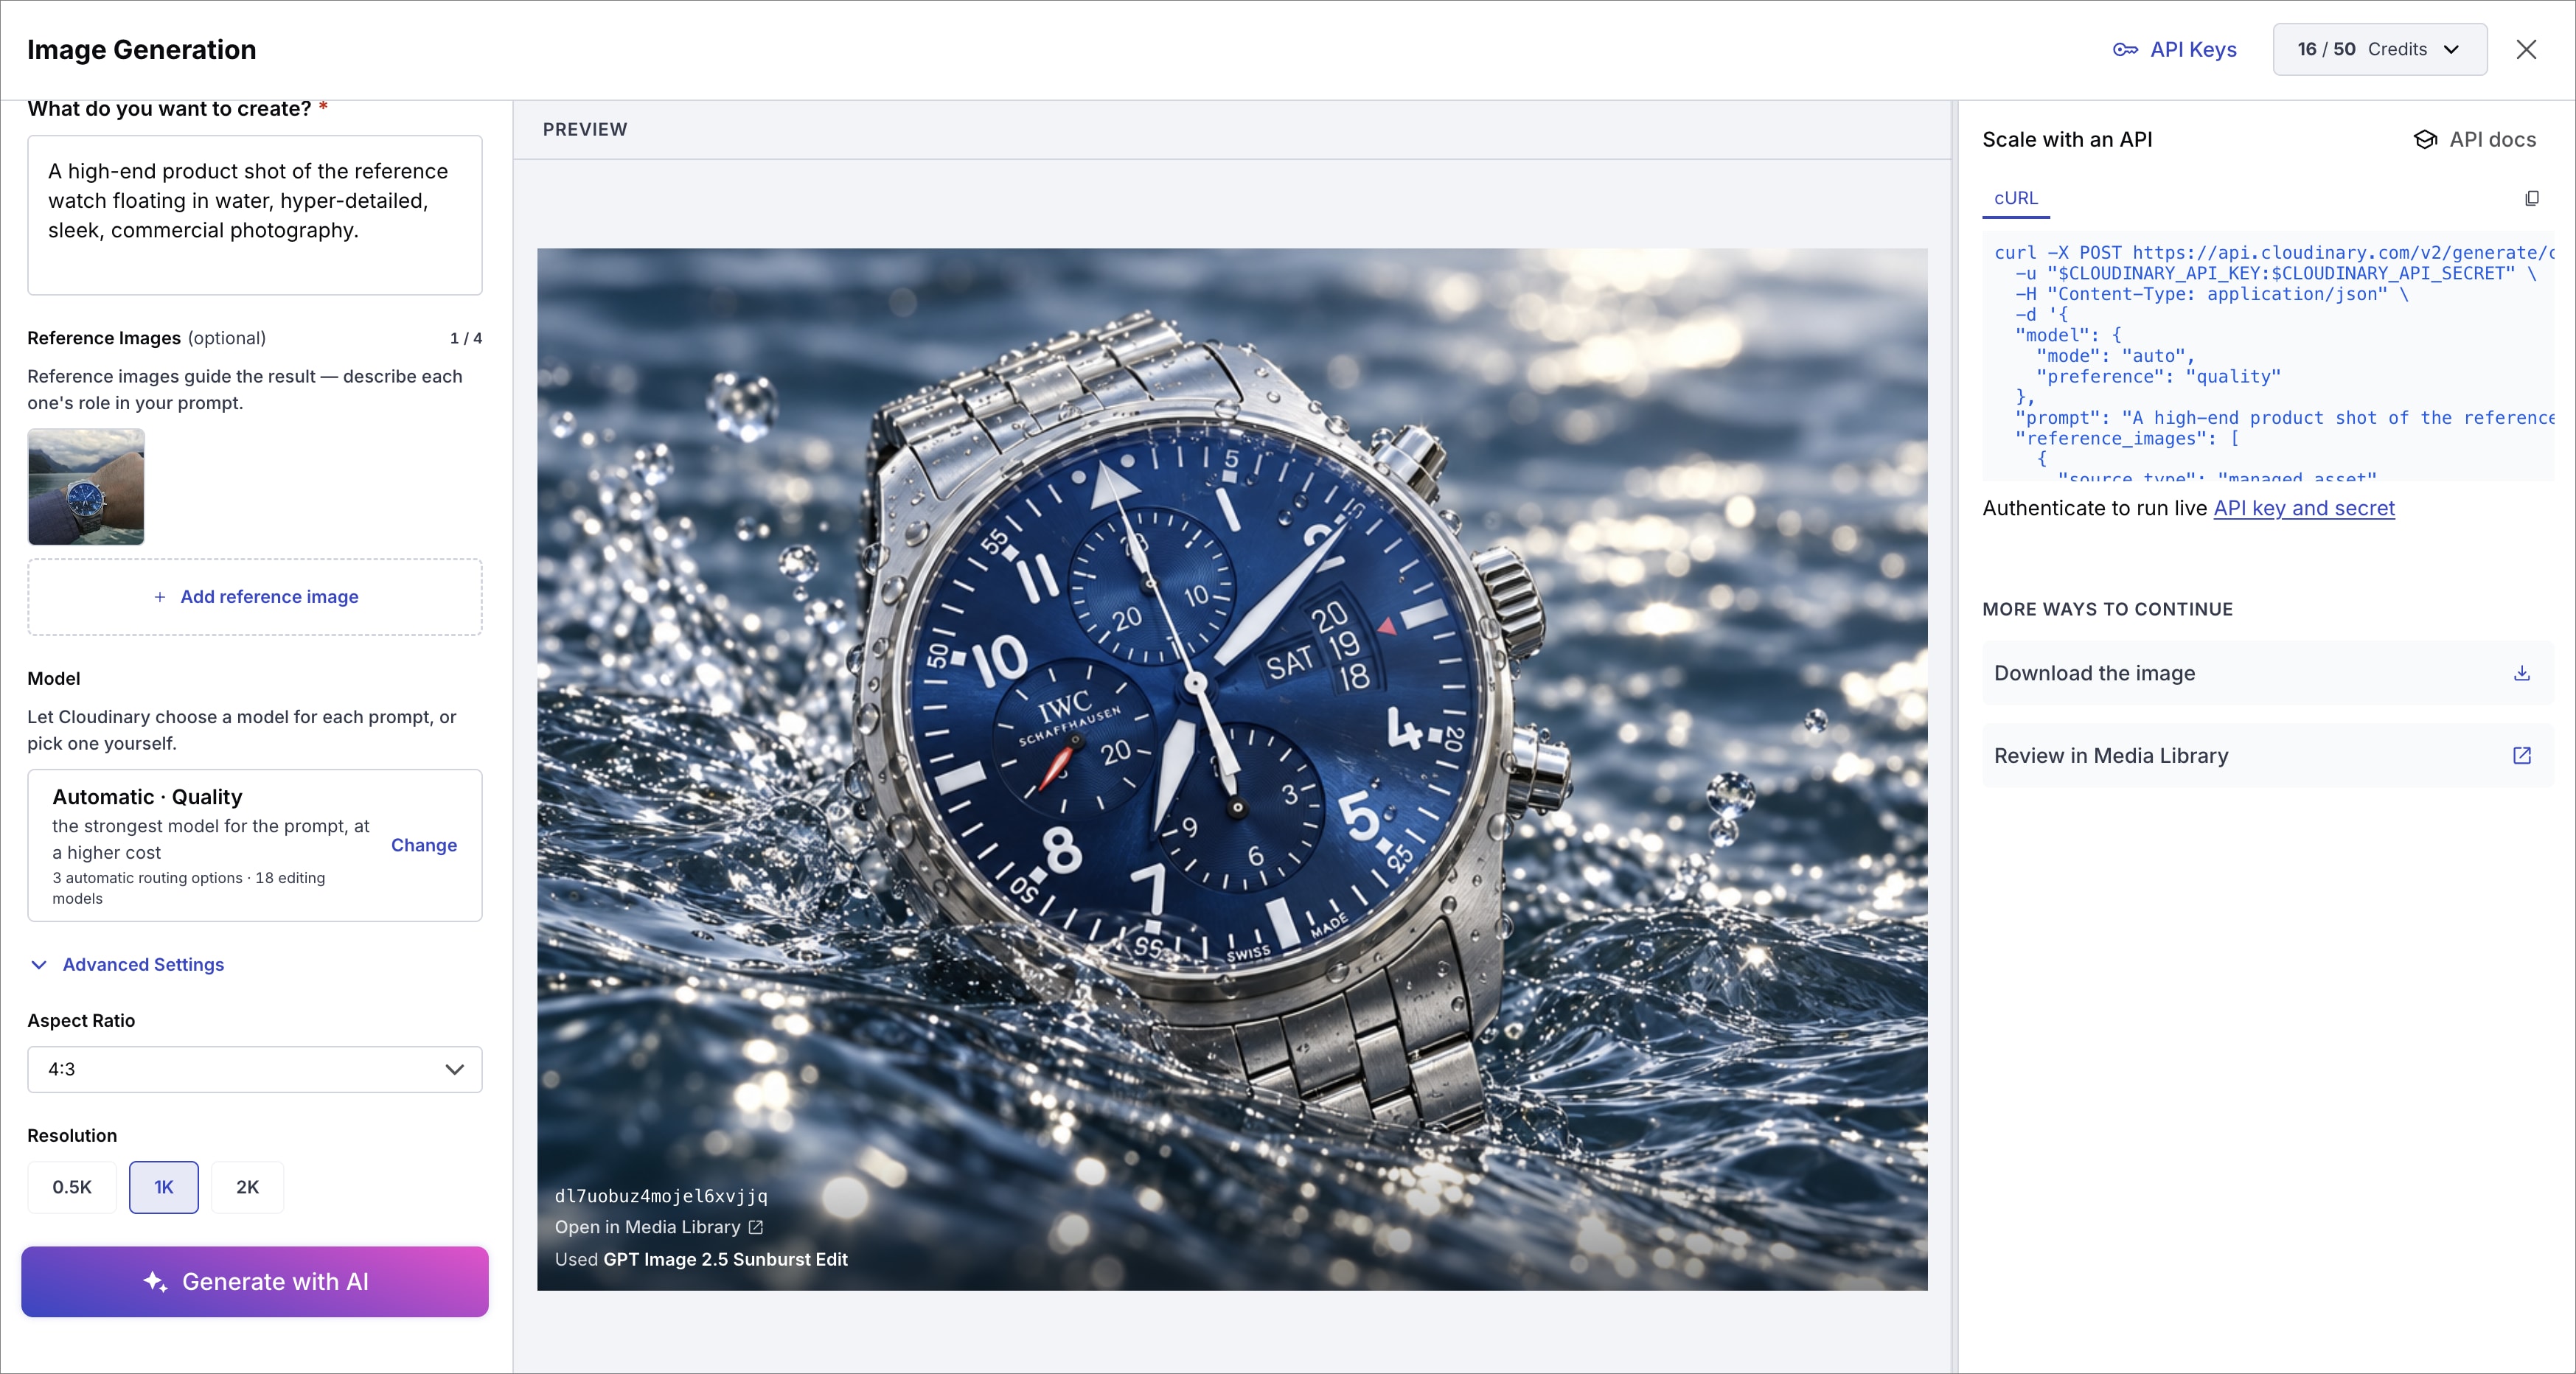
Images generated via the Console are automatically saved to your Media Library and you can copy the URL of the image ready for optimized delivery.
Generating images via the MCP server
The Asset Management MCP server includes the Image Generation tools, so your AI agent can generate images in your product environment straight from a chat prompt in Cursor, Claude, VS Code, or any other MCP client.
The server exposes these tools:
| Tool | Description |
|---|---|
generate-image |
Generates an image from a text prompt. |
generate-image-from-images |
Generates an image from a text prompt guided by one or more reference images, using an edit-capable model. |
get-generation-task |
Gets the status of an asynchronous generation. |
The tools call the same Image Generation API and accept the same parameters, so everything in this guide, including model selection, storage options, and reference images, applies when you work through the MCP server.
To get started:
- Register for the add-on, as described in Getting started.
- Add the Asset Management MCP server to your AI client. See MCP servers installation.
You can now generate images by describing them in natural language, for example:
- "Generate a photorealistic image of a ceramic coffee mug on a wooden table in morning light, and save it to the 'product_shots' folder."
- "Use the asset 'models/jacket_front' as a reference and generate the same jacket in navy blue."
Generating images via the API
Use the Image Generation API to generate images programmatically from a text prompt, optionally guided by reference images, and integrate them directly into your workflows.
For the full API reference, see the Image Generation API reference.
Endpoints and authentication
The API has two endpoints, both taking a POST request with a JSON body:
| Endpoint | Generates an image from |
|---|---|
POST /v2/generate/<CLOUD_NAME>/text_to_image |
A text prompt. |
POST /v2/generate/<CLOUD_NAME>/image_to_image |
A text prompt and up to 4 reference images. See Generate an image from reference images. |
Both accept the same parameters otherwise, and both can run synchronously or asynchronously.
The Image Generation API uses HTTP Basic Authentication. Pass your API Key as the username and your API Secret as the password, either in the URL or in the -u flag:
You can find your Cloud name, API Key, and API Secret on the API Keys page of the Cloudinary Console.
Selecting a model
You select a model in the model parameter, in one of three mutually exclusive ways:
-
Automatically (recommended): set
model.modetoautoand let Cloudinary choose the model for each request. See Automatic model selection. -
By ID: set
model.idto pin an exact model, for when you need a particular one. Every model can be selected this way. -
By family and tier: set
model.familyand an optionalmodel.tierto get the current model in that slot, which keeps working as models change. Only the models that hold a family and tier can be selected this way.
When you omit the model parameter, the API uses nano-banana at the premium tier.
For the models available and what each one is for, see Supported models.
Automatic model selection
Instead of naming a model, you can set model.mode to auto and let Cloudinary choose the model for each request. Cloudinary makes the choice per request, based on your prompt, the number of reference images, the requested output size, and where the image is stored.
Automatic selection is useful when you don't want to track which model suits which kind of prompt, and it keeps your integration current: as models are added, updated, or retired, requests using auto pick up the change without any code change on your side.
Automatic selection works on both the text_to_image and image_to_image endpoints, and in both synchronous and asynchronous mode. It's mutually exclusive with model.id and model.family: a request that combines auto with either of them returns a 400 error.
Steer the choice with a preference
Add an optional preference to tell Cloudinary what the choice should optimize for. If you omit it, Cloudinary uses balanced.
| Preference | Optimizes for |
|---|---|
| balanced (default) | Quality and cost, weighted equally. |
| quality | Quality alone, without weighing cost. |
| economy | Cost first, quality second. |
| balanced_fast | The same as balanced, and also favors faster models. |
| quality_fast | The same as quality, and also favors faster models. |
| economy_fast | The same as economy, and also favors faster models. |
The _fast variants add generation speed to the trade-off and never select a model that typically takes longer than 30 seconds to generate an image.
See which model ran
Cloudinary resolves auto to a specific model before generating, so the response reports the model that ran in data.assets[].model, with its family, tier, and id, exactly as it does when you select a model yourself:
Always key on model.id, which is always a concrete model. Some models are offered by ID only and belong to no family or tier, and those report none for family and tier:
For an asynchronous request, the resolved model appears in the task result, in data.result.assets[].model. On the image_to_image endpoint, the resolved model is always an edit-capable model.
model_id contextual metadata field, so you can see which model produced an asset later on.Generate an image and save it in your product environment
The simplest possible request requires only a prompt. The API uses the default nano-banana (premium) model and default image dimensions, and stores the result as a permanent asset in your product environment, where it's immediately available for delivery, transformation, and optimization.
The response includes a permanent secure_url and the asset_id, public_id, and other managed asset fields you can use in other Cloudinary APIs.
The generated image:

Control the stored asset with target
Include a target object to control how and where the generated asset is stored. Set target.target_type to managed_asset (the default) and optionally specify a public_id to control where the asset is stored, and an upload_preset to apply additional configuration (learn about upload presets):
Let Cloudinary choose the model
Unless you need a particular model, this is the recommended way to generate an image: set model.mode to auto and Cloudinary selects the model for each request, keeping up with the roster as models are added, updated, or retired.
Optionally add a preference to say what the choice should optimize for. This works on both endpoints; for an image_to_image example, see Let Cloudinary choose the edit model. For details on how the choice is made and what each preference means, see Automatic model selection.
The response reports the model Cloudinary chose in data.assets[].model:
The generated image:

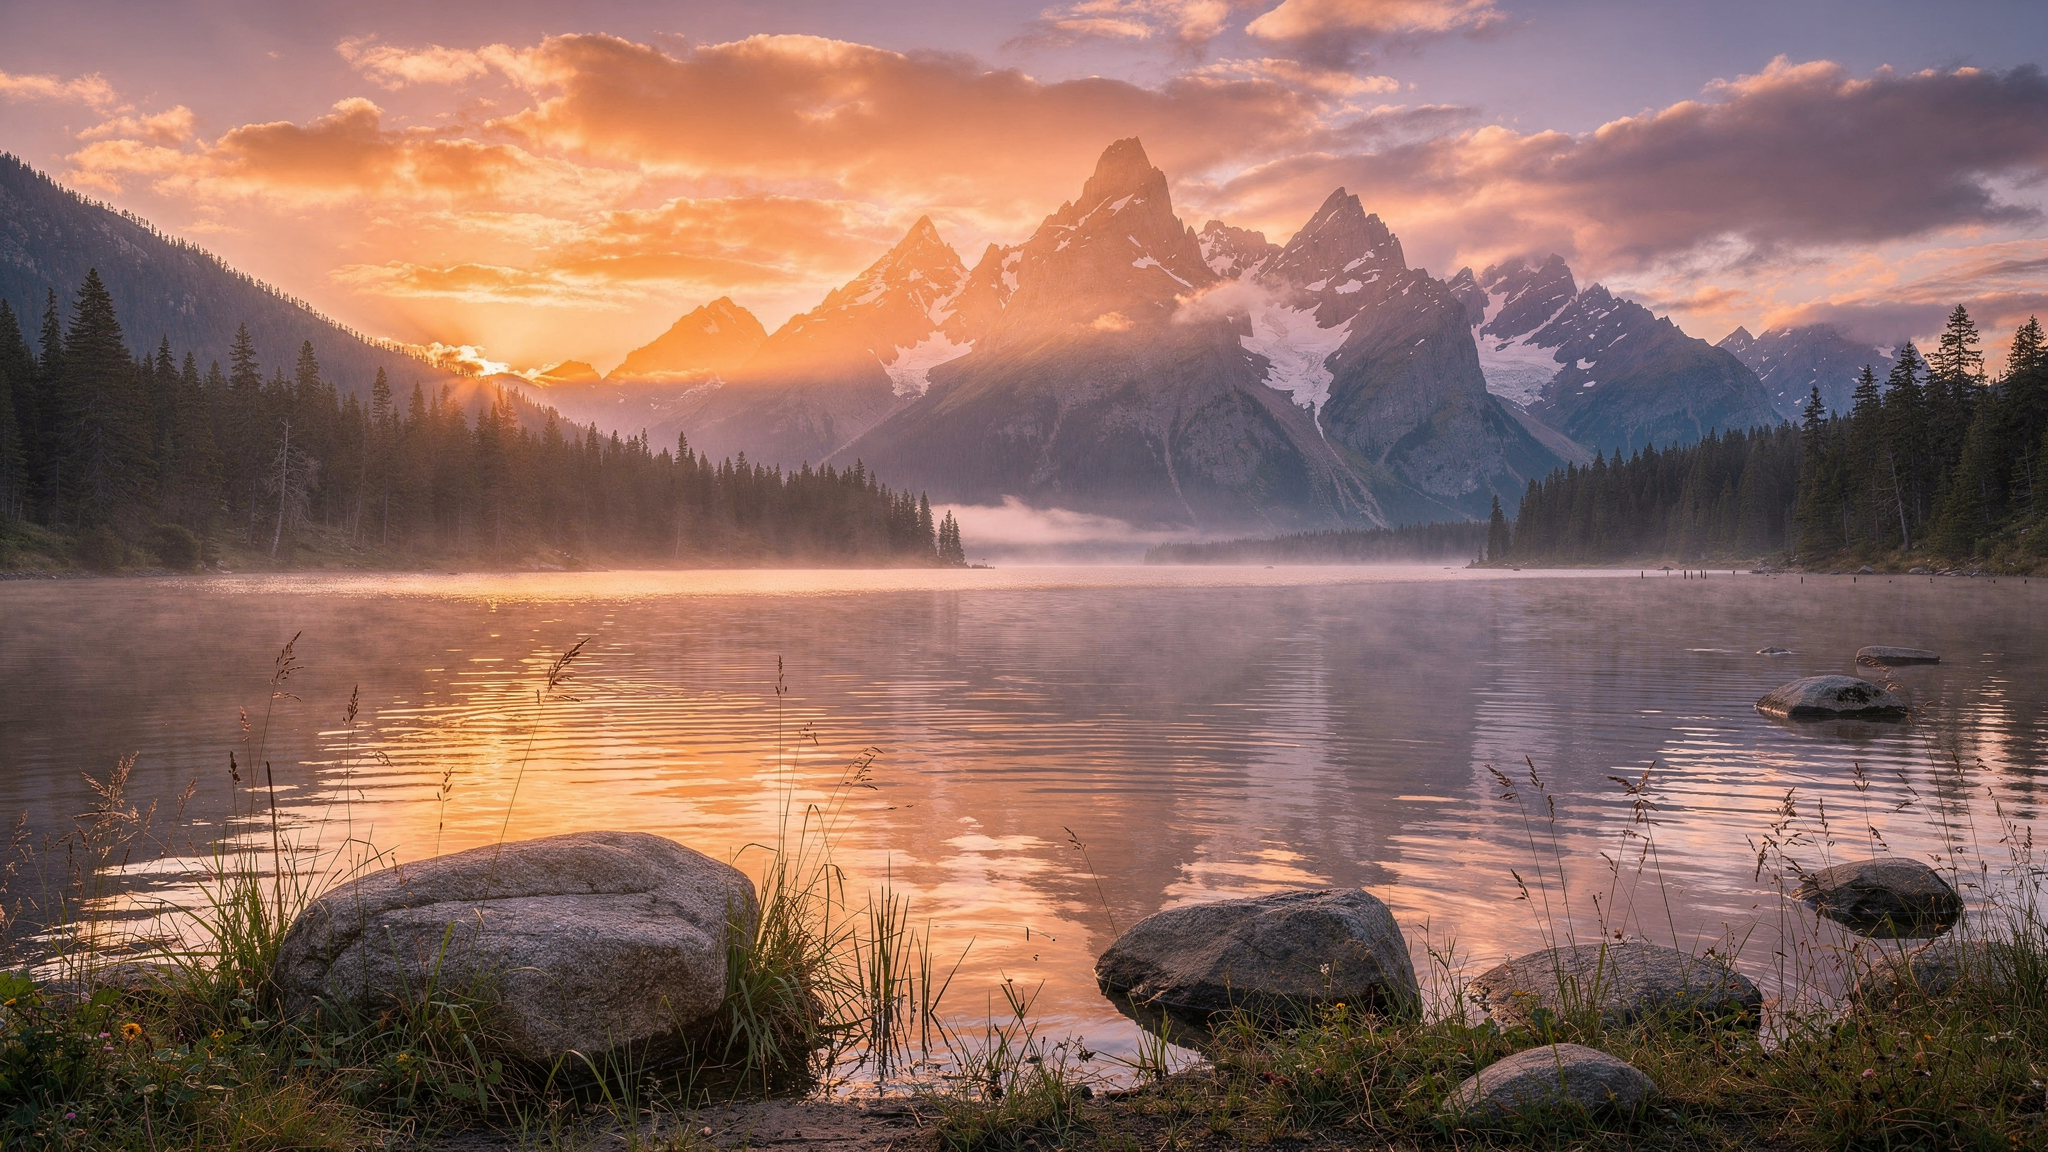
Generate an image with a specific model family and size
When you do need a particular model, select a model family and quality tier, and use the declarative aspect_ratio and resolution parameters to specify output size. The API resolves the closest dimensions the selected model supports.
The generated image:
Specify an exact model and use pixel dimensions
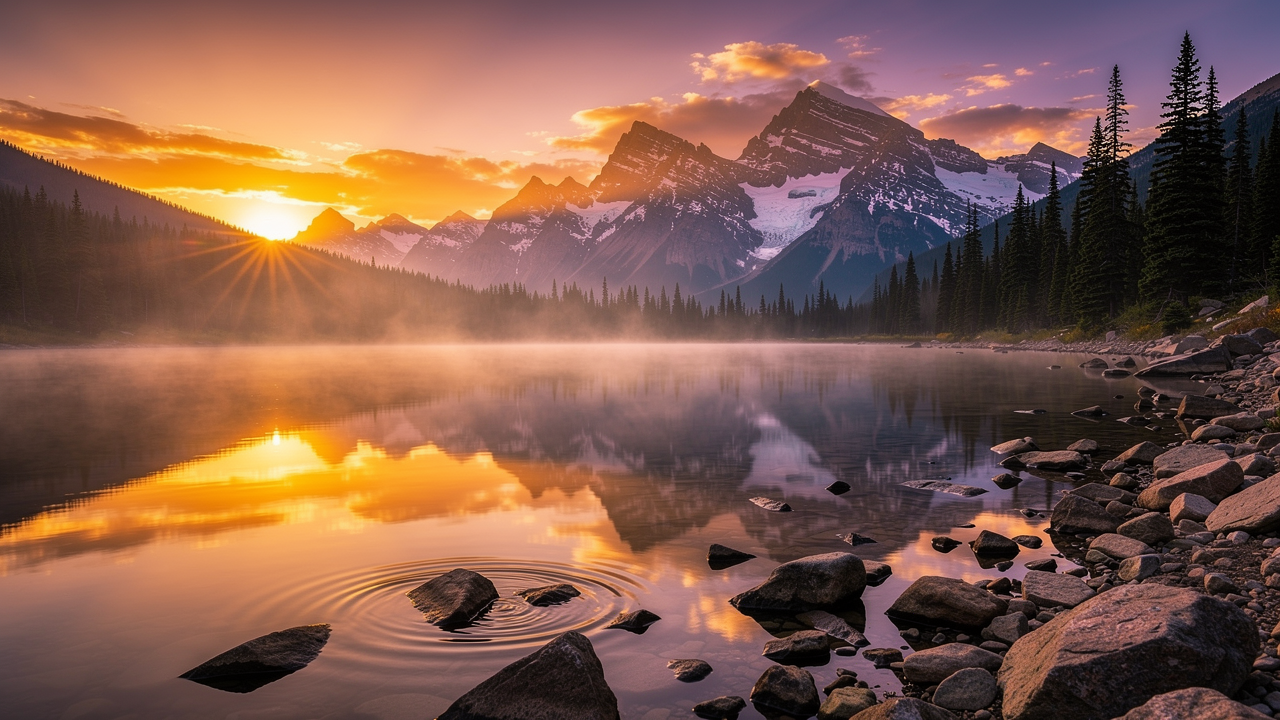
Use model.id to specify an exact model version, and use width and height for precise pixel control.
seed to reproduce a specific generation result. See the Seed support column for which models support it; models that don't support seeds silently ignore the parameter.The generated image:
Generate a temporary image
Set target.target_type to temporary to generate a short-lived image that expires after a fixed period. This is useful for previewing or evaluating prompts before committing quota to a permanent asset, for example, to iterate on a prompt before saving the result.
The response includes a secure_url that's valid until the expires_at time, and reports the model auto resolved to. To save the image permanently, resubmit the request with target.target_type set to managed_asset.
Generate an image asynchronously
For long-running generations, set async to true. The API returns immediately with a 202 response containing a task_id. You can poll the task endpoint or use a webhook to receive the result.
Response (202 Accepted):
Check the status of an async generation
Poll the task endpoint using the task_id returned in the async response, or receive the result at your notification_url.
When the task is complete, the generated asset is available with its storage and media metadata, including the model auto resolved to. This is the notification Cloudinary sends to your notification_url:
The task endpoint returns the same asset, nested under data.result, together with the task's status and task_id.
The generated image:

Generate an image from reference images
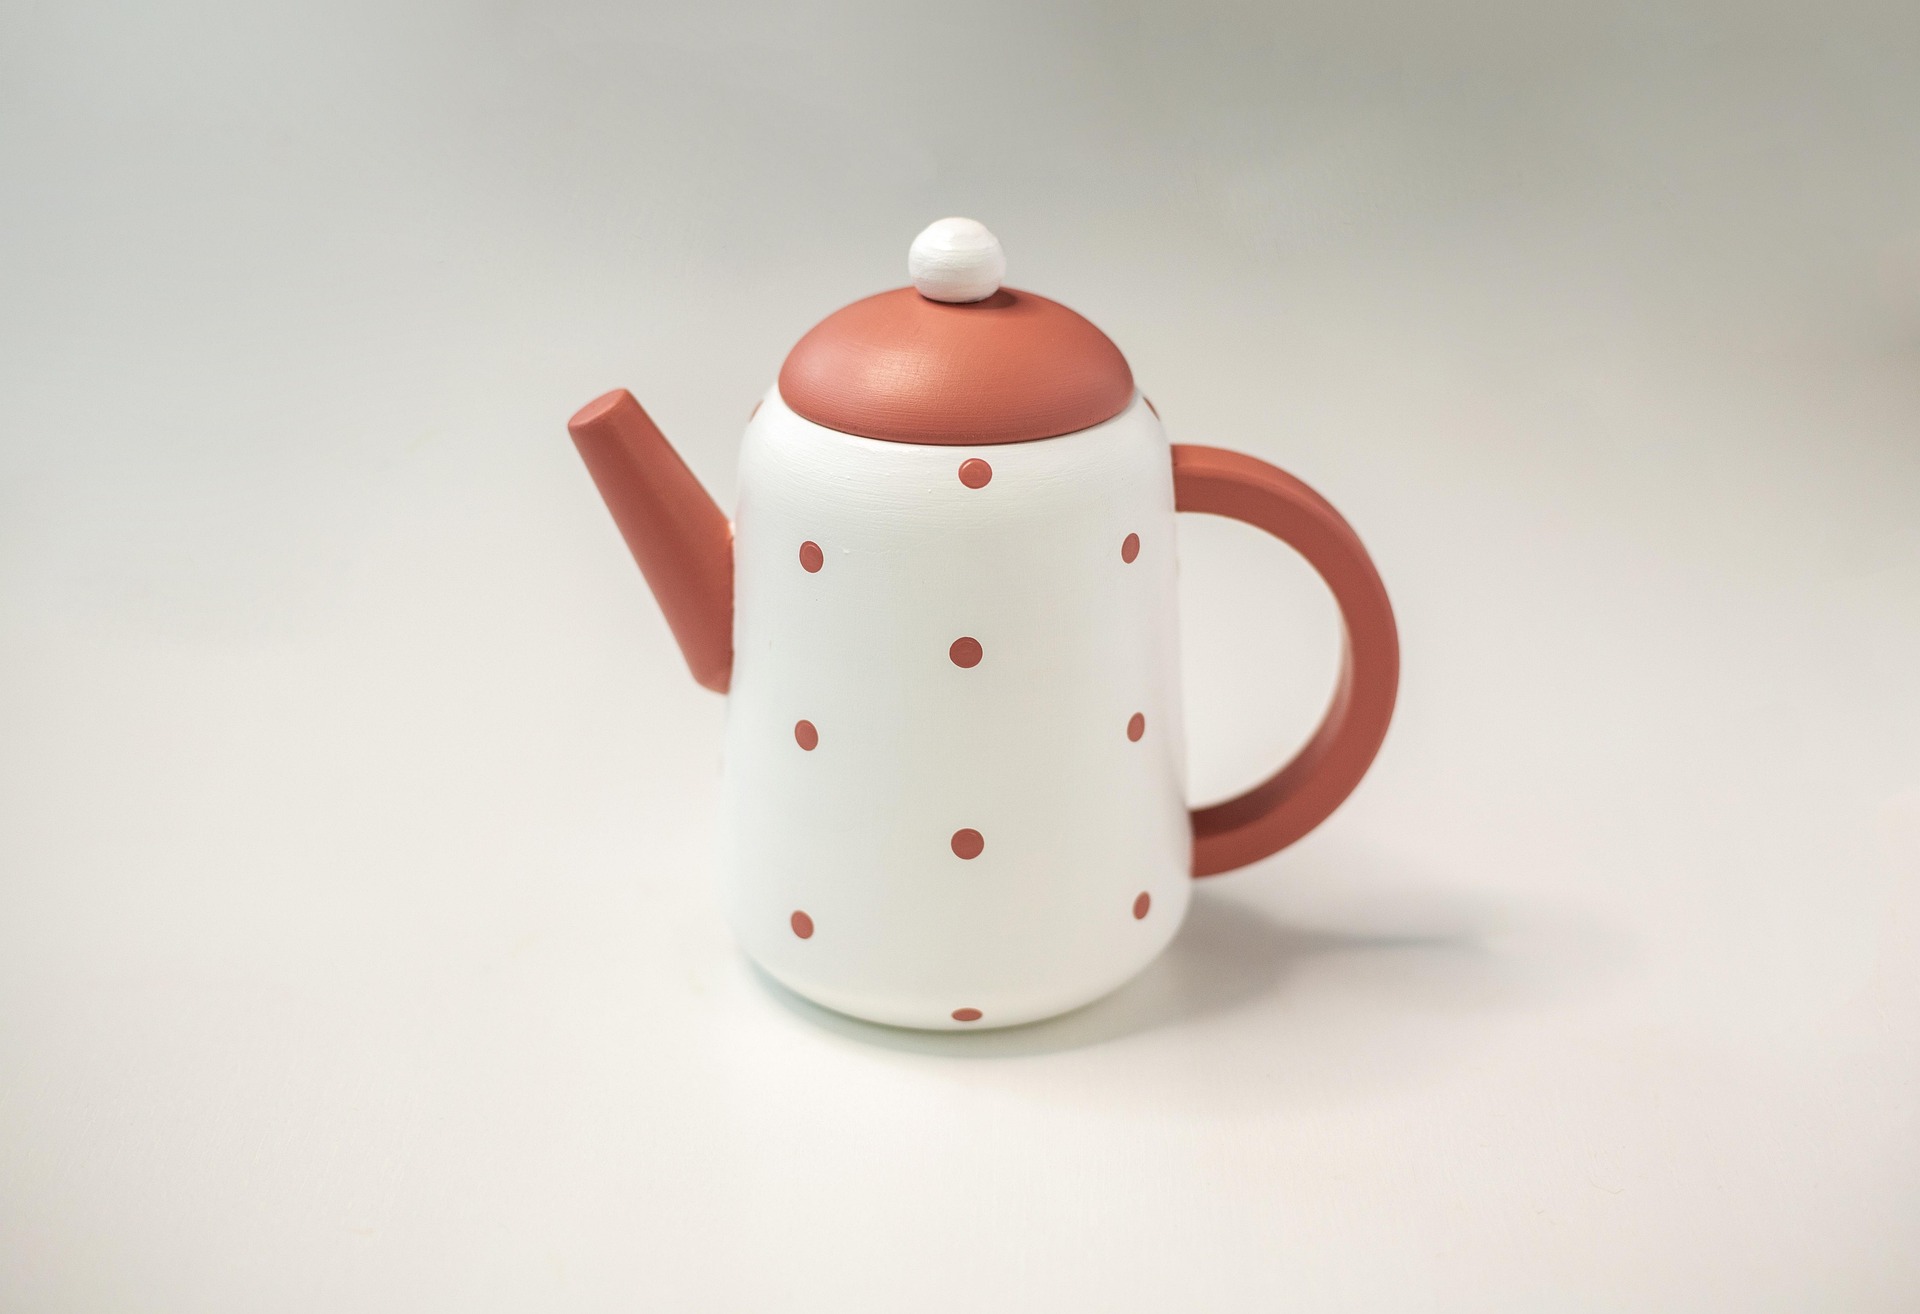
Use the image_to_image endpoint to generate an image guided by a prompt and one or more reference images. This supports use cases such as restyling, on-brand variants, character consistency, virtual try-on, and edit/extend.
Both prompt and reference_images are required. All other parameters (model, image_size, format, target, seed, async, notification_url) behave the same as for the text_to_image endpoint. Note that this endpoint accepts only edit-capable models.
Reference images are 1-indexed and you can address them positionally in the prompt as [1], [2], and so on. The platform accepts up to 4 reference images, though a specific model may accept fewer (see Max reference images in the edit models table) — exceeding the selected model's capacity returns a 400. Each reference image is provided in one of two ways, set via source_type:
-
url: an external HTTPS URL. -
managed_asset: a stored asset in your product environment, byasset_id(read permission is checked).
By URL:
By managed asset ID:
The response has the same structure as for the text_to_image endpoint, including the stored asset's secure_url and managed asset fields.
The reference image ([1]) and the generated image:
 Reference
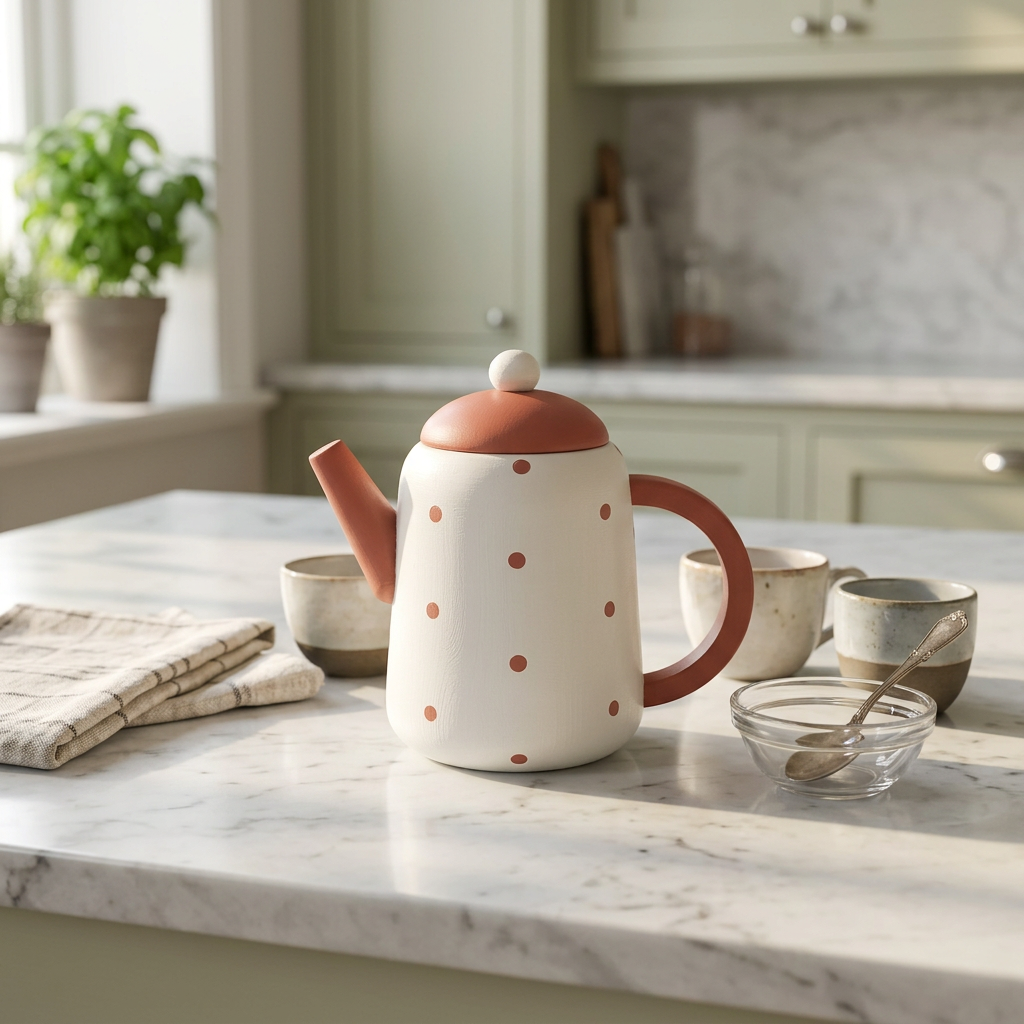 Generated
Let Cloudinary choose the edit model
You can also let Cloudinary choose the edit model, by setting model.mode to auto. On this endpoint it always resolves to an edit-capable model:
Here, auto resolved to an edit-capable model, as it always does on this endpoint:
The same reference image ([1]) and the generated image:
Reference
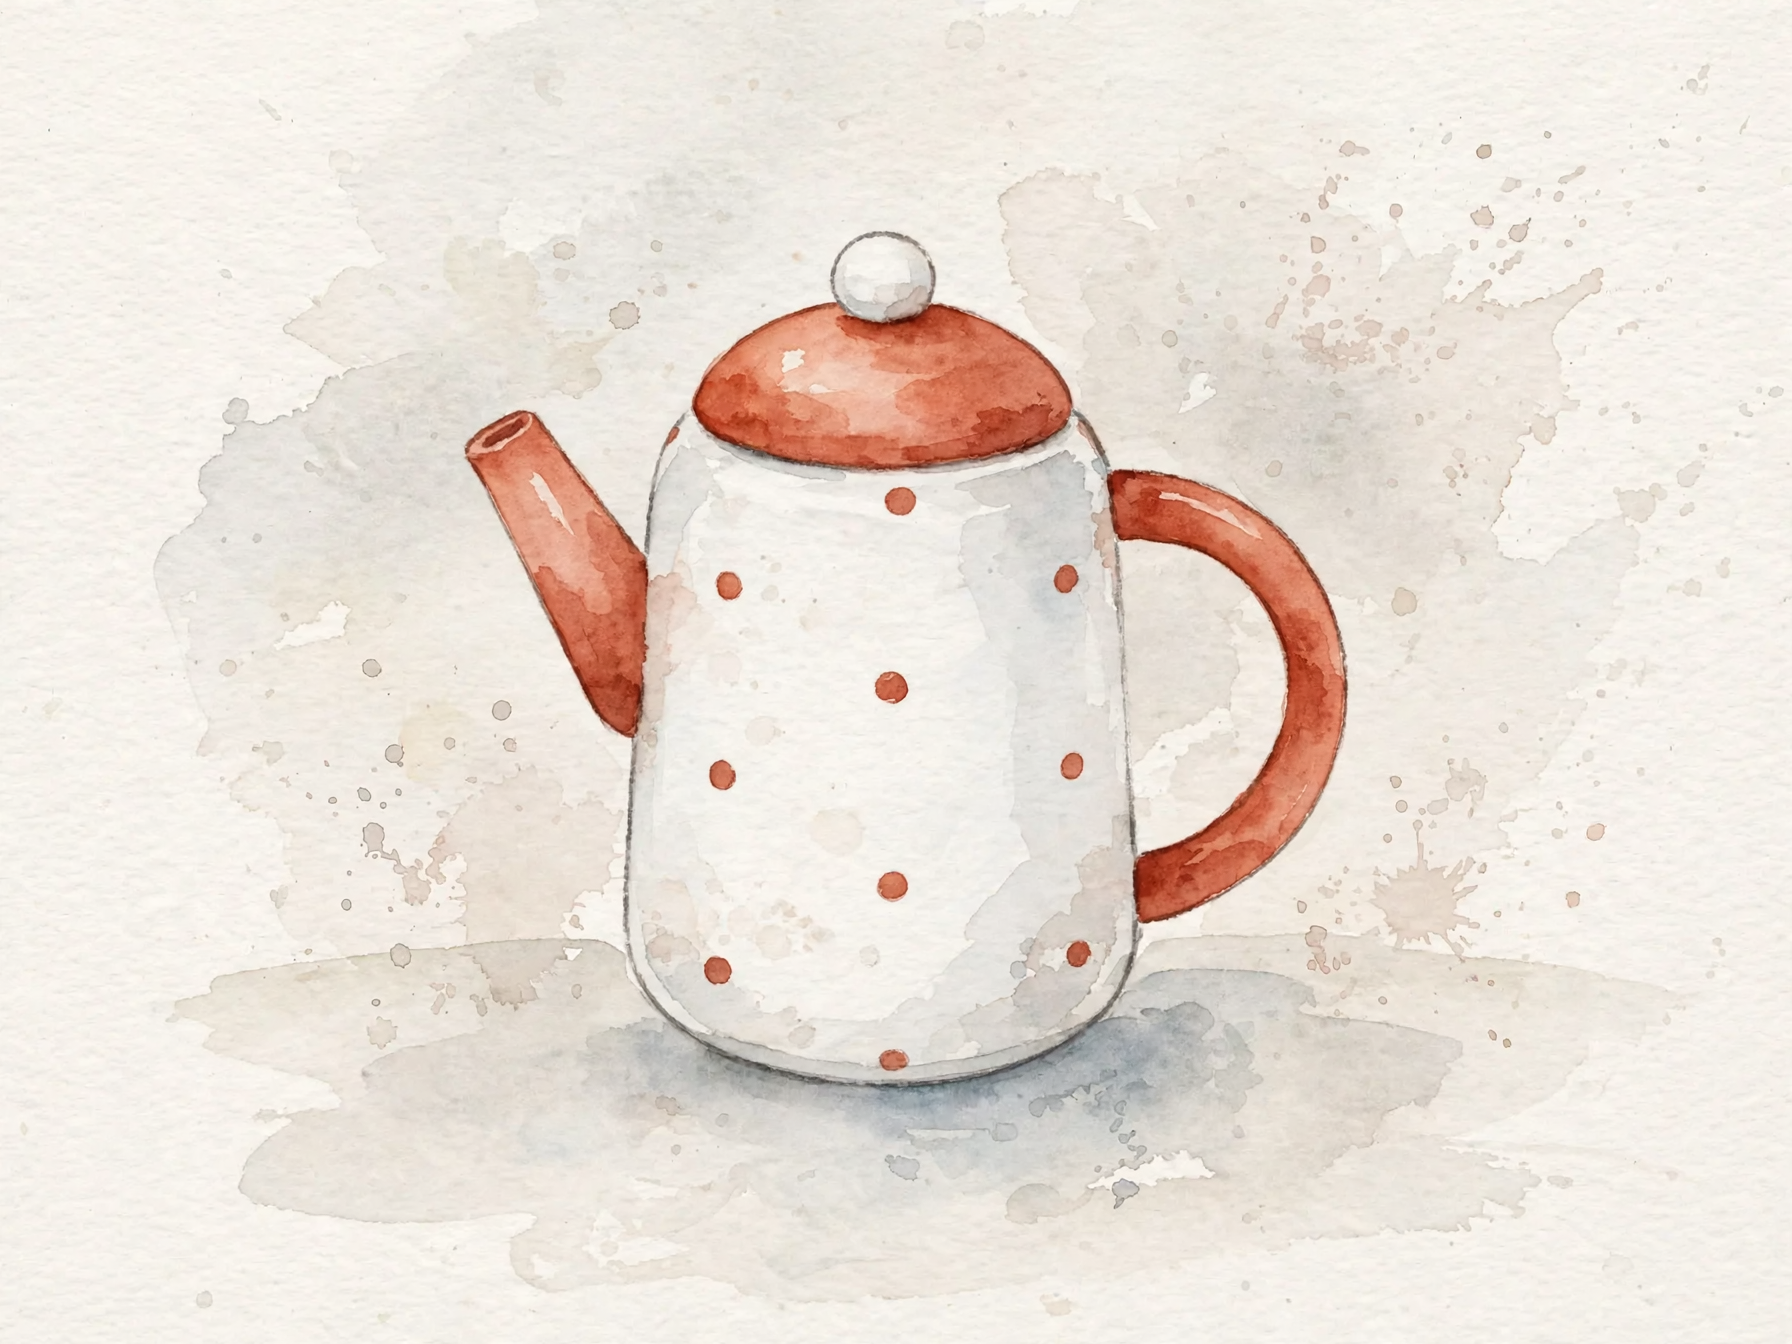 Generated
Supported models
The Image Generation API supports the models listed below. Any of them can be pinned with model.id; see Selecting a model for the other ways to choose one.
The family and tier matrix holds two models per family, one standard and one premium, so it names only part of the roster. Every other model is available by model.id only: those have no family or tier in the table below, and report none for both in the response, as described in See which model ran.
| Model ID | Description | Family | Tier | Seed support |
|---|---|---|---|---|
| nano-banana-1 | General-purpose generation | nano-banana |
standard |
Yes |
| nano-banana-2 | General-purpose generation | nano-banana |
premium |
Yes |
| nano-banana-2-lite | The fastest, lowest-cost Nano Banana model | Yes | ||
| flux-2-klein-9b | Photorealistic images | flux |
standard |
Yes |
| flux-2-pro | Photorealistic images | flux |
premium |
Yes |
| flux-2-flash | Fast, economical FLUX generation, up to 4 MP | Yes | ||
| recraft-v3 | Vector and illustration | recraft |
standard |
No |
| recraft-v4 | Vector and illustration | recraft |
premium |
No |
| recraft-v4.1-utility | Faster, lighter Recraft for high-volume work | No | ||
| recraft-v4.1-utility-pro | High-resolution, cost-efficient Recraft | No | ||
| gpt-image-1-mini | Campaign and marketing images | gpt-image |
standard |
No |
| gpt-image-2 | Campaign and marketing images | gpt-image |
premium |
No |
| gpt-image-2.5-flare | Fast, high-quality general-purpose generation, with natural lighting, rich textures, complex layouts, and transparent backgrounds | No | ||
| gpt-image-2.5-sunburst | Precision-focused generation, with extra fidelity on intricate detail in exchange for longer generation times | No | ||
| ideogram-v4-turbo | Realism, text rendering, and artistic generation | ideogram |
standard |
Yes |
| ideogram-v4-base | Realism, text rendering, and artistic generation | ideogram |
premium |
Yes |
| muse-image | Precise edits that change only what you ask, coherent across turns, composing from multiple reference images | No | ||
| mai-image-2.5 | General-purpose generation | No | ||
| mai-image-2.5-pro | Higher-quality version of mai-image-2.5 | No | ||
| seedream-5-lite | Low-cost generation and editing, up to 4K | No | ||
| seedream-5-pro | Higher-quality version of seedream-5 | No | ||
| grok-imagine-image | Stylistic variety and unusual subjects | No | ||
| grok-imagine-image-2.0-low | Grok Imagine 2.0, pinned to its lowest quality setting | No | ||
| qwen-image-3 | General-purpose generation | Yes |
auto chooses from the models the selection service currently covers, which is a subset of the models listed here. A model you can pin with model.id isn't necessarily one that auto picks.Models for generating images from reference images
Generating images from reference images requires an edit-capable model. On the image_to_image endpoint, auto always resolves to one of the models below, and a family and tier resolves to the edit model in that slot. You can also specify an exact edit model by ID.
Each model accepts a maximum number of reference images. The platform accepts up to 4, and exceeding the selected model's own maximum returns a 400 error.
| Edit model ID | Family | Tier | Max reference images |
|---|---|---|---|
| nano-banana-1-edit | nano-banana |
standard |
4 |
| nano-banana-2-edit | nano-banana |
premium |
4 |
| nano-banana-2-lite-edit | 4 | ||
| flux-2-klein-9b-edit | flux |
standard |
4 |
| flux-2-pro-edit | flux |
premium |
4 |
| flux-2-flash-edit | 4 | ||
| recraft-v3-edit | recraft |
standard |
1 |
| gpt-image-1-mini-edit | gpt-image |
standard |
4 |
| gpt-image-2-edit | gpt-image |
premium |
4 |
| gpt-image-2.5-flare-edit | 4 | ||
| gpt-image-2.5-sunburst-edit | 4 | ||
| muse-image-edit | 4 | ||
| mai-image-2.5-edit | 1 | ||
| mai-image-2.5-pro-edit | 1 | ||
| seedream-5-lite-edit | 4 | ||
| seedream-5-pro-edit | 4 | ||
| grok-imagine-image-edit | 3 | ||
| grok-imagine-image-2.0-low-edit | 3 | ||
| qwen-image-3-edit | 3 |
Requested output format
Most models generate the format you request. The recraft-v4.1-utility, recraft-v4.1-utility-pro, and seedream-5-lite models select their own output format, so they may return a different one than you asked for. The format field in the response always reports the format you actually received.
Automatic tags and metadata
When you generate an image via the Console or the API, Cloudinary automatically applies the following to the asset:
-
Tag:
text-to-imageorimage-to-image -
Contextual metadata:
-
model_id: the model used to generate the image (for example,recraft-v4) -
prompt: the text prompt used for generation -
seed: the seed value used (or0if you didn't specify one)
-
For example, the asset generated by the automatic model selection request above carries the text-to-image tag, the resolved model_id, the prompt, and a seed of 0, because the request didn't specify one:
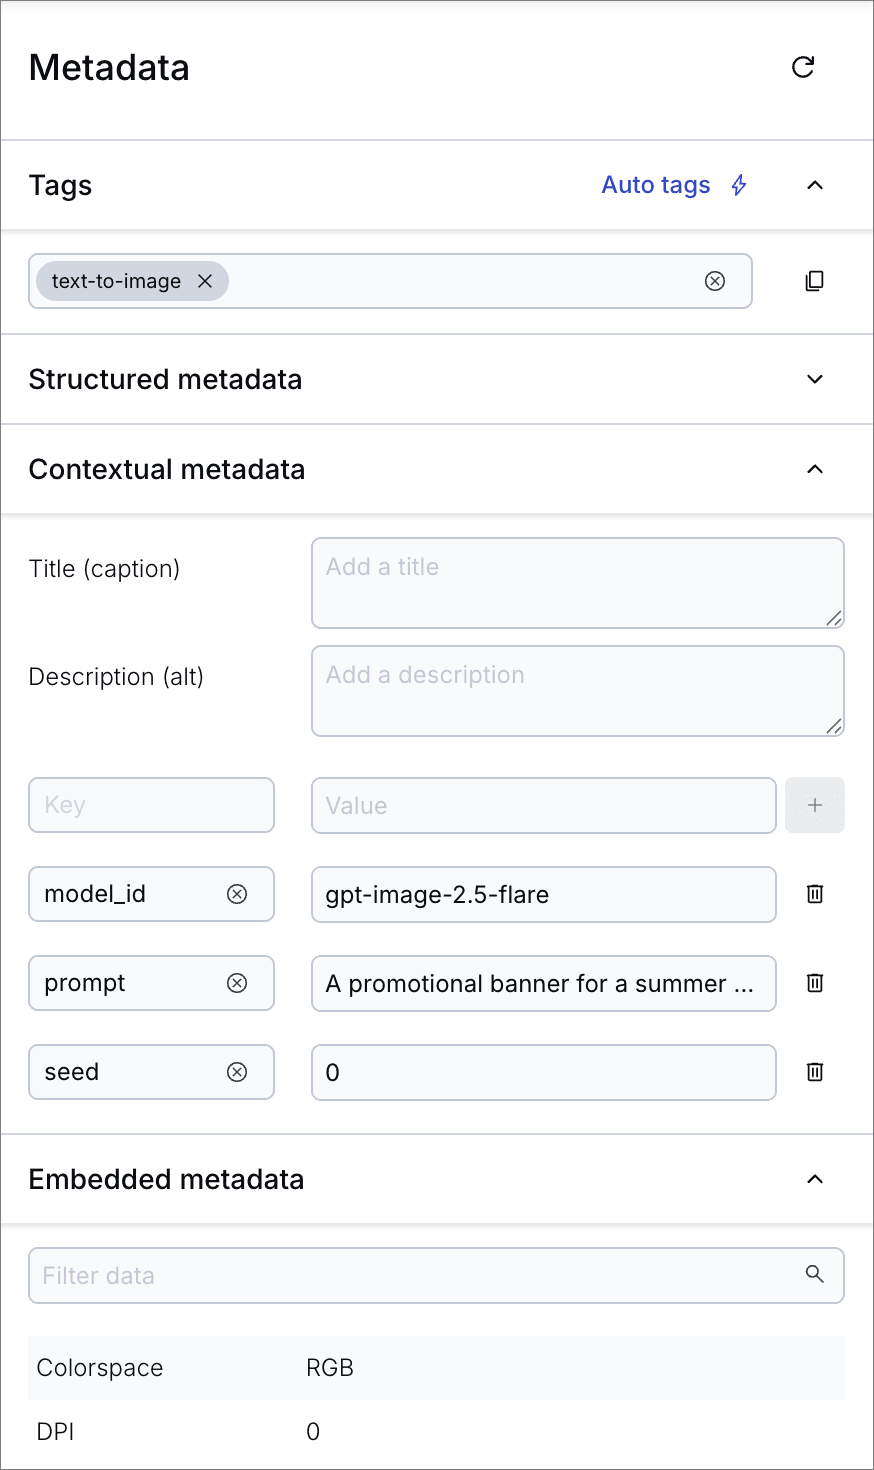
This makes it straightforward to find, filter, and manage generated images alongside your other assets in the Media Library.
Use case examples
Omnichannel social media campaigns
A marketing team wants to generate a high-end visual for a global campaign and distribute it across Instagram (1:1), TikTok (9:16), and use it as a web banner on their website (32:9). Instead of generating three separate AI images, which would result in inconsistent visuals, they generate one high-resolution image and use Cloudinary to crop it dynamically.
This request lets Cloudinary choose the model, with a quality preference for a high-end photorealistic result, and uses a reference image of the watch. It instructs the server to store it under a specific public_id.
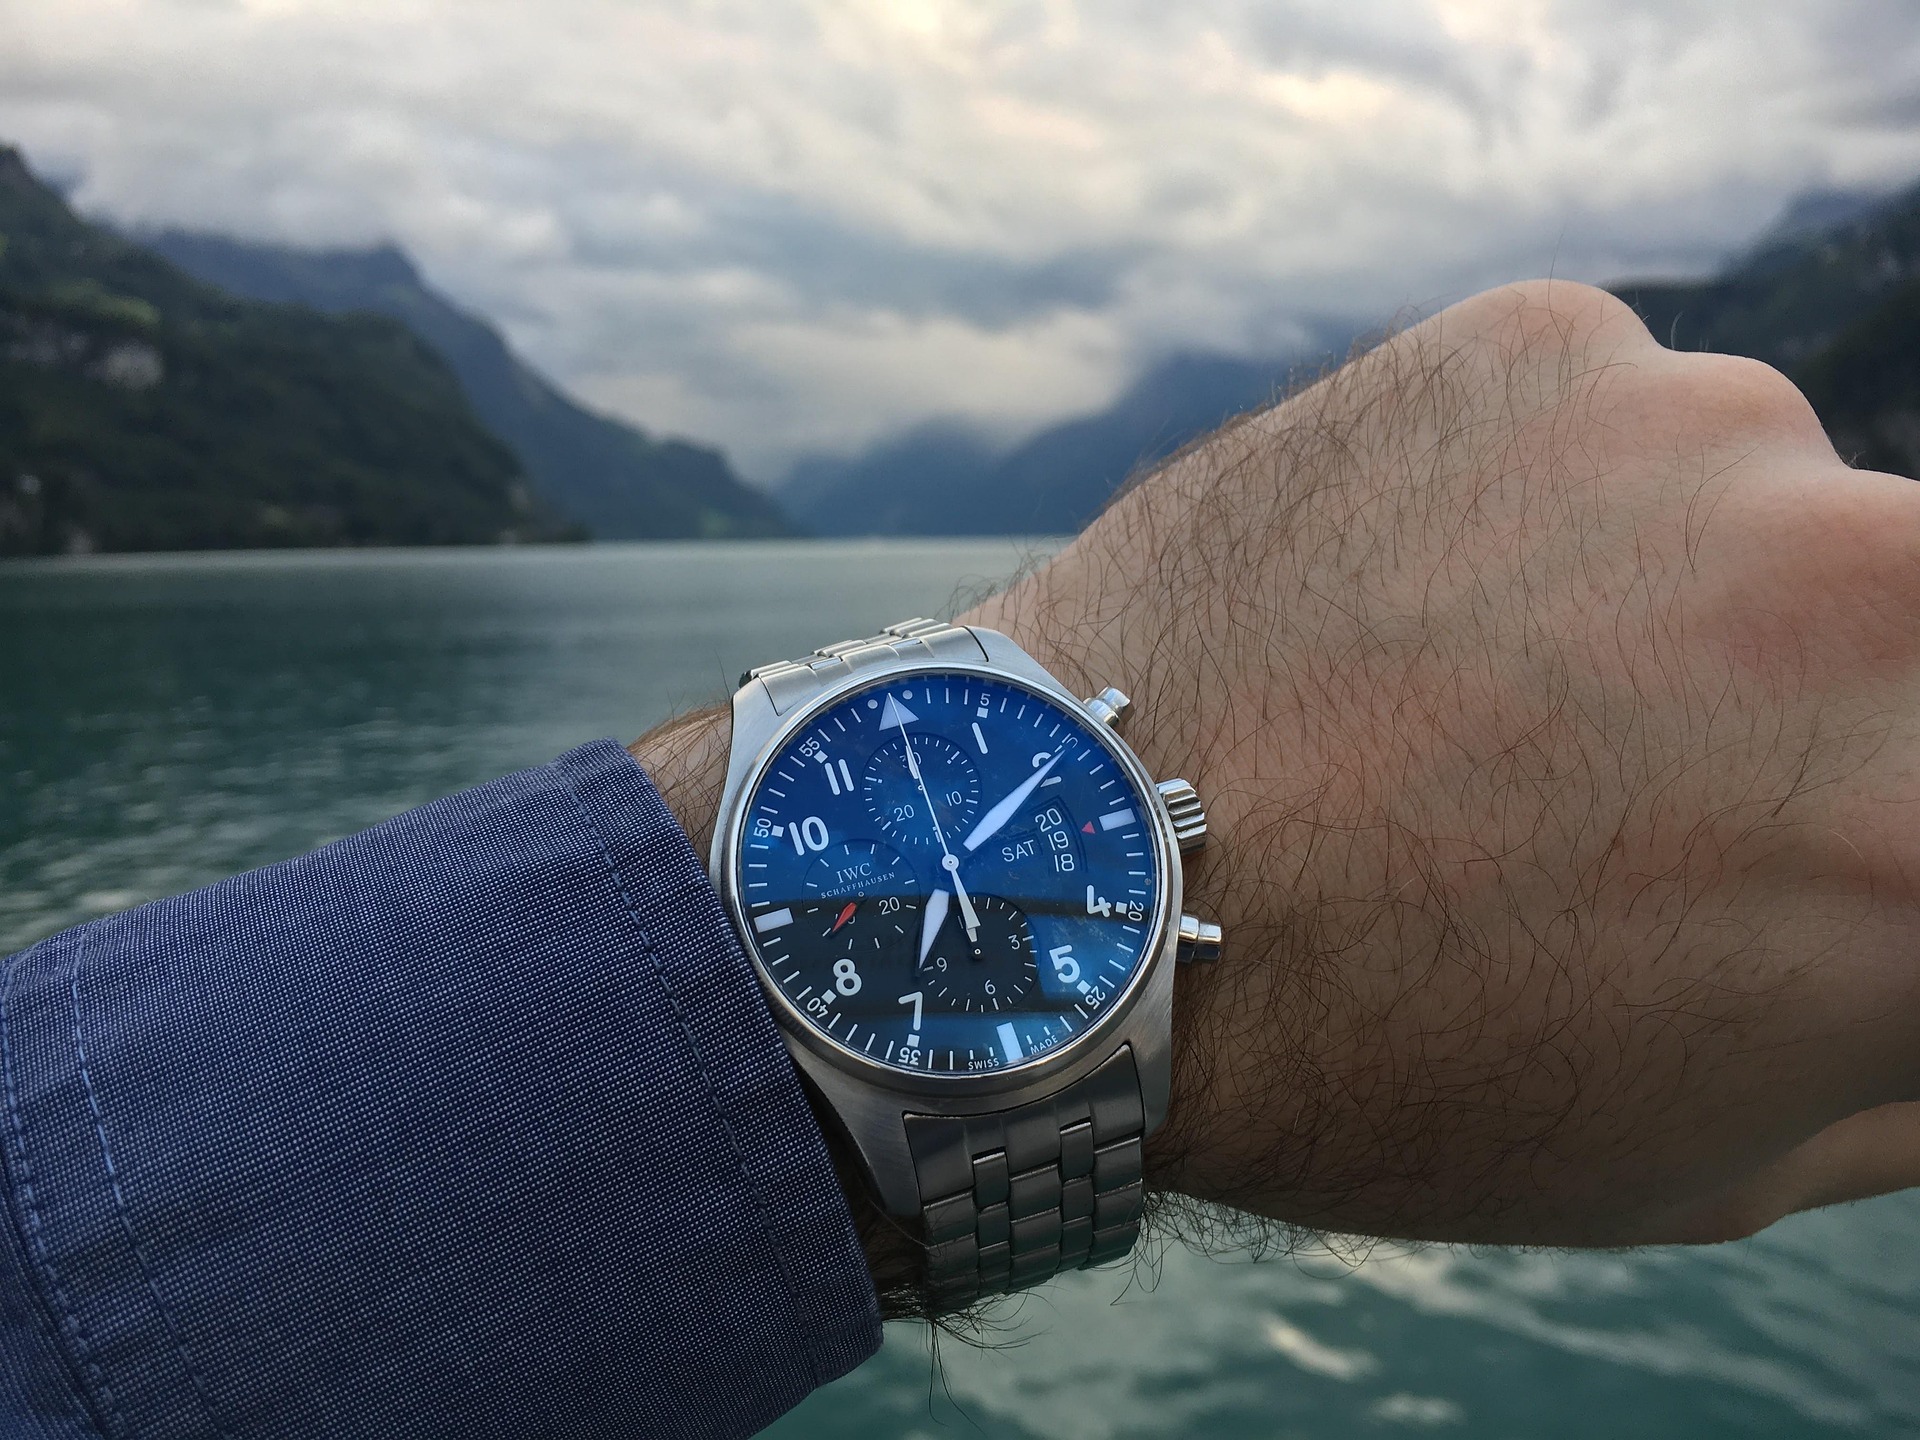 Reference
Here's an example API call for the demo product environment:
The generated image:
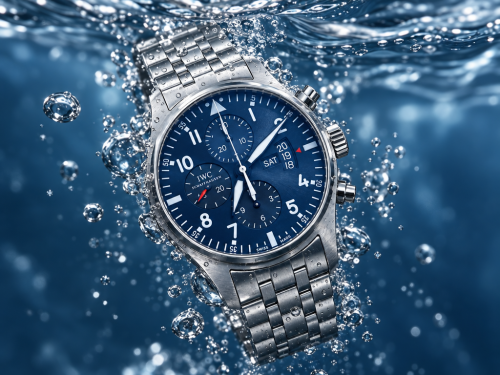
Once generated, you can immediately serve various crops out-of-the-box using Cloudinary's dynamic URL transformations:
-
Instagram Grid (1:1 Square, Smart Cropped):
-
TikTok/Stories (9:16 Vertical, Smart Cropped):
-
Web Banner (32:9 Horizontal, Smart Cropped):



Dynamic localization and ad personalization
A travel platform wants to show personalized banners to users depending on where they're booking a trip, complete with localized text rendered on the fly.
This request lets Cloudinary choose the model, so you get a composition balanced for text placement without naming one.
Here's an example API call for the demo product environment:
The generated image:
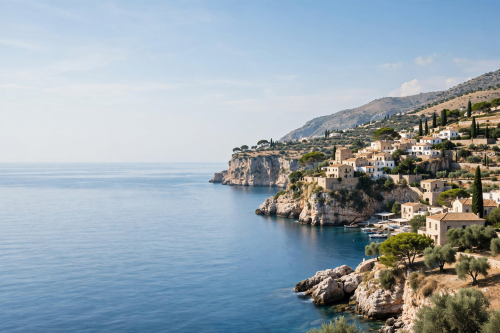
To maintain campaign consistency, generate the graphic once and dynamically burn text layers (l_text:) into the empty space:
-
English version:

-
Italian version:


Brand-aligned vector merchandise
An enterprise wants to allow users to customize internal company swag.
Vector and illustration output is a specific capability, so this request pins recraft-v4 with model.id rather than letting Cloudinary choose.
Here's an example API call for the demo product environment:
The generated image:

This URL removes the background of the sticker (e_background_removal), before layering it directly onto a pre-existing t-shirt merchandise image (swag:tshirt_mockup):

Efficient catalog photography with a reusable model
An online fashion retailer wants to shoot their catalog without booking a new photoshoot for every product. Instead, they photograph a single model once and reuse that same reference photo to generate on-model shots for each new garment, cutting studio time and cost.
This request uses the image_to_image endpoint with two reference images: the reusable model photo ([1]) and a product shot of the garment ([2]). Cloudinary chooses the model, which on this endpoint is always an edit-capable one, to composite them into a single realistic result. To generate the next product in the catalog, swap in a new garment reference and keep the same model reference.
Here's an example API call for the demo product environment:
The reference images — the model ([1]) and the jacket ([2]):
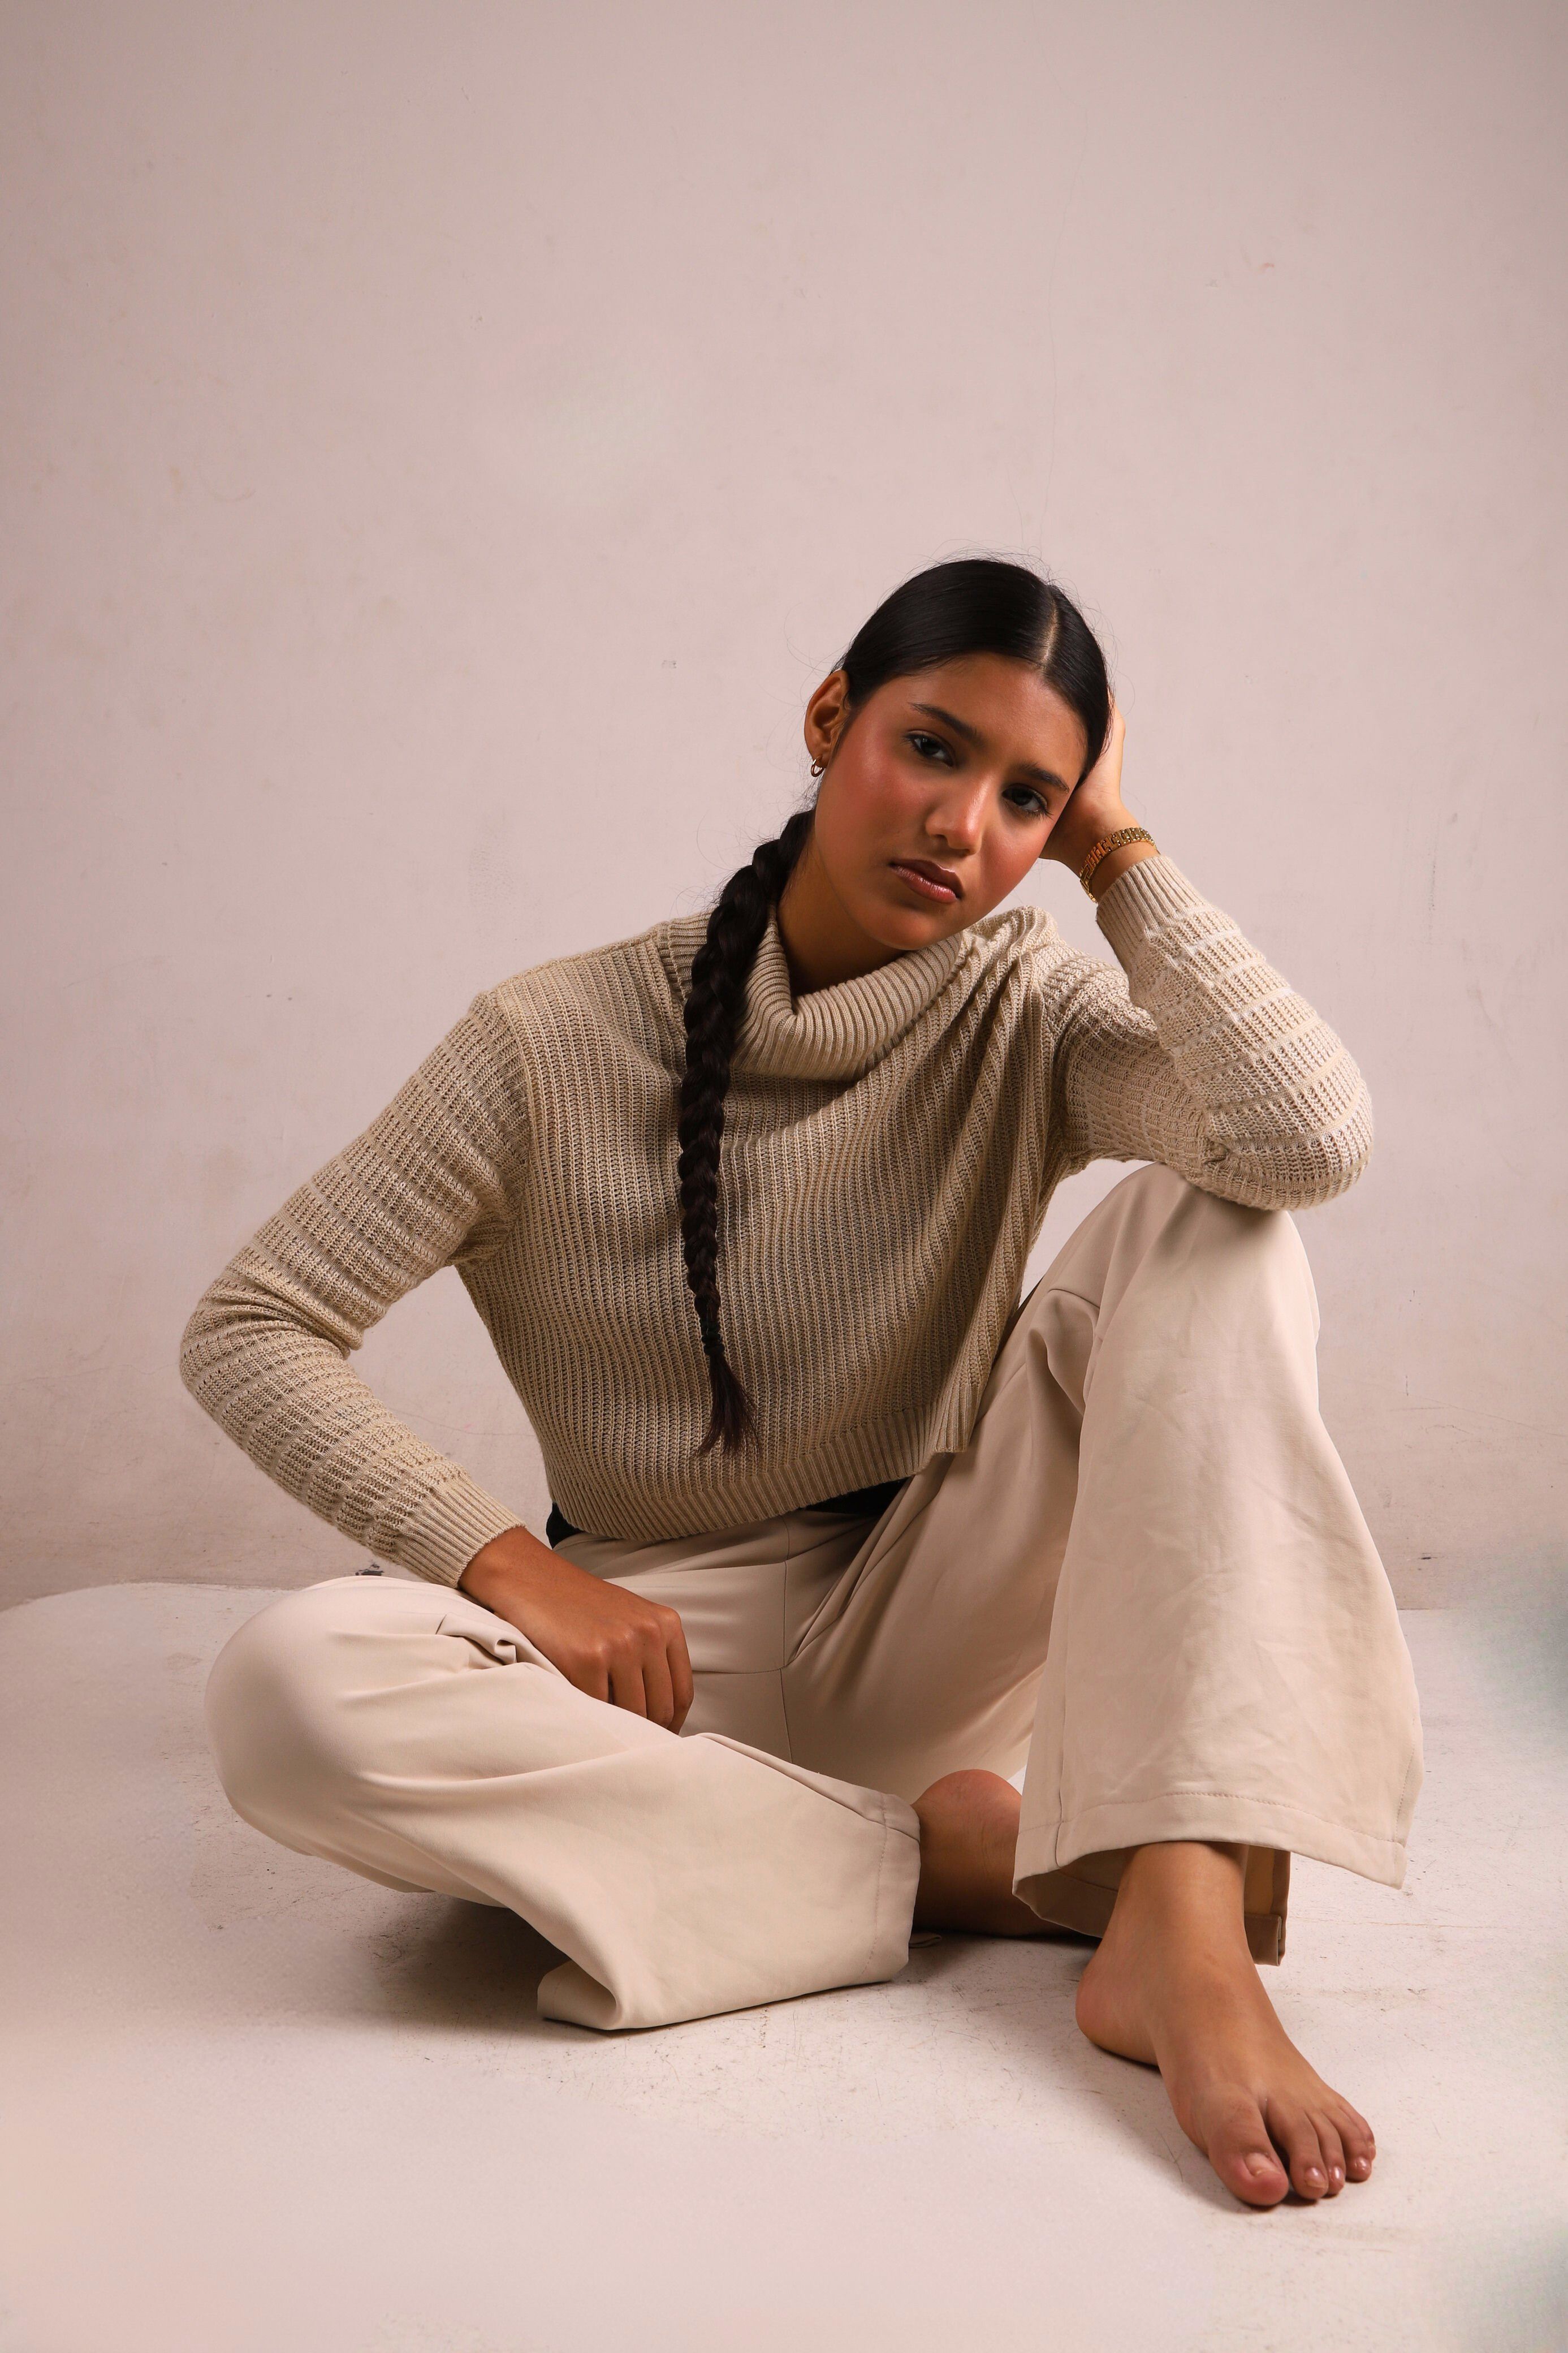 Model
Model
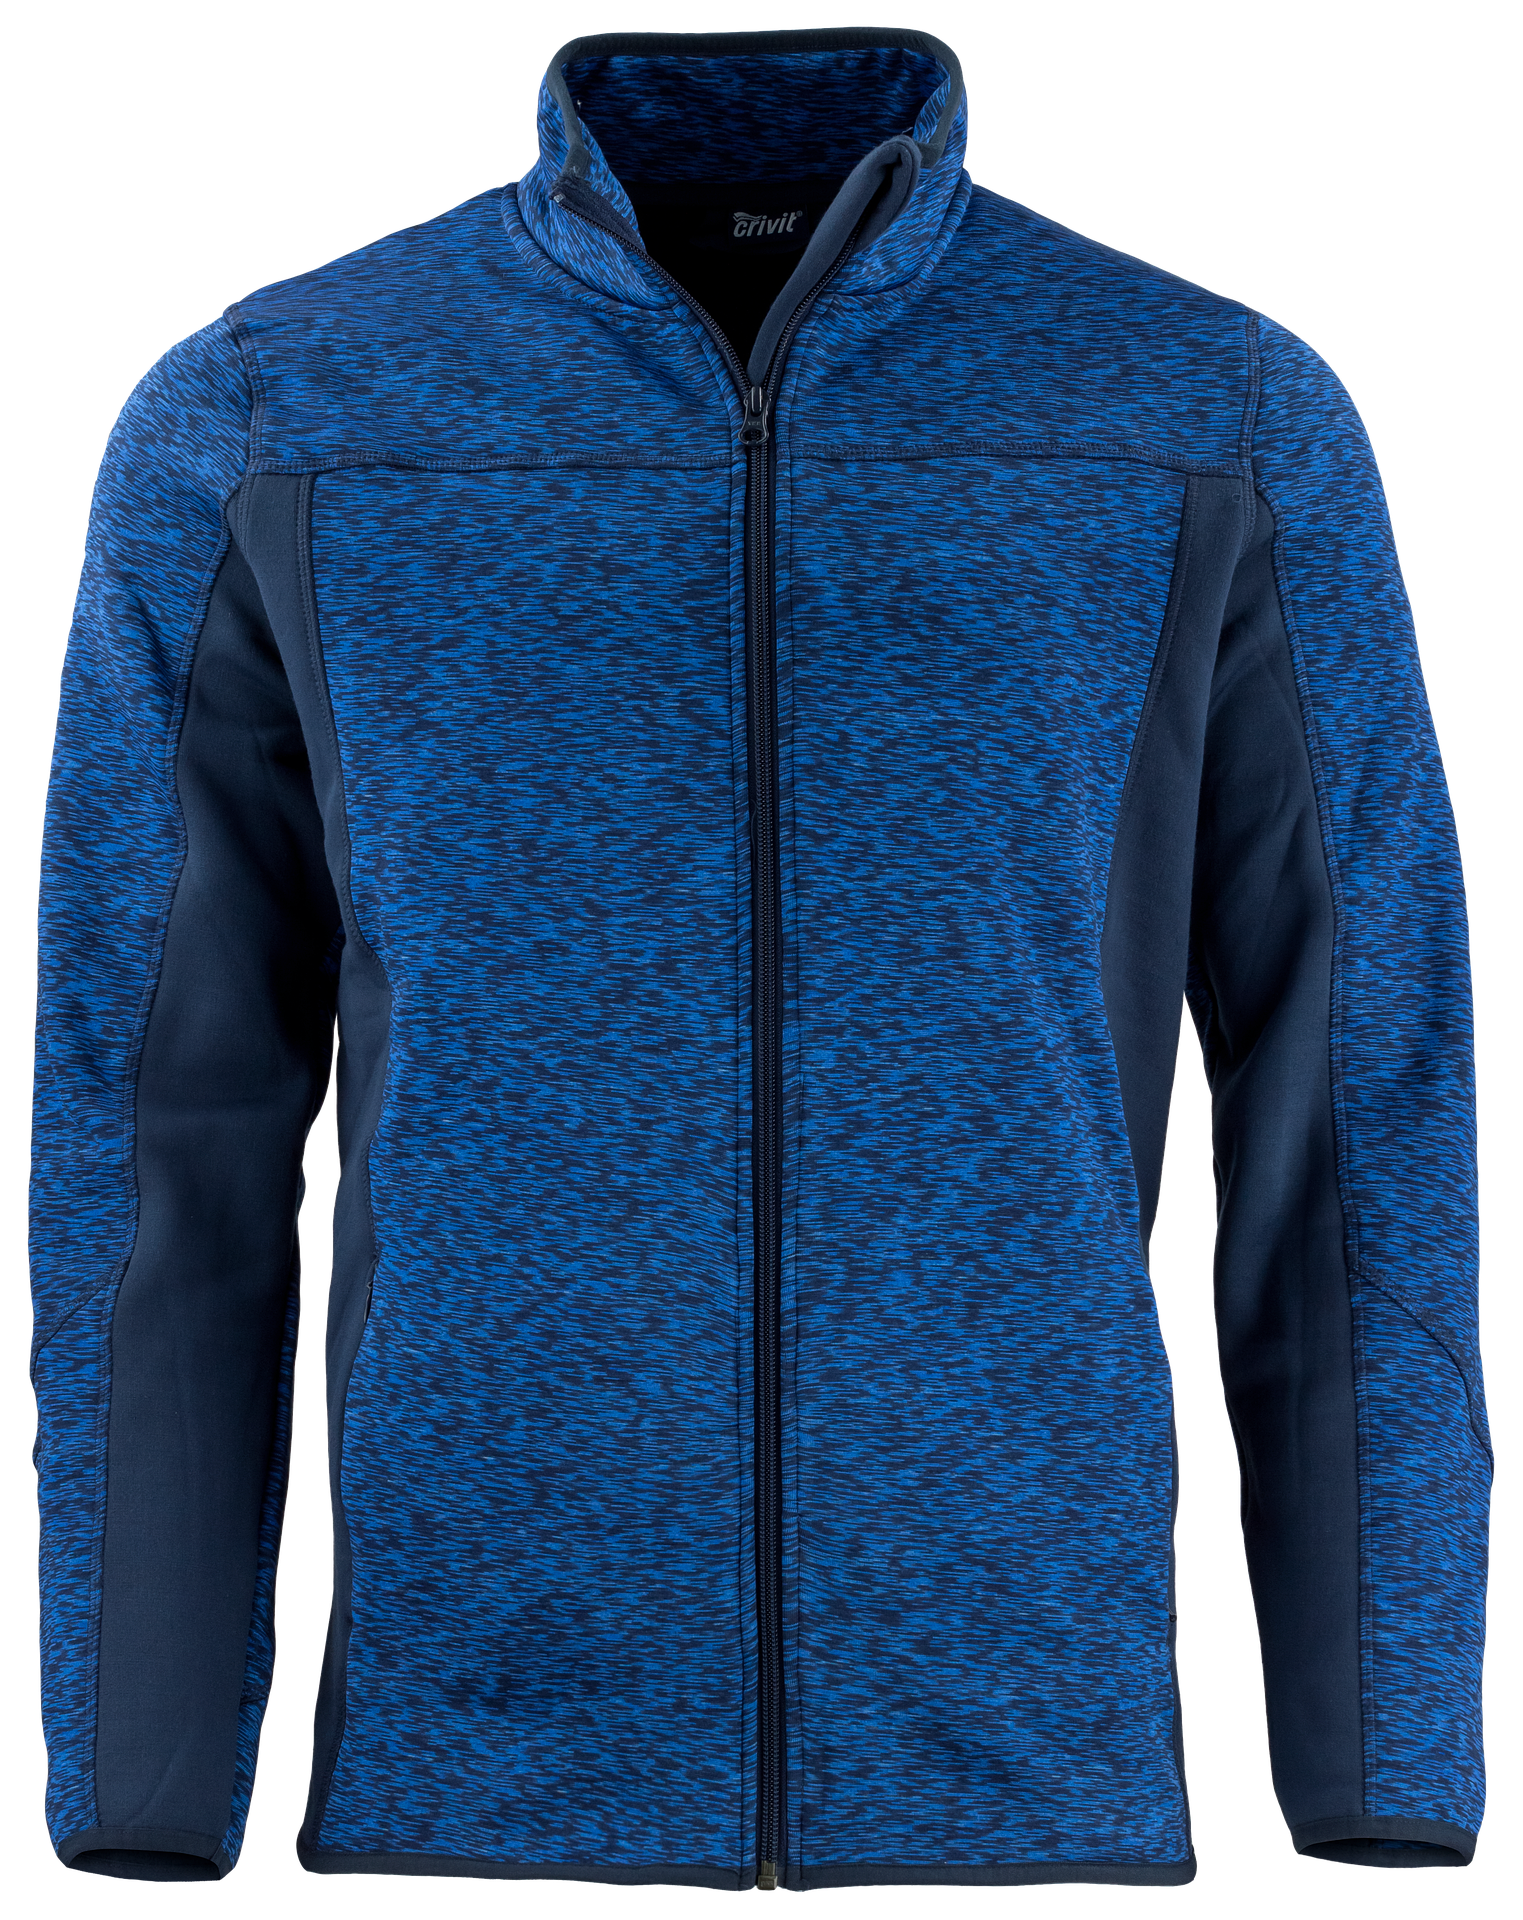 Jacket
The generated composite is stored as a managed asset like any other generation, so you can immediately deliver, transform, or optimize it with Cloudinary's standard delivery URLs. Repeat the request with a different garment reference and the same model reference to produce the rest of the catalog, without rebooking the model or studio:

Plans and quota
Image Generation uses a credit-based billing model. One credit is approximately one US cent, and each generation consumes a variable number of credits depending on the model and output quality. Higher resolution outputs consume more credits.
All Cloudinary accounts include a free monthly credit allotment. When you exhaust your free credits, you must upgrade to a paid Image Generation plan to continue generating images. Paid Image Generation plans are separate from your Cloudinary account plan. You can be on a free Cloudinary account and still subscribe to a paid Image Generation plan.
On a paid plan, generation continues on a pay-as-you-go basis once your plan credits are used up. You can view available plans, subscribe, and monitor remaining credits on the Image Generation add-on page in the Cloudinary Console.
For details about prorated billing, mid-cycle upgrades, and downgrade behavior, see Add-on units and billing.
Error
Rate this page:
