Generative AI transformations
Last updated: Feb-20-2026
Cloudinary offers a range of transformations powered by generative AI, including generative background replace for creating alternative backgrounds, generative fill to naturally extend images to fit new dimensions, generative recolor to adjust image hues, generative remove for seamless removal of elements, generative replace to substitute items within images, and generative restore to revitalize degraded visuals.
You can use natural language in most of these transformations as prompts to guide the generation process.
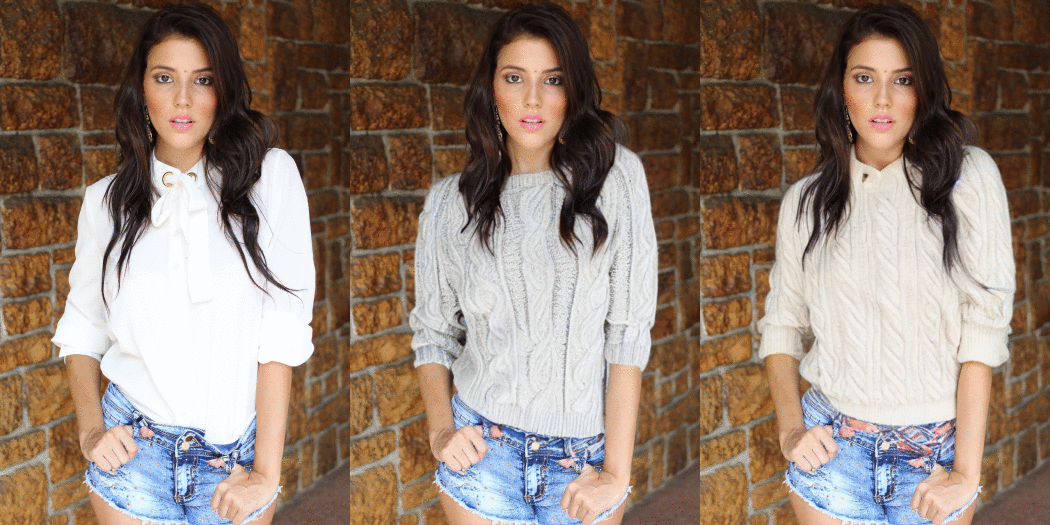
Here are some examples of generative AI transformations on the same image. Click each image to see the URL parameters applied in each case:
Generative background replace (Beta)
Use AI to generate an alternative background for your images. The new background takes into account the foreground elements, positioning them naturally within the scene.
For images with transparency, the generated background replaces the transparent area. For images without transparency, the effect first determines the foreground elements and leaves those areas intact, while replacing the background.
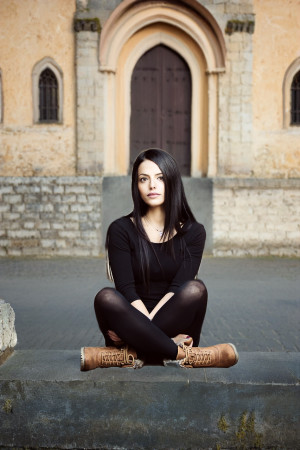
You can use generative background replace without a prompt, and let the AI decide what to show in the background, based on the foreground elements. For example, replace the background of this image (e_gen_background_replace):
Alternatively, you can use a natural language prompt to guide the AI and describe what you want to see in the background. For example, place the model in front of an old castle (e_gen_background_replace:prompt_an%20old%20castle):
Generate different backgrounds
The same background is generated every time you use the same prompt (and keep any preceding transformations the same). You can generate a different background with the same prompt (or no prompt) by setting theseed parameter. A different result is generated for each value you set. For example, regenerate the background for the old castle example (e_gen_background_replace:prompt_an%20old%20castle;seed_1):

If you want to reproduce a background, use the same seed value, and make sure to keep any preceding transformation parameters the same. Subsequent parameters can be different, for example, scale down the same image:

Replace transparent backgrounds
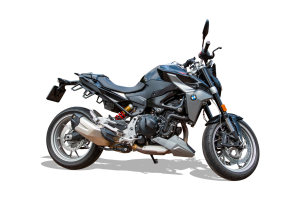
In this next example, the transparent background of the original image is replaced to give context to the motorbike (e_gen_background_replace:prompt_a%20deserted%20street):
- The use of generative AI means that results may not be 100% accurate.
- There's a special transformation count for the generative background replace effect.
- If you get blurred results when using this feature, it's likely that the built-in NSFW (Not Safe For Work) check has detected something inappropriate. You can contact support to disable this check if you believe it's too sensitive.
- The generative background replace effect isn't supported for animated images or fetched images.
- When Cloudinary is generating a derived version, you may get a 423 response returned until the version is ready. You can prepare derived versions in advance using an eager transformation.
- When Cloudinary is generating an incoming transformation, you may get a 420 response returned, with status
pendinguntil the asset is ready. - If you're using our Asia Pacific data center, you currently can't apply the generative background replace effect.
See full syntax: e_gen_background_replace in the Transformation Reference.
Try it out: Generative background replace.
Generative fill
When resizing images using one of the padding crop modes (pad, lpad, mpad or fill_pad), rather than specifying a background color or using content-aware padding, you can seamlessly extend the existing image into the padded area.
Using generative AI, you can automatically add visually realistic pixels to either or both dimensions of the image. Optionally specify a prompt to guide the result of the generation.
To extend the width of an image, specify the aspect ratio such that the width needs padding. For example, change the following portrait image to be landscape by specifying an aspect ratio of 16:9 with a padding crop, then fill in the extended width using the gen_fill background option (b_gen_fill in URLs):
Similarly, you can change a landscape image into portrait dimensions by specifying the aspect ratio such that the height needs padding:
To extend both the width and the height of an image, you can use the minimum pad mode, ensuring that the dimensions you specify are greater than the original image dimensions. For example, extend this 640 x 480 pixel image to fill a 1100 x 1100 pixel square:
Extend an image in one direction
When using padding modes, you can use the gravity parameter to position the original image within the padding, for example, perhaps with the first example, you only want to extend the image to the left, you can position the original image to the right by setting gravity to east:

Extend an image with specific elements
If you want to see something specific in the generated parts of the image, you can specify a prompt using natural language. For example, add a box of cookies to the extended region (b_gen_fill:prompt_box%20of%20cookies):
Generate different filled backgrounds
The same filled background is generated every time you use the same prompt (and keep any preceding transformations the same). You can generate a different filled background with the same prompt (or no prompt) by setting the seed parameter. A different result is generated for each value you set. For example, regenerate the filled background for the box of cookies example (b_gen_fill:prompt_box%20of%20cookies;seed_1,c_pad,h_400,w_1500):

To reproduce a filled background, use the same seed value, and make sure to keep any preceding transformation parameters the same. Subsequent parameters can be different, for example, scale down the same image:

- Generative fill can only be used on non-transparent images.
- There is a special transformation count for generative fill.
- Generative fill isn't supported for animated images or fetched images.
- If you get blurred results when using this feature, it is likely that the built-in NSFW (Not Safe For Work) check has detected something inappropriate. You can contact support to disable this check if you believe it's too sensitive.
- When Cloudinary is generating a derived version, you may get a 423 response returned until the version is ready. You can prepare derived versions in advance using an eager transformation.
- When Cloudinary is generating an incoming transformation, you may get a 420 response returned, with status
pendinguntil the asset is ready.
See full syntax: b_gen_fill in the Transformation Reference.
Try it out: Generative fill.
Generative recolor
Recolor elements of your images using generative AI.
Use natural language to describe what you want to recolor in the image. For example, turn the jacket on the right pink (e_gen_recolor:prompt_the%20jacket%20on%20the%20right;to-color_pink):
Recolor multiple elements
To recolor all instances of the prompt in the image, specify multiple_true, for example, recolor all the devices in the following image to a particular orange color, with hex code EA672A:
If there are a number of different things that you want to recolor, you can specify more than one prompt. Note that when you specify more than one prompt, multiple instances of each prompt are recolored, regardless of the multiple parameter setting. For example, in this image, all devices and both people's hair are recolored:
;to-color_EA672A/w_400/docs/devices.jpg)
Recolor multicolored objects
If the items to recolor contain many colors, you can specify the colors to change based on their dominance in the items (using a zero-based index). For example, in the image below, the blue is the third most dominant color of the dress and the most dominant color of the jacket. Therefore, to recolor both of these to a burgundy color (hex color #800020), you can chain two recolor actions:
-
e_gen_recolor:prompt_dress;apply-to-tier_(2);to-color_800020: recolors the third most dominant color in the dress to burgundy. -
e_gen_recolor:prompt_jacket;apply-to-tier_(0);to-color_800020: recolors the most dominant color in the jacket to burgundy.
Specify multiple colors to change by separating the dominant indices with semicolons. For example, change the fourth and fifth most dominant colors to green (hex color #58d68d) in the sweater (prompt_sweater;to-color_58d68d;apply-to-tier_(3;4)). The yellow and gray colors change to green:
Code explorer: AI-powered object recolor demo
This demo shows how visitors can upload an image and choose new colors for the objects detected in it.
This code is also available in GitHub.
- The generative recolor effect can only be used on non-transparent images.
- The use of generative AI means that results may not be 100% accurate.
- The generative recolor effect works best on simple objects that are clearly visible, and not abstract concepts such as "background".
- Very small objects and very large objects may not be detected.
- During processing, large images are downscaled to a maximum of 2048 x 2048 pixels, then upscaled back to their original size, which may affect quality.
- When you specify more than one prompt, all the objects specified in each of the prompts will be recolored whether or not
multiple_trueis specified in the URL. - There is a special transformation count for the generative recolor effect.
- The generative recolor effect isn't supported for animated images or fetched images.
- User-defined variables can't be used for the prompt when more than one prompt is specified.
- When Cloudinary is generating a derived version, you may get a 423 response returned until the version is ready. You can prepare derived versions in advance using an eager transformation.
- When Cloudinary is generating an incoming transformation, you may get a 420 response returned, with status
pendinguntil the asset is ready. - If you're using our Asia Pacific data center, you currently can't apply the generative recolor effect.
See full syntax: e_gen_recolor in the Transformation Reference.
Try it out: Generative recolor.
Generative remove
This effect uses generative AI to remove an object from an image and fill in the space with artificially generated, visually realistic pixels.
Use natural language to describe what you want to remove from the image, for example, remove the stick from this image of a dog with a stick in its mouth (e_gen_remove:prompt_the%20stick):
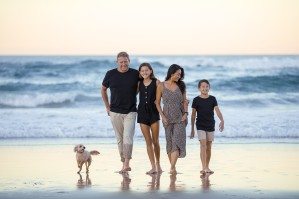
The natural language lets you be specific about what you want to remove. In the following example, specifying only 'the child' removes the child in the middle, whereas specifying the 'the child in green' removes the child wearing the green jacket:
Remove multiple items
If there is more than one of the same item in an image, you can remove them all using by setting multiple to true. For example, remove all the geese in this image (e_gen_remove:prompt_goose;multiple_true):
Otherwise, only one is removed:

If there are a number of different things that you want to remove, you can specify more than one prompt. Note that when you specify more than one prompt, multiple instances of each prompt are removed regardless of the multiple parameter setting. For example, in this image, all phones are removed, together with the mouse and keyboard:
Remove items from a region
You can also specify one or more region if you know the co-ordinates of the pixels that you want to remove. For each region, specify the x,y co-ordinates of the top left of the region, plus its width and height in pixels. For example, remove the objects from the top left and bottom right of the image:
Remove shadows and reflections
By default, shadows and reflections cast by objects specified in the prompt are not removed. If you want to remove the shadow/reflection, set the remove-shadow parameter to true:
Remove text
You can remove all the text from an image by setting the prompt to text e.g. e_gen_remove:prompt_text, or e_gen_remove:prompt_(dog;text).
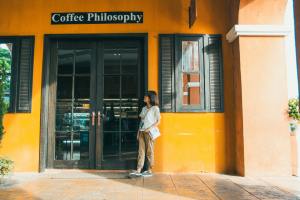
For example, remove the text and person from this storefront (e_gen_remove:prompt_(text;person)):
If you don't want to remove all the text in the image, specify the object you want to remove the text from by using the syntax text:<object> as the prompt (either as the only prompt, or together with other prompts as in the previous example).
For example, in the following image there is text in the main part of the image in addition to text on the mobile screen. You can remove the text on the mobile screen only, as follows (e_gen_remove:prompt_text:the%20mobile%20screen):
- The generative remove effect can only be used on non-transparent images.
- The use of generative AI means that results may not be 100% accurate.
- The generative remove effect works best on simple objects that are clearly visible.
- Very small objects and very large objects may not be detected.
- Don't attempt to remove faces or hands.
- During processing, large images are downscaled to a maximum of 6140 x 6140 pixels, then upscaled back to their original size, which may affect quality.
- When you specify more than one prompt, all the objects specified in each of the prompts will be removed whether or not
multiple_trueis specified in the URL. - There is a special transformation count for the generative remove effect.
- If you get blurred results when using this feature, it's likely that the built-in NSFW (Not Safe For Work) check has detected something inappropriate. You can contact support to disable this check if you believe it's too sensitive.
- The generative remove effect isn't supported for animated images or fetched images.
- User-defined variables can't be used for the prompt when more than one prompt is specified.
- When Cloudinary is generating a derived version, you may get a 423 response returned until the version is ready. You can prepare derived versions in advance using an eager transformation.
- When Cloudinary is generating an incoming transformation, you may get a 420 response returned, with status
pendinguntil the asset is ready. - If you're using our Asia Pacific data center, you currently can't apply the generative remove effect.
See full syntax: e_gen_remove in the Transformation Reference.
Try it out: Generative remove.
Generative replace
This effect uses generative AI to replace objects in images with other objects.
Use natural language to describe what you want to replace in the image, and what to replace it with.
For example, replace "the picture" with "a mirror with a silver frame" (e_gen_replace:from_the%20picture;to_a%20mirror%20with%20a%20silver%20frame):
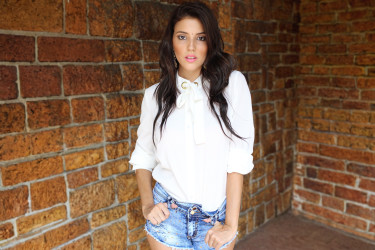
If you want to maintain the shape of the object you're replacing, set the preserve-geometry parameter to true. For example, below, notice the difference between the position of the sleeves and neckline of the sweater, with and without preserving the geometry when the shirt is replaced with a cable knit sweater:
- The generative replace effect can only be used on non-transparent images.
- The use of generative AI means that results may not be 100% accurate.
- The generative replace effect works best on simple objects that are clearly visible.
- Very small objects and very large objects may not be detected.
- Don't attempt to replace faces, hands or text.
- During processing, large images are downscaled to a maximum of 2048 x 2048 pixels, then upscaled back to their original size, which may affect quality.
- There is a special transformation count for the generative replace effect.
- The generative replace effect isn't supported for animated images or fetched images.
- When Cloudinary is generating a derived version, you may get a 423 response returned until the version is ready. You can prepare derived versions in advance using an eager transformation.
- When Cloudinary is generating an incoming transformation, you may get a 420 response returned, with status
pendinguntil the asset is ready. - If you're using our Asia Pacific data center, you currently can't apply the generative replace effect.
See full syntax: e_gen_replace in the Transformation Reference.
Try it out: Generative replace.
Generative restore
Revitalize degraded and poor quality images using generative AI.
You can use the gen_restore effect (e_gen_restore in URLs) to improve images that have become degraded through repeated processing and compression, in addition to enhancing old images by improving sharpness and reducing noise.
Particularly useful for user-generated content (UGC), generative restore can:
- Remove severe compression artifacts
- Reduce noise from grainy images
- Sharpen blurred images
Use the slider in this example to see the difference between the original image on the left and the restored image on the right:
You can use the generative restore effect together with the improve effect for even better results. While generative restore tries to rectify compression artifacts, the improve effect addresses color, contrast and brightness.
- The generative restore effect can only be used on non-transparent images.
- The use of generative AI means that results may not be 100% accurate.
- There is a special transformation count for the generative restore effect.
- The generative restore effect isn't supported for animated images or fetched images.
- When Cloudinary is generating a derived version, you may get a 423 response returned until the version is ready. You can prepare derived versions in advance using an eager transformation.
- When Cloudinary is generating an incoming transformation, you may get a 420 response returned, with status
pendinguntil the asset is ready.
See full syntax: e_gen_restore in the Transformation Reference.
Try it out: Generative restore.
 Ask AI
/c_scale,h_250/docs/woman-in-shirt.jpg)








;to-color_800020/e_gen_recolor:prompt_jacket;apply-to-tier_(0);to-color_800020/c_scale,h_300/docs/pattern-dress.jpg)
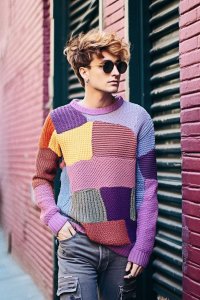
/c_scale,h_300/docs/multi-sweater.jpg)


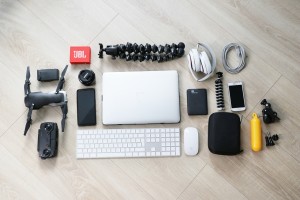
/c_scale,w_300/docs/gadgets.jpg)
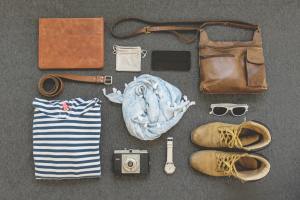
;(x_1800;y_1200;w_1000;h_800))/c_scale,w_300/docs/accessories-bag.jpg)


/c_scale,w_300/docs/shop-person.jpg)


