 Ask AI
- Get Started
- Image & Video APIs overview
- AI Power Start
- SDK Quick Starts
- Developer Kickstart
- AI agent tools and MCP servers
- Try it!
- VS Code Extension
- Video tutorial library
- Programmatic asset management
- Image onboarding
- Programmatic upload
- Upload programmatically
- Upload with Fetch API
- Create upload presets (Node.js)
- Create upload presets (Console UI)
- Auto upload
- Moderate images with AI
- Use AI to generate image captions
- Upload images in Flutter
- Upload images in Node.js
- Auto-tag images in Node.js
- Upload multiple files in Node.js
- Upload videos in Node.js
- Upload images in Python
- Auto-tag images in Python
- Upload videos in Python
- Upload images in PHP
- Upload images in Go
- Upload assets in a React app
- Upload assets in a Vue.js app
- Drag-and-drop uploads in React
- Upload assets in a Next.js app
- Upload assets with Server Actions
- Upload assets in Svelte
- Upload assets in a SvelteKit app
- Upload assets in a Remix app
- Upload images in Astro
- Upload images in Hono
- Use webhooks to remove backgrounds
- Upload images in Laravel
- Interaction with Cloudinary APIs
- Cloudinary SDKs
- Find your credentials
- Configure the JavaScript SDK
- Configure the React SDK
- Configure the Angular SDK
- Configure the Flutter SDK
- Configure Svelte Cloudinary
- Configure the Javascript SDK in Svelte
- Getting started with Cloudinary in Node.js
- Configure the Node.js SDK
- Configure the Python SDK
- Configure the PHP SDK
- Install and configure Laravel SDK
- Configure the Go SDK
- Configure the Vue.js SDK
- Configure the Next.js SDK
- List images in Next.js
- Lazy load images with Next.js
- Image fallbacks in JavaScript
- Captioning on upload with Node.js
- Create PDFs from images in Node.js
- Delete assets with Node.js
- Manage images in a Django app
- Image gallery with Astro
- Cloudinary CLI
- Widgets and tools
- Optimization and delivery
- Transformations
- Get started with transformations
- Advanced transformation features
- Text overlay transformations
- Add watermarks in JavaScript
- Complex transformations
- Named transformations
- Advanced image components
- Trim videos in Node.js
- Splice videos in Node.js
- Zoompan effect
- Video transformations
- Crop and resize images in React
- Crop and resize videos in React
- Crop and resize images in Python
- Crop images in PHP
- Remove backgrounds and add drop shadows
- AI generative fill in Next.js
- Color accessibility in JavaScript
- Transformations for social media
- Dev Hints on YouTube
- Dev Hints en Español
- Cloudinary Café Training Sessions
- Programmatic asset management
- Additional onboarding resources
- Guides
- Cloudinary Image
- Product overview
- Image transformations
- Image optimization and delivery
- Programmatic image creation
- Product Gallery widget
- Media Editor widget
- Image add-ons
- Troubleshooting and tips
- Troubleshooting image transformation errors
- 40x errors and X-Cld-Error messages
- Add a solid color overlay
- Images delivered without gzip compression
- Long time to first byte (TTFB) on WebPageTest.org
- Update a named transformation
- Cloudinary vs Imagga cropping
- Placeholder images (LQIP)
- How to detect corrupted images
- Force specific image when sharing links on Facebook
- Blurry images
- Offset face-detection gravity
- Cloudinary Video
- Product overview
- Cloudinary Video Player
- Video Player features
- Installation and setup
- How to embed the Video Player
- Video Player Studio
- Video Player customization
- Playlists and recommendations
- HLS and MPEG-DASH
- Video Player accessibility
- Video Player advanced features
- Video Player API reference
- Player profiles API reference
- Video config API reference
- Adaptive bitrate streaming
- Video transformations
- Video and audio optimization
- Video transcription
- AI Video Analysis
- Video analytics
- Live streaming
- Video add-ons
- Video best practices
- Social media videos
- Troubleshooting and tips
- Upload
- Asset management
- CRUD asset management APIs
- Media Library for developers
- Search for assets
- Eager and incoming transformations
- Custom metadata
- Analyze assets
- Moderate assets
- Webhook notifications
- Advanced asset management
- Add-ons
- Troubleshooting and tips
- Admin API authentication issues
- Why has the public ID of my asset changed?
- Check resource type and delivery type
- Get image or video dimensions
- Download account assets
- Delete or modify original images
- Does Cloudinary store any cookies?
- Underscores in public IDs or folder names
- Update already fetched asset
- Upload, manage, and deliver PDFs
- Cloudinary "sample" images
- Avoiding duplicate uploads
- Permitted naming conventions
- Adult/NSFW content policy
- High transformation rate
- Account management
- Retail and e-commerce
- User-generated content
- Accessible media
- AI in action
- Native mobile
- Add-ons
- Advanced Facial Attributes Detection
- Amazon Rekognition AI Moderation
- Amazon Rekognition Video Moderation
- Amazon Rekognition Auto Tagging
- Amazon Rekognition Celebrity Detection
- Aspose Document Conversion
- Cloudinary AI Background Removal
- Cloudinary AI Content Analysis
- Cloudinary AI Vision
- Cloudinary Duplicate Image Detection
- Cloudinary Image Generation
- Google AI Video Moderation
- Google AI Video Transcription
- Google Auto Tagging
- Google Automatic Video Tagging
- Google Translation
- Image to Video
- Image to Video API reference
- Imagga Auto Tagging
- Imagga Crop and Scale
- Perception Point Malware Detection
- Microsoft Azure Video Indexer
- OCR Text Detection and Extraction
- Pixelz - Remove the Background
- URL2PNG Website Screenshots
- VIESUS™ Automatic Image Enhancement
- WebPurify Image Moderation
- Cloudinary Image
- References
- Transformation URL API
- Upload API
- Admin API
- Provisioning API
- Agent account creation API
- Permissions API
- Analyze API (Beta)
- Live streaming API
- Player profiles API
- Video config API
- Video Canvas API
- Image Generation API
- Image to Video API
- Cloudinary CLI
- SDK references
- Postman collections
- Upload Widget API
- Product Gallery API
- Media Editor API
- Video Player API
- Media Library Widget API
- SDKs
- Release Notes
Suggested transformation options for placeholder images/ LQIP
Get Started with Cloudinary
Paste one prompt into your AI coding assistant and it sets up Cloudinary for you: installs the SDK, configures skills and MCP servers, and validates your setup.
Install Cloudinary Agent Skills
Cloudinary agent skills give your AI coding assistant first-class context for working with Cloudinary.
Run to install or update the skills:
View the Skills repo on GitHub | Learn about Cloudinary Skills
Last updated: Jul-24-2026
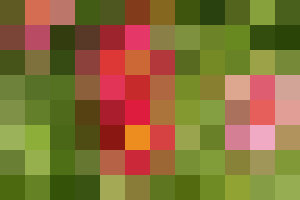
When implementing a responsive design, or a lazy-loading method to optimize how your images are loaded on your webpage, a common implementation choice is to use low-quality image placeholders or LQIPs.
The exact steps to do this will vary based on how your responsive images or lazy-loading is implemented. In each case, the idea is to load a low-quality copy of the image quickly, and then replace it with a higher-quality image later.
The use of LQIPs means that the user will see a visual indicator of the images that have not yet loaded. If a user quickly scrolls down the page, for example, they'll see the placeholders rather than seeing broken image tags or lots of blank space.
A simple missing image icon may be used in place of all images that weren't loaded yet but using Cloudinary's image transformation features it's easy to use a smaller copy of each image, making the placeholders blend seamlessly with the intended final images.
Some of Cloudinary's client-side libraries include this feature directly, and using our React library as an example, our Placeholder component allows you to choose placeholders to be used before the main image is loaded, see Image placeholders.
If you're using our URL-based transformations directly, there are several options that will provide LQIPs that load quickly and with a small file size. You can see some examples below to help you choose which is best for your own design.
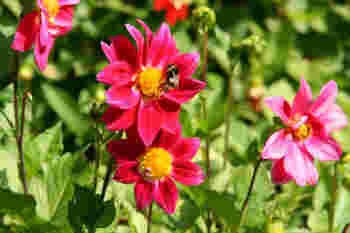
The original asset for these examples is the "sample" image in the demo account. The sample image is 117 KB (864 x 576px): https://res.cloudinary.com/demo/image/upload/sample.jpg


✔️ Feedback sent!
Error
Unfortunately there's been an error sending your feedback.
Rate this page:
