Non-product asset workflows
Last updated: Feb-17-2026
This section provides an example workflow for managing non-product assets, also known as editorial, content, or brand assets. Use these recommendations as a foundation and adapt the implementation to fit your company’s needs.
Unlike product assets, non-product assets—such as hero images, marketing videos, social media content, and promotional materials—are often curated to shape the overall experience. These assets typically require manual selection, approval, and refinement. As an administrator, you may handle setup and automation, while content editors focus on editing and selecting assets for the website and other delivery channels.
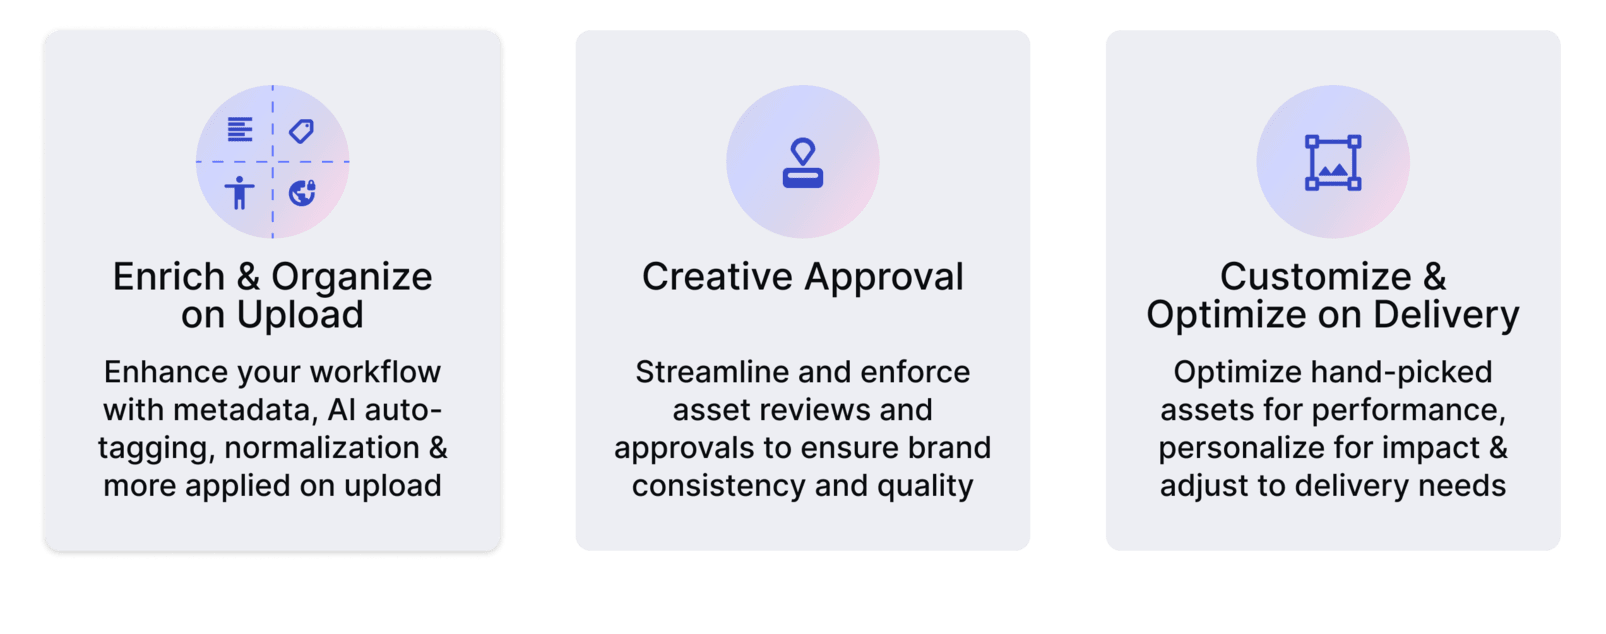
Enrich and organize on upload
Handle setup tasks such as creating folders, configuring auto-tagging, managing accessibility settings, and enforcing access restrictions. Meanwhile, content editors manually upload assets via the Media Library within Cloudinary’s Assets (DAM) product. Contributors select and upload images and videos for storytelling, branding, and marketing, adding metadata as needed.
In this section, you'll learn how to set up and upload non-product assets in the Media Library.
Step 1: Create folder structure
Start by organizing your non-product assets—such as brand logos, marketing images, video content, or internal documentation—into a clear folder structure. This improves searchability and asset management, and is especially important because permissions and governance in the Media Library are enforced through folder structure.
We recommend starting with a root folder like non_product_assets/, and organizing by purpose or content type.
Here's a sample folder structure for non-product assets:
To create a folder:
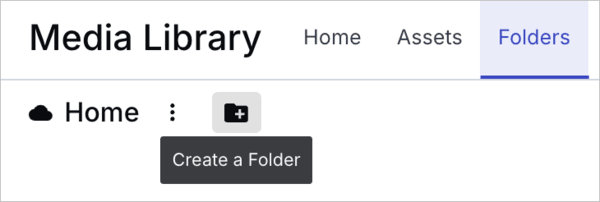
- Click the Folders tab at the top of the Media Library to navigate to that page.
- Click the Create a Folder icon at the top left corner.
- To create a subfolder, navigate to the parent folder first.
Sharing folders with Media Library users
While developers on your team may have Admin user roles, you should assign Media Library user roles to content editors in your organization who work with assets within the Media Library. For more information on adding users and assigning roles, see User and group management.
Media Library users won't be able to view any content in the Media Library until you share folders with them. Once you do that, they'll be able to access the assets within the folder and its subfolders at the permission level you assign.
To share a folder:
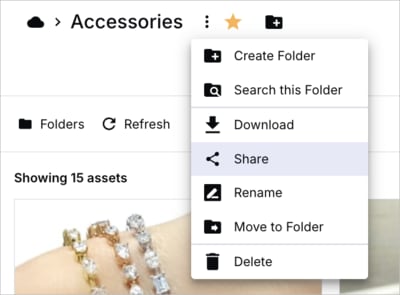
- Select Share from the options drop-down next to the current folder path at the top of the Media Library

- Select the users and/or user groups you want to share the folder with, as well as the permission level for each.
For more information, see Folder management.
Step 2: Register for add-ons
In order to enable some upload preset options, you first need to register for Cloudinary's add-ons. You'll then activate the selected add-ons using upload preset options in Step 3.
Here are some of the add-ons you may want to apply:
| Add-on | What it Does | Considerations | Implementation |
|---|---|---|---|
| Google Auto Tagging | Automatically tags images using Google Vision AI. | Works well for general object recognition and categorization. | 1 - Register for the Google Auto Tagging add-on in the Add-ons page. 2 - Enable Google Auto Tagging in Addons page of a new upload preset. |
| Amazon Rekognition Auto Tagging | Detects objects and assigns tags using Amazon Rekognition. | Useful for AI-powered object detection and scene analysis. | 1 - Register for the Amazon Rekognition Auto Tagging add-on. 2 - Enable Rekognition Auto Tagging in the Addons page of a new upload preset. |
| Auto Moderation | Flags inappropriate content. | Ideal for content moderation and brand safety. | 1 - Register for the Rekognition AI Moderation and Rekognition AI Video Moderation add-on. 2 - Enable Rekognition AI Moderation (for images) or Rekognition AI Video Moderation (for videos) in the Addons page of a new upload preset. |
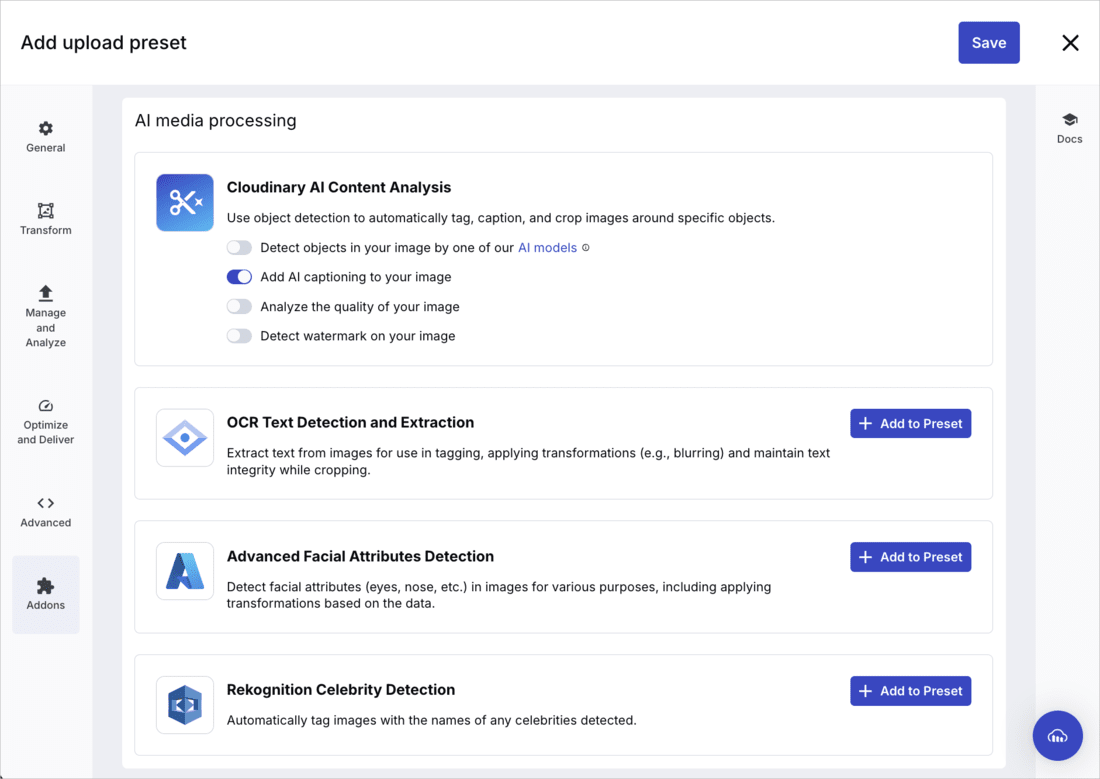
| Cloudinary AI Content Analysis | Generates image captions and auto-tags assets. | Useful for automatic alt text and SEO improvements. | 1 - Register for the Cloudinary AI Content Analysis add-on. 2 - Enable Add AI captioning to your image for the Cloudinary AI Content Analysis add-on in the AI media processing section in the Addons page of a new upload preset. |
| Google Video Intelligence | Labels objects and scenes in videos. | Ideal for video content classification. | 1 - Register for the Google Video Intelligence add-on. 2 - Enable Google Automatic Video Tagging in the Addons page of a new upload preset. |
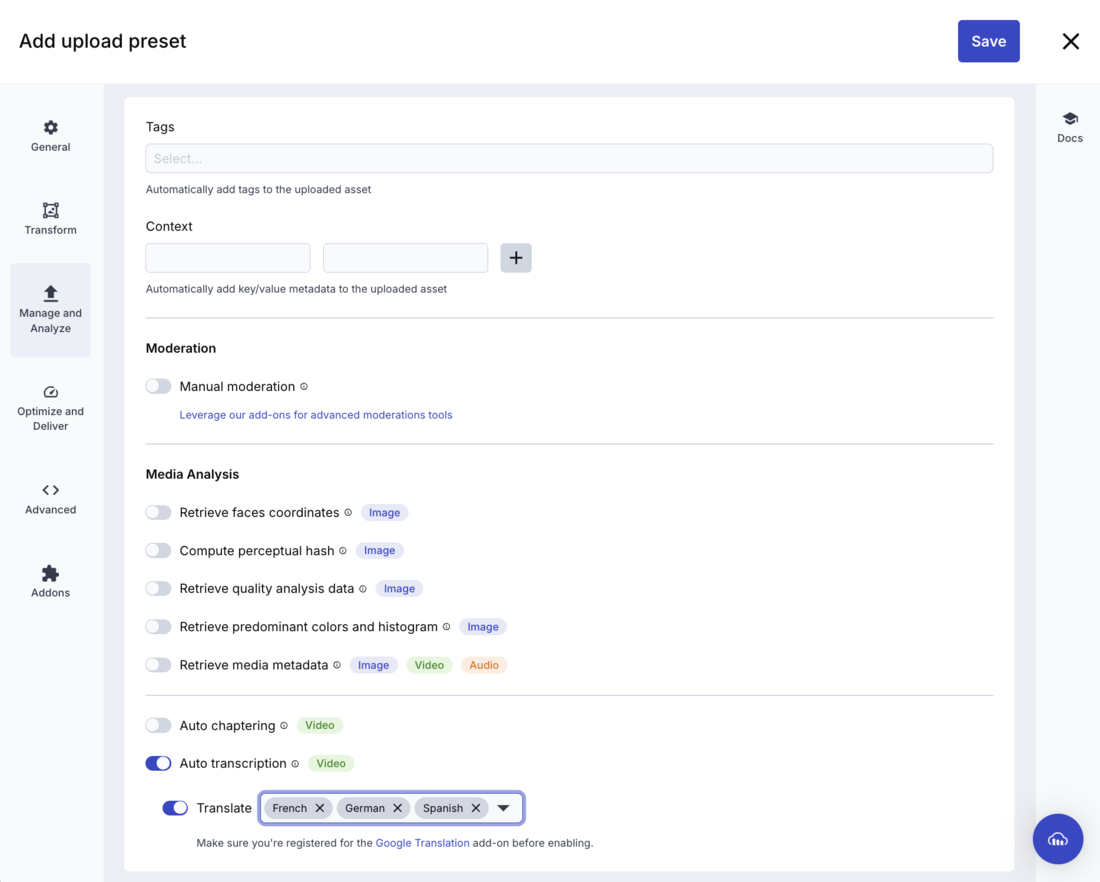
| Google Translation | Translates video transcription into multiple languages. (You don't need to register for an add-on to activate Cloudinary's transcription functionality, but you do need to register for the add-on for translation.) | Enhances accessibility, SEO, and multi-language support. | 1 - Register for the Google Translation add-on. 2 - Enable Auto transcription and Translate, and select a language in the Manage and Analyze page of a new upload preset. |
Step 3: Use an upload preset for auto-tagging, alt-text, and access control
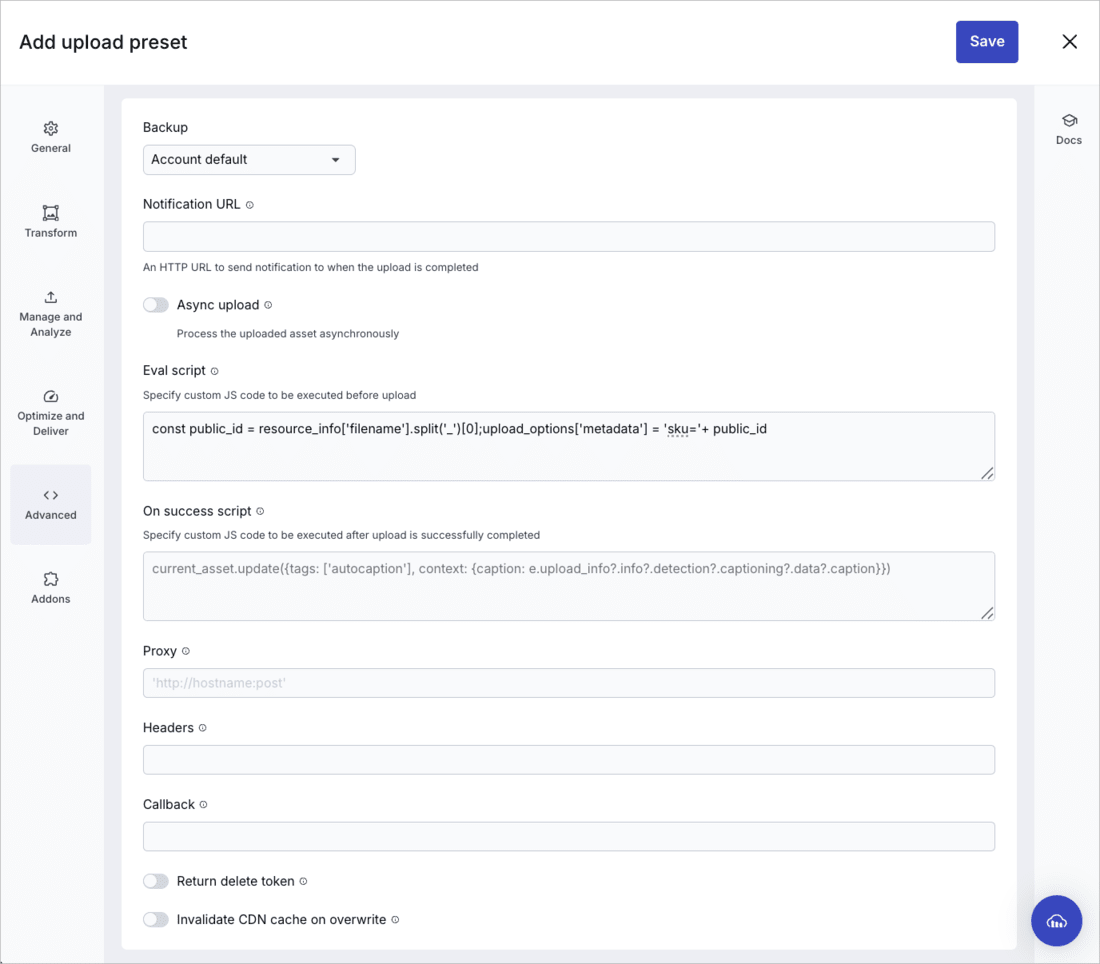
You can create upload presets, which centrally define a set of asset upload options. Users can apply the options by applying the presets on upload to improve accessibility, streamline searchability, and enforce asset restrictions.
To create an upload preset to apply upload options:
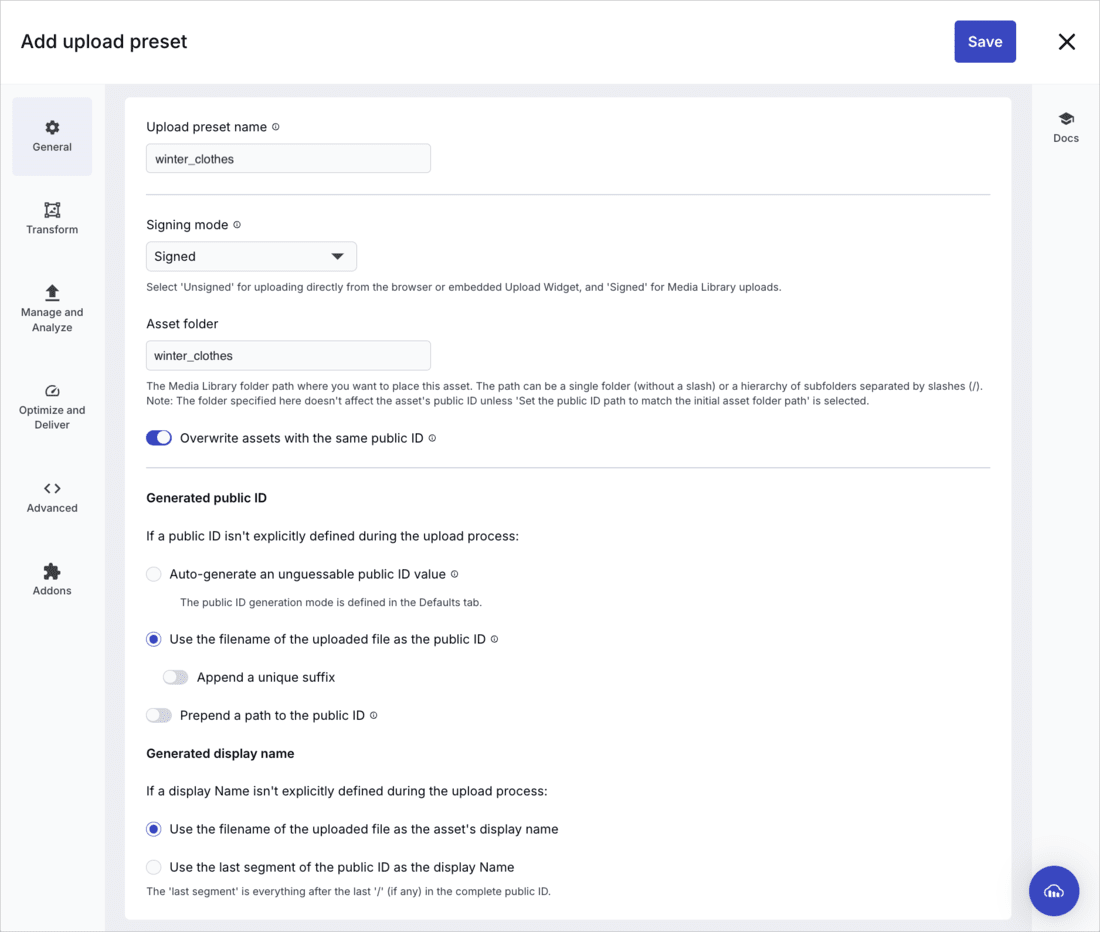
- Navigate to the Upload Presets tab on the Upload page of the Console Settings and click Add Upload Preset.
- Use the table below to apply recommended upload preset options, see how they align with best practices, and learn how to implement them.
| Option | How it Supports Best Practices | Implementation |
|---|---|---|
| Naming and folder location | Enforces naming conventions within your organization. Enforces governance within the organization and improves discoverability by uploading assets to meaningful folder locations. |
In the General tab of the new upload preset: - Enter the name of the Asset folder you want to upload to. - Select Use the filename of the uploaded file as the public ID to enforce naming conventions when the uploaded file contains the SKU. Note: If the SKU isn't part of the uploaded file's name and the SKU needs to be part of the public ID, set the SKU as a |
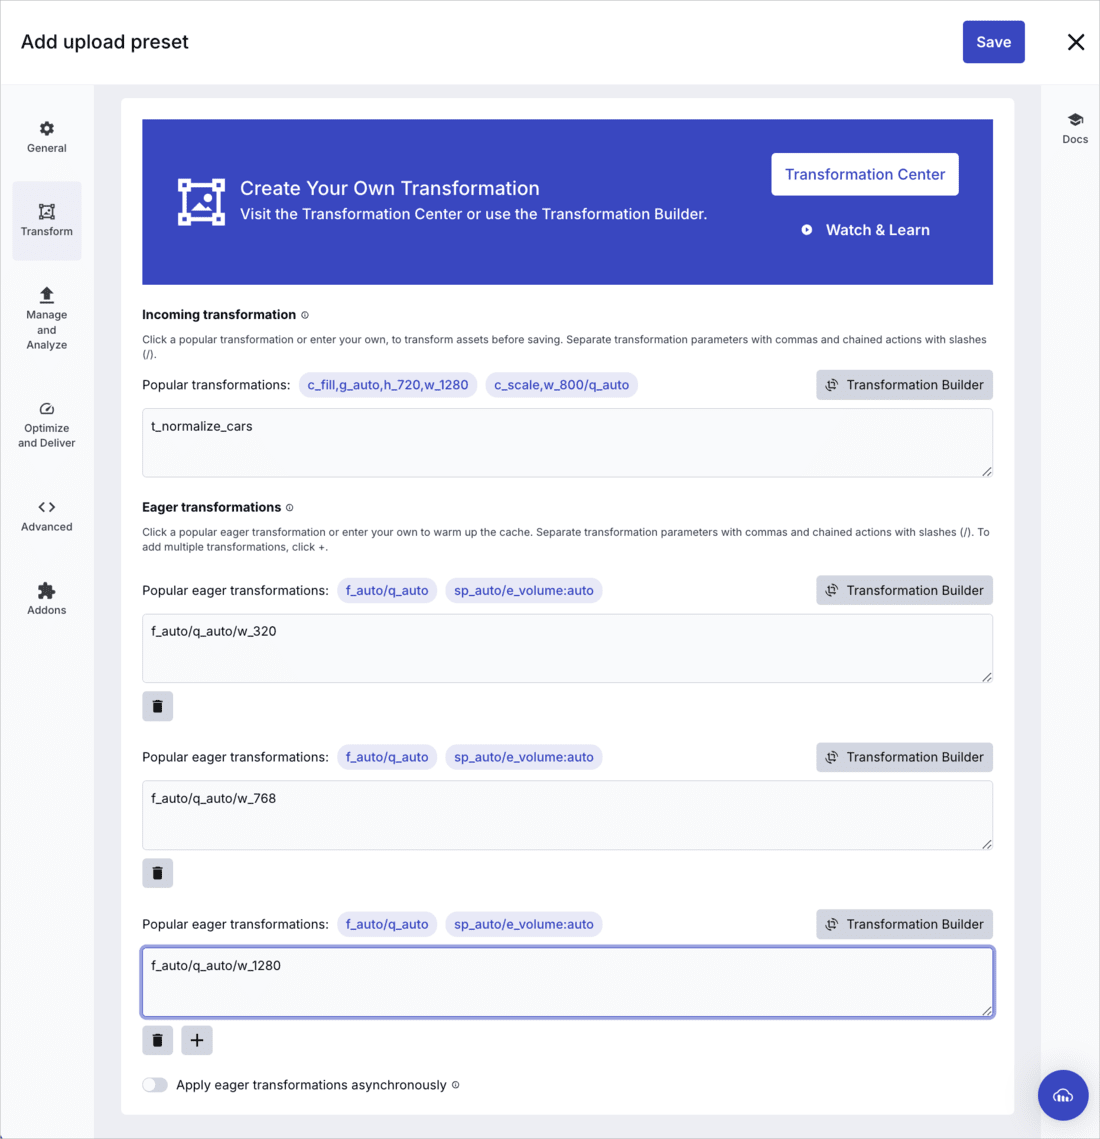
| Improve image and video performance | Prepares responsive images for various viewports and uses auto-format and quality settings to make sure your website loads quickly. Warms up the cache by generating the specified transformations on upload, before the assets are actually requested. |
In the Transform tab of the new upload preset, add f_auto/q_auto as Eager transformations for various viewport sizes, e.g., w_320, w_768, w_1280, w_1600.
|
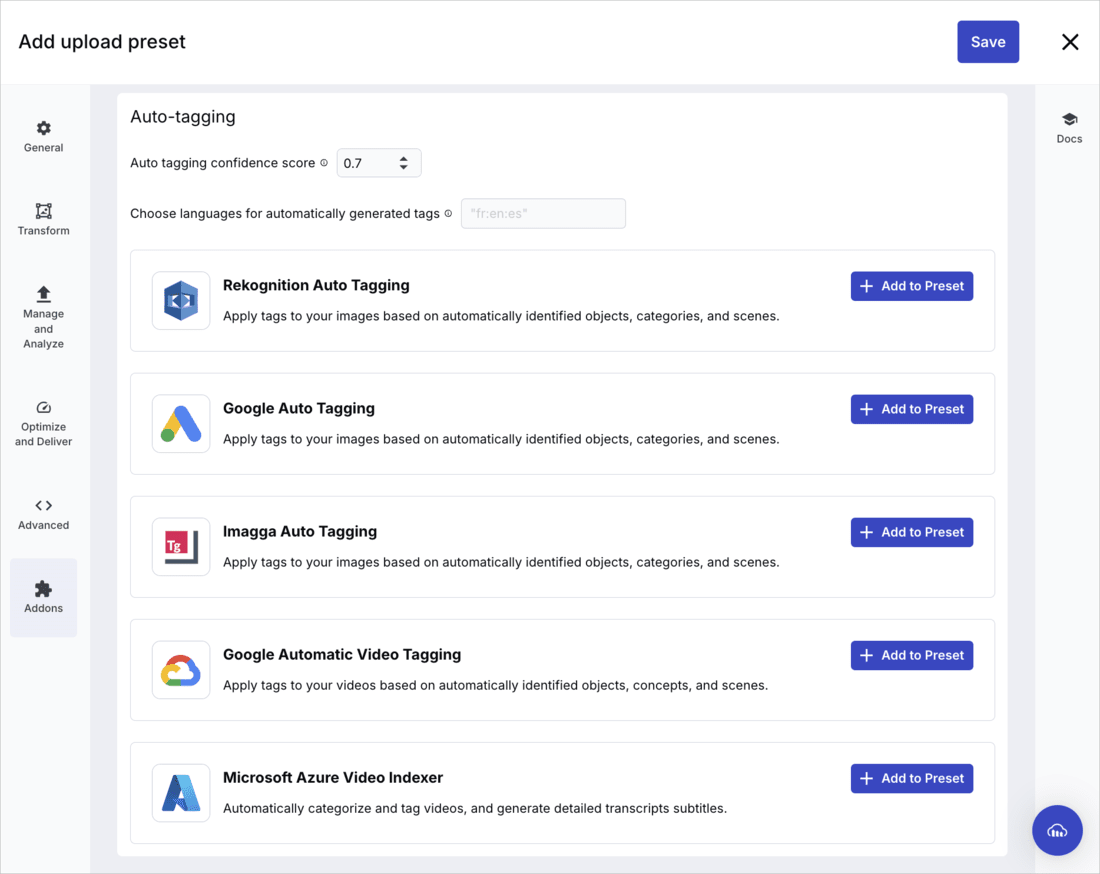
| Enhance searchability with auto-tagging | Categorizes assets accurately for faster search and retrieval while reducing manual effort. | In the Addons tab of the new upload preset, select the auto-tagging add-on(s). Make sure you're registered for those add-ons, as described in Step 4. |
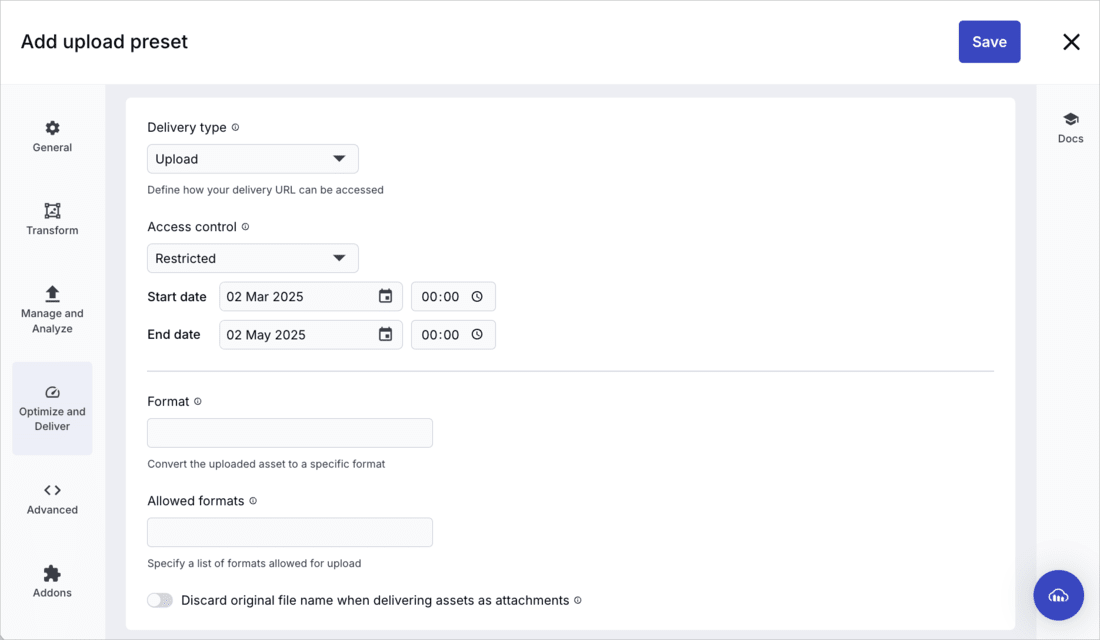
| Restrict access to assets with time based availability | Ensures sensitive assets are only available when needed. | In the Optimize and Deliver tab of the new upload preset, set Access control to Restricted, with an optional date range for unrestricted availability. |
| Auto-generate captions | Creates captions that you can use as alt text to make images accessible to visually impaired users and improve SEO. | In the Addons tab of the new upload preset, select Add Al captioning to your image from the Cloudinary Al Content Analysis add-on. Make sure you're registered for the Cloudinary AI Content Analysis add-on, as described in Step 5.
To add the caption to a previously created structured metadata field called Caption (whose external_id is
Retrieve the structured metadata field value for an asset and assign it to its alt text when rendering it in your HTML code. |
| Generate video transcription and translations | Provides video transcription and translation to make videos accessible to deaf and hard-of-hearing users and expand reach to multilingual audiences. | In the Manage and Analyze tab of the new upload preset, turn on Auto transcription and select the languages you want to provide. Make sure you're registered for the Video Transcription and Translation add-on , as described in Step 4. |
- Remember to click Save at the top left corner.
Step 3: Set up metadata for searchability
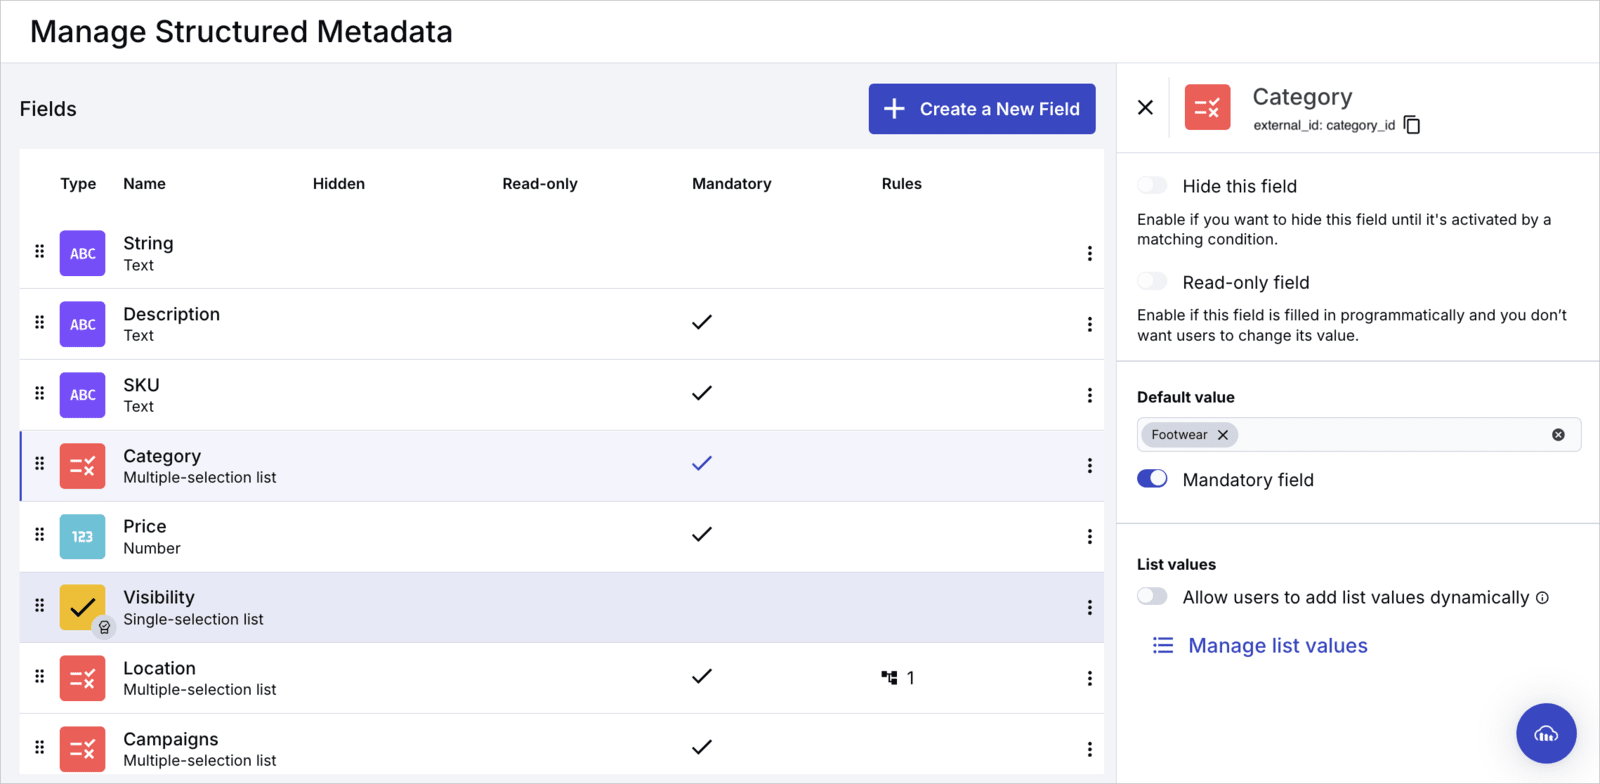
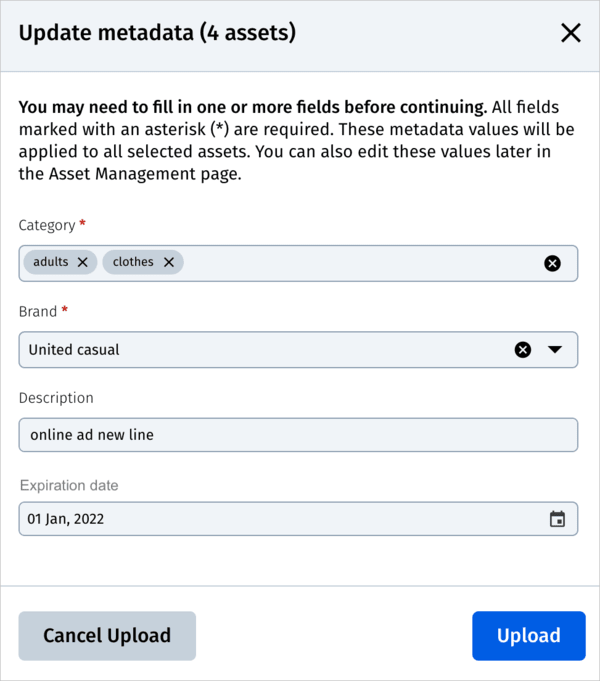
To ensure assets are easily searchable and properly categorized, identify which metadata fields are relevant for your non-product assets and then create structured metadata fields. Configure Cloudinary to prompt users for metadata entry on every upload.
To define metadata in the Media Library:
- Go to the Structured Metadata page in the Console.
- Configure the following metadata options:
- Field types: Text, number, date, single-selection, and multiple-selection lists.
- Mandatory fields: Define required fields to ensure consistent metadata entry. (Make sure you set a realistic number of mandatory fields so your users don't get overwhelmed.)
- Default values: Assign default values to mandatory fields to prevent upload failures.
- List values: Specify predefined values for single and multiple-selection fields.
-
Metadata rules: Set conditional rules (e.g., State field appears only if Country is US).
For more information, see Structured metadata.
Step 4: Manual upload via the Media Library
Content editors can manually upload assets while applying auto-tagging, automatic alt text generation, and video transcription and translation during the upload process by using an upload preset.
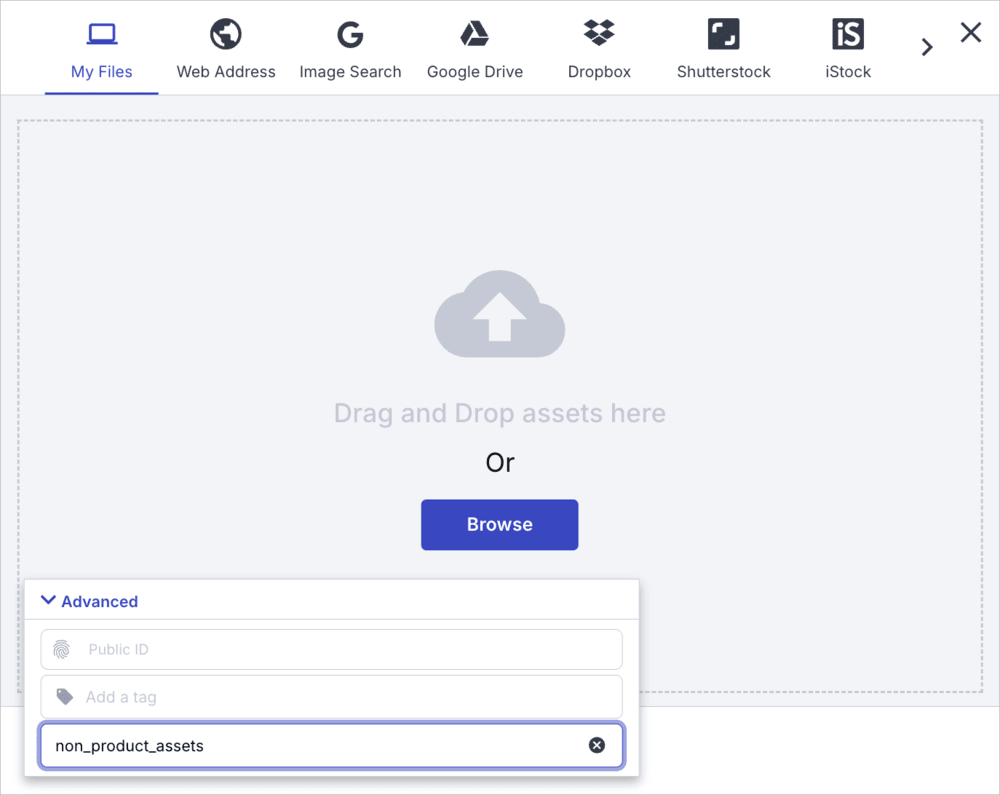
Default upload preset: You can set up Media Library Upload Preset Defaults for your images and videos. Select an upload preset that will apply to all uploads performed from the Media Library, whether the upload is done by dragging and dropping into the Media Library or via the Upload Widget by clicking the Upload button.
Upload preset selection: For flexibility in selecting upload presets, you can click Upload to launch the Upload Widget, then select an Upload Preset in the Advanced section and select the appropriate preset from the Upload Preset drop-down.
- Require metadata on upload: In the Upload page of the Preferences, select Always for the Request metadata on upload. When that setting is enabled, Cloudinary prompts filling in metadata field values before finalizing the upload.
Creative approval
Ensure brand consistency and quality control by using a structured approval process for non-product assets before distribution. Cloudinary's creative approval workflow streamlines proofing, collaboration, and final approval.
Cloudinary's approval process consists of:
Approval flows: Configurable multi-step workflows that define the review stages assets must pass through before approval.
Proofs: A collection of assets assigned to an approval flow for structured review and approval.
To enforce approvals, create a proof, apply an approval flow, and iterate on assets until final approval.
Key benefits
Streamlined approvals: Assign specific reviewers and enforce stage-based approval sequences.
Integrated editing and retouching: Apply transformations and enhancements during the approval process.
Structured proofing: Ensure thorough review before distribution.
Enterprise plans:
- Creative approval is a premium offering for our Assets product. Availability depends on your account setup and incurs an additional cost. If creative approval is not yet enabled for your account and you'd like to enable it, please contact your Customer Success Manager.
Free plan:
- This feature is unavailable on the Assets Free plan. For more options and information, contact us.
For more information on how to create and manage creative approval, see Creative approval flows and Proofs.
Customize and optimize on delivery
Create named transformations programmatically or using the Transformation Builder to optimize, resize assets, and apply overlays or effects. We recommend using named transformations over direct transformations as they shorten URLs for better SEO, are easy to reuse, and are simpler to apply when given meaningful names.
After you create the named transformation, you can:
-
Apply it directly to transform an asset. For example, the following example applies the
billboard_adnamed transformation to therestaurant_bannerimage:
Associate them with components in your CSM, so that no matter which image or video content editors select for that area of the website, those visuals get handled according to design requirements.
- If a transformation is short and not going to be reused, you can apply it directly to the asset instead of creating a named transformation.
- You can use variables in the transformation, whether you apply them directly or as named transformations. For example, if you want to localize text overlays or switch out generative AI prompts for specifying background requests or objects for removal. For more information, see the Transformation reference and User-defined variables and arithmetic image transformations.
For more information about creating named transformations to customize assets on delivery, see Customize and optimize on delivery.
Deliver assets to websites
When delivering assets from Cloudinary, your approach depends on whether you’re using an integrated CMS, a custom CMS integration, or a standalone front-end. Each scenario has different methods for inserting and optimizing assets while ensuring a seamless content workflow.
The table below outlines the key differences between these three approaches and how Cloudinary fits into each:
| Scenario | How to Use Cloudinary | Best for |
|---|---|---|
| Delivering assets through an integrated CMS | The CMS has a built-in Cloudinary integration, allowing users to browse, search, and insert assets directly from the CMS interface via the Media Library Widget. | Content editors using CMS platforms like WordPress, Contentful, or Shopify. For a full listing, see Integrations. |
| Building a custom CMS integration for asset delivery | You need to embed the Media Library Widget in your CMS to provide Cloudinary's asset management features without switching platforms. | Teams using a CMS that doesn’t have a native Cloudinary integration. |
| Delivering assets to a front-end without a Cloudinary integration | Retrieve asset programmatically using Cloudinary’s APIs and deliver them via dynamic URLs with transformations. | Developers building static sites, SPAs, custom applications, or headless front ends. |
In the following sections, we’ll walk through how to delivery assets with Cloudinary for each of these methods.
Delivering assets through an integrated CMS
Once you've set up the transformations for optimization and personalization for the various types of content, the content editors handle asset insertion within the CMS.
Insert a personalized asset
If your CMS integrates with Cloudinary, you can access the Media Library directly from your CMS interface, making it easy to insert assets into website content.
- When adding an image or video to your CMS, select the Cloudinary Media Library to browse available assets.
- Select from the search methods available in the Advanced Search drop-down to find the asset you want to generate variations for.
- Double click the asset you want to insert to open the manage page.
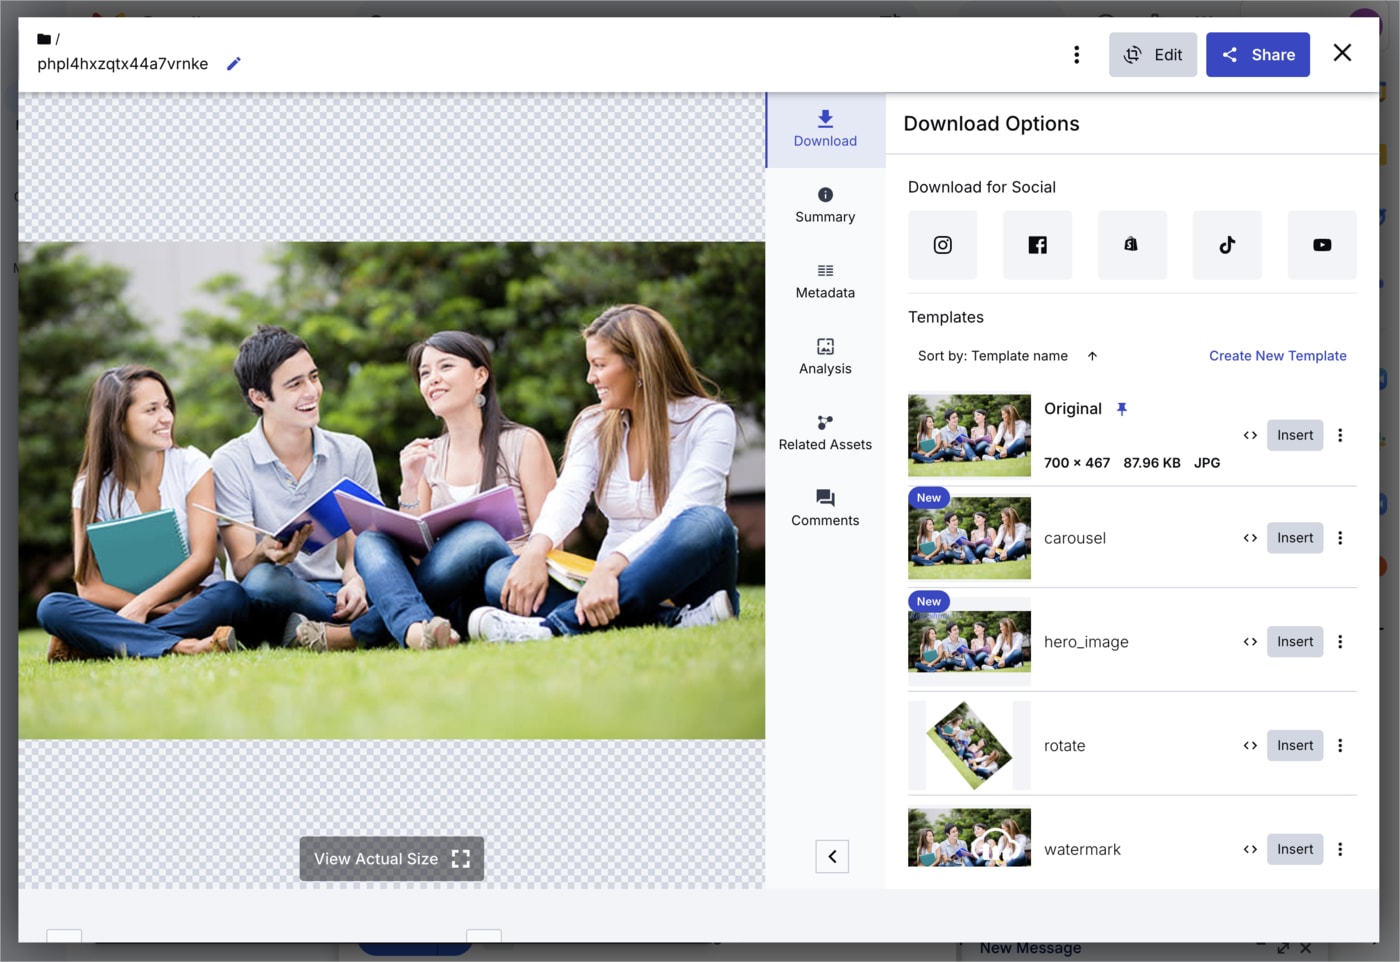
- Find the template you want to use for delivery and click Insert.NoteFor a named transformations to be available as templates in the Media Library, you need to enable it as described in Creating named transformations using the Transformation Builder.
Building a custom CMS integration for asset delivery
If your CMS doesn’t have a built-in Cloudinary integration, you can embed the Media Library Widget to access Cloudinary's Media Library directly from your CMS interface. This allows seamless asset management without switching between platforms.
To integrate Cloudinary into your tech stack, embed the Media Library Widget within your CMS.
Example implementation
The following code sandbox demonstrates how to integrate the Media Library Widget in HTML without using an iframe:
This code is also available in GitHub.
Once this integration is complete, follow the instructions in Delivering assets through an integrated CMS to insert your assets.
Delivering assets to a front-end without a Cloudinary integration
If you use a front-end that's not integrated with Cloudinary, you can use programmatically integrate Cloudinary functionalities using one of our back-end SDKs.
Step 1: Find the assets
-
Search API method: Query assets using a Lucene-like expression syntax for precise filtering and retrieval.
Example: Find images tagged with 'hero_image', uploaded within the last day, and exceeding 1 MB in size. In the response, sort the results by
public_idin descending order, and limit the returned results to 30 assets: -
The resources endpoint of the Admin API: Retrieve the asset's secure delivery URL using the asset's public ID.
-
Admin API visual search method: Locate images based on visual similarity rather than text-based metadata.
Example: Execute a visual search for 'footwear':
-
Here's a sample response containing some of the returned fields:
Step 2: Customize and deliver
Once you've selected the asset to fit into the component, apply the named transformation to it.
-
Use an SDK helper method to generate the HTML image tag that includes the delivery URL for the
docs/winter_fashionimage with thedark_text_overlaynamed transformation applied:
Generates the image tag:
<img src="https://res.cloudinary.com/demo/image/upload/t_dark_text_overlay/docs/winter_fashion.jpg"> Use the generated image tag in your code.
-
To make the image responsive, create named transformations for mobile and tablets, as well and use
srcsetin your HTML structure.
Other delivery channels
Besides delivering non-product images on your website, you can also deliver to the following channels:
Social media: Optimize images for different platform size and format requirements.
Third-party stakeholders: Ensure compliance with background color or file format constraints and protect your assets by watermarking.
Email campaigns: Maintain quality within file size and resolution limitations.
Market places: Adhere to specific format, background, metadata, and naming rules.
For more information, see Multi-channed content delivery.
 Ask AI
