EasyFlows
Last updated: Feb-17-2026
Overview
You can build EasyFlows using an easy-to-use no-code, natural language interface. These flows give you direct control over your media management and enable you to work faster and more efficiently by easily connecting and syncing to the tasks and processes you rely on every day. You can create media management workflows to implement standardized branding, asset expiration, auto-tagging, and more.
An EasyFlow consists of a set of trigger-actions that you connect together, enabling you to create step-by-step actions for execution. Each flow performs a specific function. By combining triggers with actions, you can develop a customized application to address your media use case effectively.
Create a new EasyFlow
From the Home page, you can select one of the given flow starting triggers, or you can create your own flow from scratch by clicking New EasyFlow.
Select a trigger
The first step consists of selecting when the automation should run. Once you select a generalized trigger, you can then add one or more conditions to narrow down the specific criteria for when the trigger will activate. For example, if creating an automation that triggers when a file is uploaded, you can add a condition that it only applies to assets that are videos. You can add multiple conditions by clicking the + and icon to create another condition.
Select actions
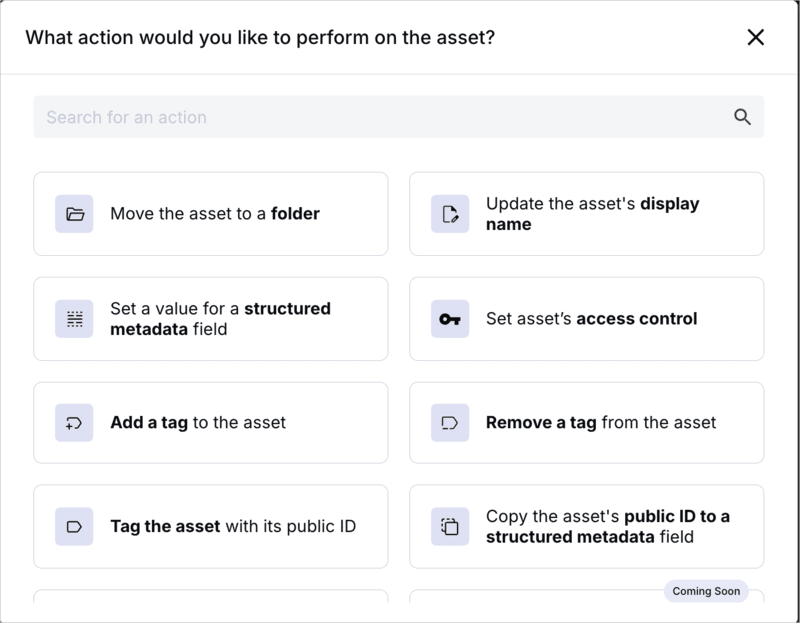
Once you've set your trigger, click the + Add an action block underneath the trigger block to add an action from the available options on the form that pops up. Depending on the action you select, you may need to further configure the action with the presented options. For example, if you select to move the asset to another folder, you need to select which folder to move it to.
You can add multiple actions by clicking the + Add an action block underneath the last action block.
Once you've finished adding actions, remember to click the Save button at the top-right.
Enable and disable EasyFlows
In the Flows page you'll see an indication of which of your flows are enabled or disabled under the Status column.
To enable a flow, open the flow and click the toggle at the top right of the page:
Use the same toggle to disable a flow.
Use cases
Here are some example flows that might inspire you as to what you can configure for your workflows:
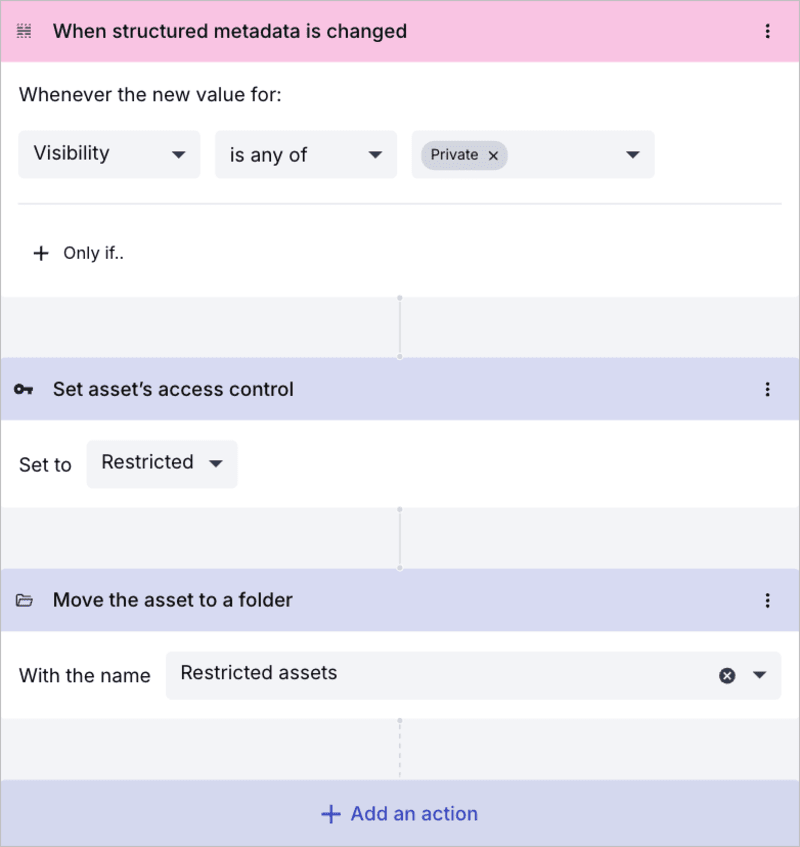
- Restrict access control when the Visibility field in an asset's structured metadata is set to Private:
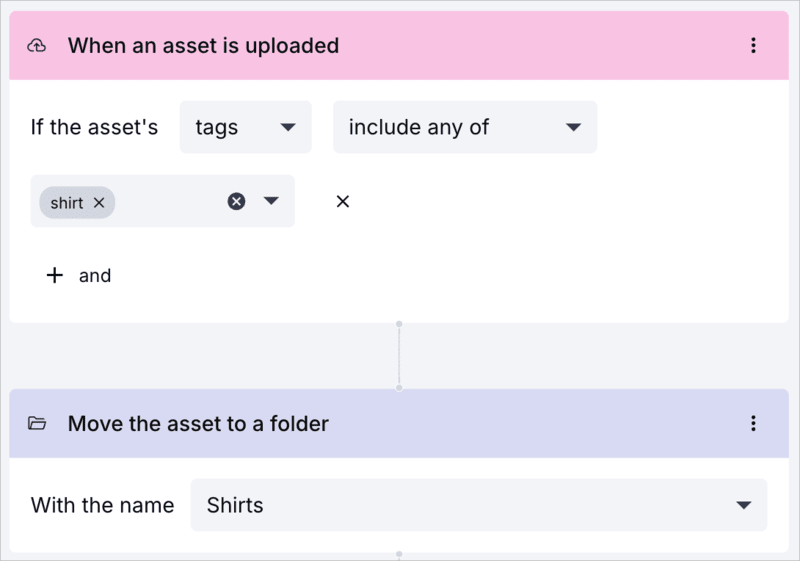
- Move all images tagged with shirt to the Shirts folder:
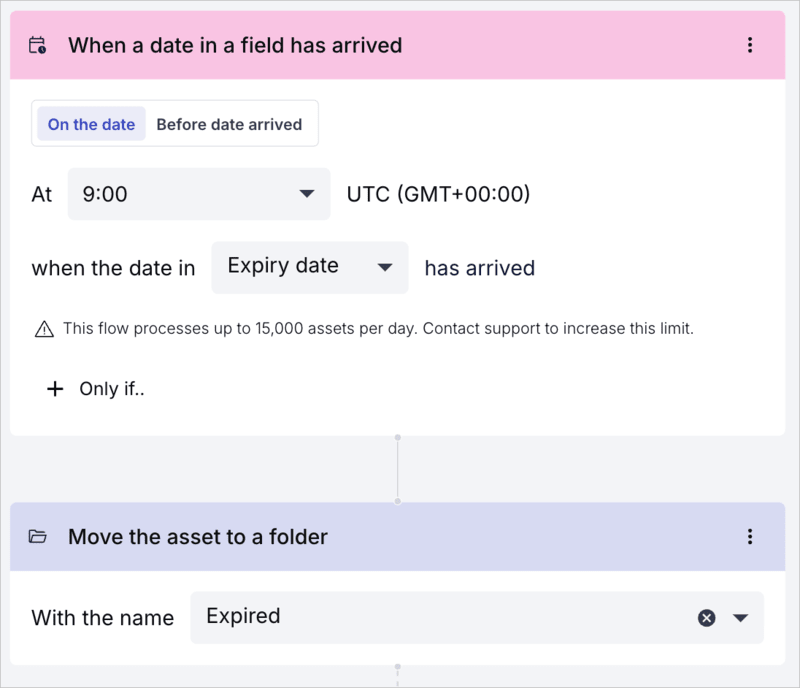
- Check for assets that have reached their expiration date and move them to an expiration folder:
 Ask AI


