Image effects and enhancements
Last updated: Feb-20-2026
Cloudinary's visual effects and enhancements are a great way to easily change the way your images look within your site or application. For example, you can change the shape of your images, blur and pixelate them, apply quality improvements, make color adjustments, change the look and feel with fun effects, apply filters, and much more. You can also apply multiple effects to an image by applying each effect as a separate chained transformation.
Some transformations use fairly simple syntax, whereas others require more explanation - examples of these types of transformations are shown in the advanced syntax examples.
Besides the examples on this page, there are many more effects available and you can find a full list of them, including examples, by checking out our URL transformation reference.
Here are some popular options for using effects and artistic enhancements. Click each image to see the URL parameters applied in each case:
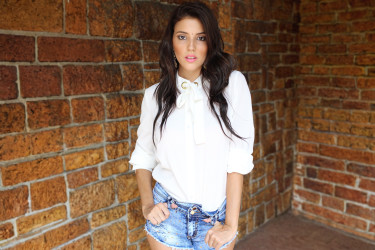
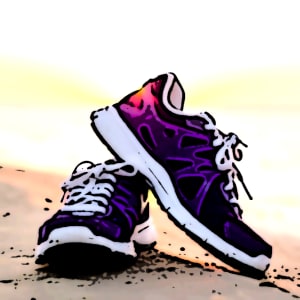 Cartoonify
 your images
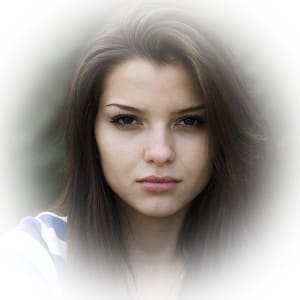 Add a vignette to
your images
 Generate low quality
image placeholders
 Add image
 outlines
Simple syntax examples
Here are some examples of effects and enhancements that use a simple transformation syntax. Click the links to see the full syntax for each transformation in the URL transformation reference.
Artistic filters
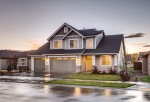
Apply an artistic filter using the art effect, specifying one of the filters shown.
Available filters
Filters:
 al_dente
 athena
 audrey
 aurora
 daguerre
 eucalyptus
 fes
fes
 frost
frost
 hairspray
 hokusai
 incognito
 linen
linen
 peacock
 primavera
 quartz
 red_rock
 refresh
 sizzle
 sonnet
 ukulele
 zorro
zorro
See full syntax: e_art in the Transformation Reference.
Cartoonify
Make an image look more like a cartoon using the cartoonify effect.
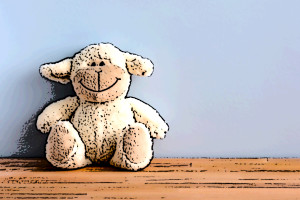
See full syntax: e_cartoonify in the Transformation Reference.
Opacity
Adjust the opacity of an image using the opacity transformation (o in URLs). Specify a value between 0 and 100, representing the percentage of transparency, where 100 means completely opaque and 0 is completely transparent. In this case the image is delivered with 30% opacity:
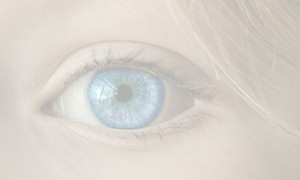
See full syntax: o (opacity) in the Transformation Reference.
Pixelate
Pixelate an image using the pixelate effect.
See full syntax: e_pixelate in the Transformation Reference.
Sepia
Change the colors of an image to shades of sepia using the sepia effect.
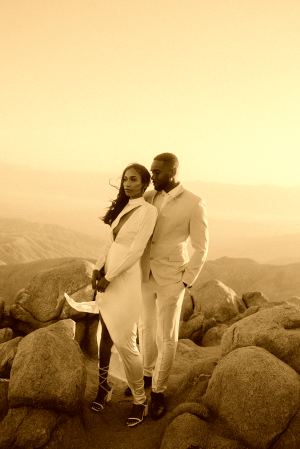
See full syntax: e_sepia in the Transformation Reference.
Vignette
Fade the edges of images into the background using the vignette effect.
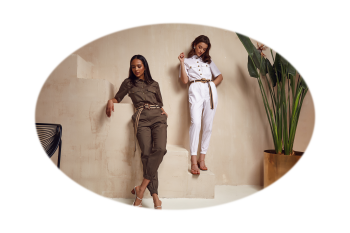
See full syntax: e_vignette in the Transformation Reference.
Image enhancement options
Cloudinary offers various way to enhance your images. This table explains the difference between them, and below you can see examples of each.
| Transformation | Purpose | Key features | Main use cases | How it works |
|---|---|---|---|---|
| Generative restore (e_gen_restore) |
Excels in revitalizing images affected by digital manipulation and compression. | ✅ Compression Artifact Removal: Effectively eliminates JPEG blockiness and overshoot due to compression. ✅ Noise Reduction: Smoothens grainy images for a cleaner visual. ✅ Image Sharpening: Boosts clarity and detail in blurred images. |
✅ Over-compressed images. ✅ User-generated content. ✅ Restoring vintage photos. |
Utilizes generative AI to recover and refine lost image details. |
| Upscale (e_upscale) |
Increases the resolution of an image using AI, with special attention to faces. | ✅ Enhances clarity and detail while upscaling. ✅ Specialized face detection and enhancement. ✅ Preserves the natural look of faces. |
✅ Improving the quality of low resolution images, especially those with human faces. | Analyzes the image, with additional logic applied to faces, to predict necessary pixels. |
| Enhance (e_enhance) |
Enhances the overall appeal of images without altering content using AI. | ✅ Improves exposure, color balance, and white balance. ✅ Enhances the general look of an image. |
✅ Any images requiring a quality boost. ✅ User-generated content. |
An AI model analyzes and applies various operators to enhance the image. |
| Improve (e_improve) |
Automatically improves images by adjusting colors, contrast, and lighting. | ✅ Enhances overall visual quality. ✅ Adjusts colors, contrast, and lighting. |
✅ Enhancing user-generated content. ✅ Any images requiring a quality boost. |
Applies an automatic enhancement filter to the image. |
| Auto enhance (e_auto_enhance) |
Automatically enhances overall visual quality without you having to choose the enhancement option to apply. | ✅ Intelligently applies the techniques described above. | ✅ Enhancing user-generated content. ✅ Improving the quality of low resolution images. ✅ Any images requiring a quality boost. |
Uses AI to determine the best way to improve the image quality. If the image is already high quality, only minor adjustments are made. Otherwise, more aggressive enhancements are applied. |
- Watch a video tutorial showing how to apply them in a React app.
- Take a look at the profile picture sample project, which demonstrates applying these options following quality analysis in a Next.js app.
Generative restore
This example shows how the generative restore effect can enhance the details of a highly compressed image:
Try it out: Generative restore.
Upscale
This example shows how the upscale effect can preserve the details of a low resolution image when upscaling:
Try it out: Upscale.
Enhance
This example shows how the enhance effect can improve the lighting of an under exposed image:
Try it out: AI image enhancer.
Improve
This example shows how the improve effect can adjust the overall colors and contrast in an image:
See full syntax: e_improve in the Transformation Reference.
Auto enhance
This example shows how the auto_enhance effect can improve image quality by automatically applying several enhancement techniques, such as removing noise and sharpening image details:
- There is a special transformation count for the auto enhance effect.
- The auto enhance effect is not supported for fetched images.
See full syntax: e_auto_enhance in the Transformation Reference.
Advanced syntax examples
In general, most of the visual effects and enhancements can take an additional option to tailor the effect to your liking. For some, however, you may need to provide additional syntax and use some more complex concepts. It is important to understand how these advanced transformations work when attempting to use them. The sections below outline some of the more advanced transformations and help you to use these with your own assets.
Remember, there are many more transformations available and you can find a full list of them, including examples, by checking out our URL transformation reference.
3-color-dimension LUTs (3D LUTs)
3-color-dimension lookup tables (known as 3D LUTs) map one color space to another. You can use them to adjust colors, contrast, and/or saturation, so that you can correct contrast, fix a camera's inability to see a particular color shade, or give a final finished look or a particular style to your image.
After uploading a .3dl or .cube file as a raw file, you can apply it to any image using the lut property of the layer parameter ( l_lut: in URLs), followed by the LUT file name, including the file extension (.3dl or .cube).
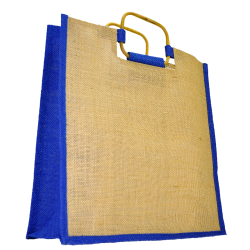
Below you can see the docs/textured_handbag.jpg image file in its original color, compared to the image with different LUT files applied. Below these is the code for applying one of the LUTs.
See full syntax: l_lut in the Transformation Reference.
Background color
Use the background parameter (b in URLs) to set the background color of the image. The image background is visible when padding is added with one of the padding crop modes, when rounding corners, when adding overlays, and with semi-transparent PNGs and GIFs.
An opaque color can be set as an RGB hex triplet (e.g., b_rgb:3e2222), a 3-digit RGB hex (e.g., b_rgb:777) or a named color (e.g., b_green). Cloudinary's client libraries also support a # shortcut for RGB (e.g., setting background to #3e2222 which is then translated to rgb:3e2222).
For example, the uploaded image named mountain_scene padded to a width and height of 300 pixels with a light blue background:
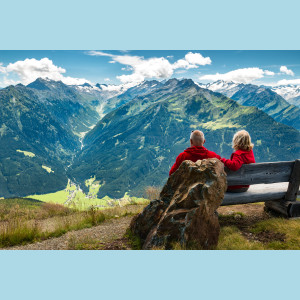
You can also use a 4-digit or 8-digit RGBA hex quadruplet for the background color, where the 4th hex value represents the alpha (opacity) value (e.g., co_rgb:3e222240 results in 25% opacity).
predominant_contrast. This selects the strongest contrasting color to the predominant color while taking all pixels in the image into account. For example, l_text:Arial_30:foo,b_predominant_contrast.See full syntax: b (background) in the Transformation Reference.
Try it out: Background.
Content-aware padding
You can automatically set the background color to the most prominent color in the image when applying one of the padding crop modes (pad, lpad, mpad or fill_pad) by setting the background parameter to auto (b_auto in URLs). The parameter can also accept an additional value as follows:
-
b_auto:border- selects the predominant color while taking only the image border pixels into account. This is the default option forb_auto. -
b_auto:predominant- selects the predominant color while taking all pixels in the image into account. -
b_auto:border_contrast- selects the strongest contrasting color to the predominant color while taking only the image border pixels into account. -
b_auto:predominant_contrast- selects the strongest contrasting color to the predominant color while taking all pixels in the image into account.
For example, padding the purple-suit-hanky-tablet image to a width and height of 300 pixels, and with the background color set to the predominant color in the image:
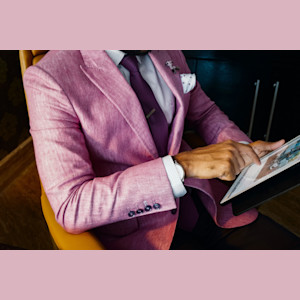
See full syntax: b_auto in the Transformation Reference.
Try it out: Background.
Gradient fade
You can also apply a padding gradient fade effect with the predominant colors in the image by adjusting the value of the b_auto parameter as follows:
b_auto:[gradient_type]:[number]:[direction]
Where:
-
gradient_type- one of the following values:-
predominant_gradient- base the gradient fade effect on the predominant colors in the image -
predominant_gradient_contrast- base the effect on the colors that contrast the predominant colors in the image -
border_gradient- base the gradient fade effect on the predominant colors in the border pixels of the image -
border_gradient_contrast- base the effect on the colors that contrast the predominant colors in the border pixels of the image
-
-
number- the number of predominant colors to select. Possible values:2or4. Default:2 -
direction- if 2 colors are selected, this parameter specifies the direction to blend the 2 colors together (if 4 colors are selected each gets interpolated between the four corners). Possible values:horizontal,vertical,diagonal_desc, anddiagonal_asc. Default:horizontal
Custom color palette
Add a custom palette to limit the selected color to one of the colors in the palette that you provide. Once the predominant color has been calculated then the closest color from the available palette is selected. Append a colon and then the value palette followed by a list of colors, each separated by an underscore. For example, to automatically add padding and a palette that limits the possible choices to green, red and blue: b_auto:palette_red_green_blue
The palette can be used in combination with any of the various values for b_auto, and the same color in the palette can be selected more than once when requesting multiple predominant colors. For example, padding to a width and height of 300 pixels, with a 4 color gradient fade in the auto colored padding, and limiting the possible colors to red, green, blue, and orange:

Gradient fade into padding
Fade the image into the added padding by adding the gradient_fade effect with a value of symmetric_pad (e_gradient_fade:symmetric_pad in URLs). The padding blends into the edge of the image with a strength indicated by an additional value, separated by a colon (Range: 0 to 100, Default: 20). Values for x and y can also be specified as a percentage (range: 0.0 to 1.0), or in pixels (integer values) to indicate how far into the image to apply the gradient effect. By default, the gradient is applied 30% into the image (x_0.3).
For example, padding the string image to a width and height of 300 pixels, with the background color set to the predominant color, and with a gradient fade effect, between the added padding and 50% into the image.

See full syntax: e_gradient_fade in the Transformation Reference.
Try it out: Background.
Borders
Add a solid border around images with the border parameter (bo in URLs). The parameter accepts a value with a CSS-like format: width_style_color (e.g., 3px_solid_black).
An opaque color can be set as an RGB hex triplet (e.g., rgb:3e2222), a 3-digit RGB hex (e.g., rgb:777) or a named color (e.g., green).
You can also use a 4-digit or 8-digit RGBA hex quadruplet for the color, where the 4th hex value represents the alpha (opacity) value (e.g., co_rgb:3e222240 results in 25% opacity).
Additionally, Cloudinary's client libraries also support a # shortcut for RGB (e.g., setting color to #3e2222 which is then translated to rgb:3e2222), and when using Cloudinary's client libraries, you can optionally set the border values programmatically instead of as a single string (e.g., border: { width: 4, color: 'black' }).
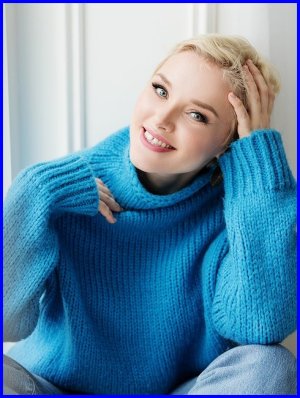
For example, the uploaded JPG image named blue_sweater delivered with a 5 pixel blue border:
Borders are also useful for adding to overlays to clearly define the overlaying image, and also automatically adapt to any rounded corner transformations. For example, the base image given rounded corners with a 10 pixel grey border, and an overlay of the image of sale resized to a 100x100 thumbnail added to the northeast corner:

predominant_contrast. This selects the strongest contrasting color to the predominant color while taking all pixels in the image into account. For example, l_text:Arial_30:foo,bo_3px_solid_predominant_contrast
See full syntax: bo (border) in the Transformation Reference.
Color blind effects
Cloudinary has a number of features that can help you to choose the best images as well as to transform problematic images to ones that are more accessible to color blind people. You can use Cloudinary to:
- Simulate how an image would look to people with different color blind conditions.
- Assist people with color blind conditions to help differentiate problematic colors.
- Analyze images to provide color blind accessibility scores and information on which colors are the hardest to differentiate.
Simulate color blind conditions
You can simulate a number of different color blind conditions using the simulate_colorblind effect. For full syntax and supported conditions, see the e_simulate_colorblind parameter in the Transformation URL API Reference.
Simulate the way an image would appear to someone with deuteranopia (most common form of) color blindness:
See full syntax: e_simulate_colorblind in the Transformation Reference.
Assist people with color blind conditions
Use the assist_colorblind effect (e_assist_colorblind in URLs) to help people with color blind conditions to differentiate between colors.
You can add stripes in different directions and thicknesses to different colors, making them easier to differentiate, for example:
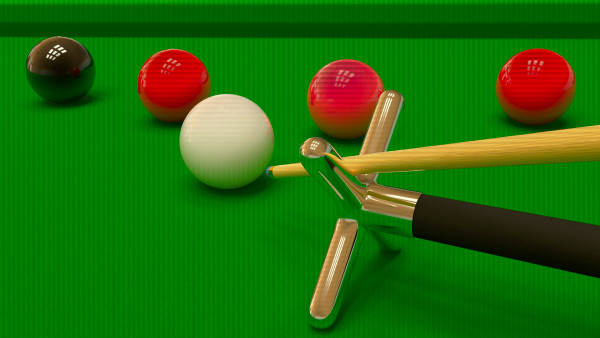
A color blind person would see the stripes like this:
Alternatively, you can use color shifts to make colors easier to distinguish by specifying the xray assist type, for example:

See full syntax: e_assist_colorblind in the Transformation Reference.
Displacement maps
You can displace pixels in a source image based on the intensity of pixels in a displacement map image using the e_displace effect in conjunction with a displacement map image specified as an overlay. This can be useful to create interesting effects in a select area of an image or to warp the entire image to fit a needed design or texture. For example, to make an image wrap around a coffee cup or appear to be printed on a textured canvas.
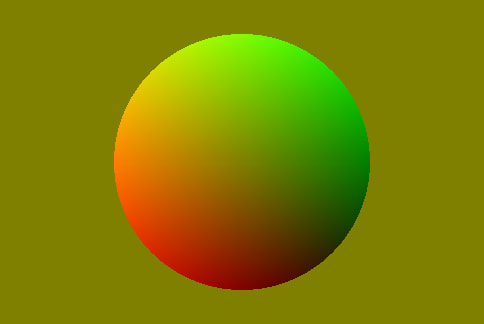
The displace effect (e_displace in URLs) algorithm displaces the pixels in an image according to the color channels of the pixels in another specified image (a gradient map specified with the overlay parameter). The displace effect is added in the same component as the layer_apply flag. The red channel controls horizontal displacement, green controls vertical displacement, and the blue channel is ignored.
The final displacement of each pixel in the base image is determined by a combination of the red and green color channels, together with the configured x and/or y parameters:
| x | Red Channel | Pixel Displacement |
|---|---|---|
| Positive | 0 - 127 | Right |
| Positive | 128 - 255 | Left |
| Negative | 0 - 127 | Left |
| Negative | 128 - 255 | Right |
| y | Green Channel | Pixel Displacement |
|---|---|---|
| Positive | 0 - 127 | Down |
| Positive | 128 - 255 | Up |
| Negative | 0 - 127 | Up |
| Negative | 128 - 255 | Down |
The displacement of pixels is proportional to the channel values, with the extreme values giving the most displacement, and values closer to 128 giving the least displacement.
The displacement formulae are:
x displacement = (127-red channel)*(x parameter)/127y displacement = (127-green channel)*(y parameter)/127
Positive displacement is right and down, and negative displacement is up and left.
For example, specifying an x value of 500, at red channel values of 0 and 255, the base image pixels are displaced by 500 pixels horizontally, whereas at 114 and 141 (127 - 10% and 128 + 10%) the base image pixels are displaced by 50 pixels horizontally.
| x | Red Channel | Pixel Displacement |
|---|---|---|
| 500 | 0 | 500 pixels right |
| 500 | 114 | 50 pixels right |
| 500 | 141 | 50 pixels left |
| 500 | 255 | 500 pixels left |
x and y must be between -999 and 999.This is a standard displacement map algorithm used by popular image editing tools, so you can upload existing displacement maps found on the internet or created by your graphic artists to your product environment and specify them as the overlay asset, enabling you to dynamically apply the displacement effect on other images in your product environment or those uploaded by your end users.
Several sample use case of this layer-based effect are shown in the sections below.
See full syntax: e_displace in the Transformation Reference.
Use case: Warp an image to fit a 3-dimensional product
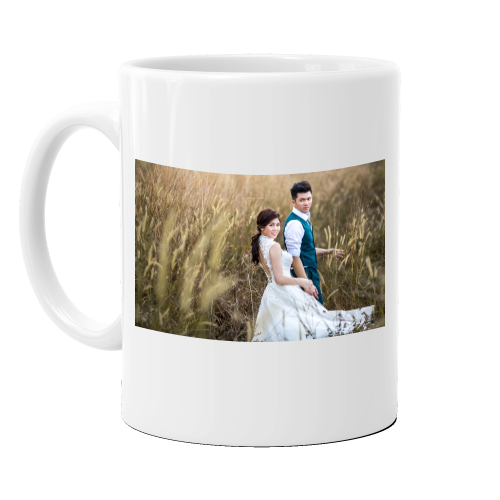
Use a displacement map to warp the perspective of an overlay image for final placement as an overlay on a mug:
Using this overlay transformation for placement on a mug:
Use case: Create a zoom effect
To displace the sample image by using a displacement map, creating a zoom effect:
You could take this a step further by applying this displacement along with another overlay component that adds a magnifying glass. In this example, the same displacement map as above is used on a different base image and offset to a different location.
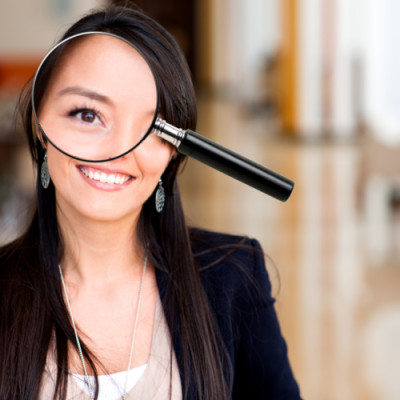
Use case: Apply a texture to your image
Interactive texture demo
For more details on displacement mapping with the displace effect, see the article on Displacement Maps for Easy Image Transformations with Cloudinary. The article includes a variety of examples, as well as an interactive demo.
Distort
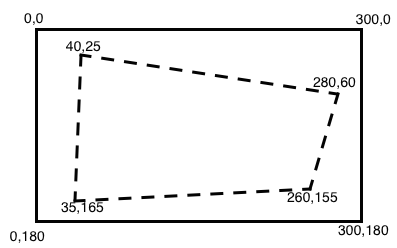
Using the distort effect, you can change the shape of an image, distorting its dimensions and the image itself. It works in one of two modes: you can either change the positioning of each of the corners, or you can warp the image into an arc.
To change the positioning of each of the corners, it is helpful to have in mind a picture like the one below. The solid rectangle shows the coordinates of the corners of the original image. The intended result of the distortion is represented by the dashed shape. The new corner coordinates are specified in the distort effect as x,y pairs, clockwise from top-left. For example:
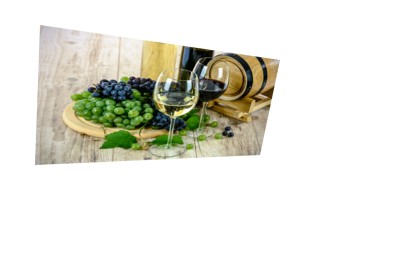
For more details on perspective warping with the distort effect, see the article on How to dynamically distort images to fit your graphic design.
To curve an image, you can specify arc and the number of degrees in the distort effect, instead of the corner coordinates. If you specify a positive value for the number of degrees, the image is curved upwards, like a frown. Negative values curve the image downwards, like a smile.
You can distort text in the same way as images, for example, to add curved text to the frisbee image (e_distort:arc:-120):

See full syntax: e_distort in the Transformation Reference.
Text distortion demo
The CLOUDINARY text in the following demo was created using the text method of the Upload API. Try distorting it by entering different values for the corner coordinates.
Select one of the options or manually change the corner coordinates then generate the new distorted text.
,
,
,
,
Generative AI effects
Cloudinary has a number of transformations that make use of generative AI:
- Generative background replace: Generate an alternative background for your images
- Generative fill: Naturally extend your images to fit new dimensions
- Generative recolor: Recolor aspects of your images
- Generative remove: Seamlessly remove parts of your images
- Generative replace: Replace items in your images
- Generative restore: Revitalize degraded images
You can use natural language in most of these transformations as prompts to guide the generation process.
- See Generative AI transformations for details.
- See AI in Action for more uses of AI within Cloudinary.
Layer blending and masking
Effects: screen, multiply, overlay, mask, anti_removal
These effects are used for blending an overlay with an image.
For example, to make each pixel of the boy_tree image brighter according to the pixel value of the overlaid cloudinary_icon_blue image:
See full syntax: e_screen, e_multiply, e_overlay, e_mask, e_anti_removal in the Transformation Reference.
Outline
The outline effect (e_outline in URLs) enables you to add an outline to your transparent images. The parameter can also be passed additional values as follows:
-
mode - how to apply the outline effect which can be one of the following values:
inner,inner_fill,outer,fill. Default value:innerandouter. -
width - the first integer supplied applies to the thickness of the outline in pixels. Default value:
5. Range: 1 - 100 -
blur - the second integer supplied applies to the level of blur of the outline. Default value:
0. Range: 0 - 2000
Use the color parameter (co in URLs) to define a new color for the outline (the default is black). The color can be specified as an RGB hex triplet (e.g., rgb:3e2222), a 3-digit RGB hex (e.g., rgb:777) or a named color (e.g., green). For example, to add an orange outline:

You can also add a multi-colored outline by creating successive outline effect components. For example:
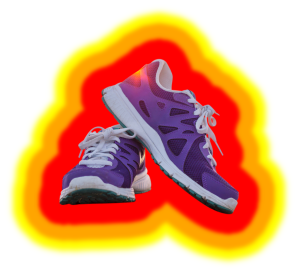
See full syntax: e_outline in the Transformation Reference.
Replace color
You can replace a color in an image using the replace_color effect. Unless you specify otherwise, the most prominent high-saturation color in an image is selected as the color to change. By default, a tolerance of 50 is applied to this color, representing a radius in the LAB color space, so that similar shades are also replaced, achieving a more natural effect.
For example, without specifying a color to change, the most prominent color is changed to the specified maroon:
Adding a tolerance value of 10 (e_replace_color:maroon:10) prevents the handle also changing color:
Specifying blue as the color to replace (to a tolerance of 80 from the color #2b38aa) replaces the blue sides with parallel shades of maroon, taking into account shadows, lighting, etc:
See full syntax: e_replace_color in the Transformation Reference.
Rotation
Rotate an image by any arbitrary angle in degrees with the angle parameter (a in URLs). A positive integer value rotates the image clockwise, and a negative integer value rotates the image counterclockwise. If the angle is not a multiple of 90 then a rectangular transparent bounding box is added containing the rotated image and empty space. In these cases, it's recommended to deliver the image in a transparent format if the background is not white.
You can also take advantage of special angle-rotation modes, such as a_hflip / a_vflip to horizontally or vertically mirror flip an image, a_auto_right / a_auto_left to rotate an image 90 degrees only if the requested aspect ratio is different than the original image's aspect ratio, or a_ignore to prevent Cloudinary from automatically rotating images based on the images's stored EXIF details.
For details on these rotation modes, see the Transformation Reference.
Rotation examples
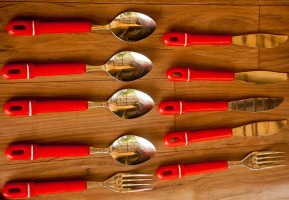
The following images apply various rotation options to the cutlery image:
- Rotate the image by 90 degrees:

- Rotate the image by -20 degrees (automatically adds a transparent bounding box):

- Vertically mirror flip the image and rotate by 45 degrees (automatically adds a transparent bounding box):

- Crop the image to a 200x200 circle, then rotate the image by 30 degrees (automatically adds a transparent bounding box) and finally trim the extra whitespace added:

See full syntax: a (angle) in the Transformation Reference.
Try it out: Rotate.
Rounding
Many website designs need images with rounded corners, while some websites require images with a complete circular or oval (ellipse) crop. Twitter, for example, uses rounded corners for its users' profile pictures.
Programmatically, rounded corners can be achieved using the original rectangular images combined with modern CSS properties or image masking overlays. However, it is sometimes useful to deliver images with rounded corners in the first place. This is particularly helpful when you want to embed images inside an email (most mail clients can't add CSS based rounded corners), a PDF or a mobile application. Delivering images with already rounded corners is also useful if you want to simplify your CSS and markup or when you need to support older browsers.
Transforming an image to a rounded version is done using the radius parameter (r in URLs). You can manually specify the amount to round various corners, or you can set it to automatically round to an exact ellipse or circle.
background transformation parameter. Keep in mind that the PNG format produces larger files than the JPEG format. For more information, see the article on PNG optimization - saving bandwidth on transparent PNGs with dynamic underlay.Manually setting rounding values
To manually control the rounding, use the radius parameter with between 1 and 4 values defining the rounding amount (in pixels, separated by colons), following the same concept as the border-radius CSS property. When specifying multiple values, keep a corner untouched by specifying '0'.
- One value: Symmetrical. All four corners are rounded equally according to the specified value.
- Two values: Opposites are symmetrical. The first value applies to the top-left and bottom-right corners. The second value applies to the top-right and bottom-left corners.
- Three values: One set of corners is symmetrical. The first value applies to the top-left. The second value applies to the top-right and bottom-left corners. The third value applies to the bottom-right.
- Four values: The rounding for each corner is specified separately, in clockwise order, starting with the top-left.
For example:
Automatically rounding to an ellipse or circle
Rather than specifying specific rounding values, you can automatically crop images to the shape of an ellipse (if the requested image size is a rectangle) or a circle (if the requested image size is a square). Simply pass max as the value of the radius parameter instead of numeric values.
The following example transforms an uploaded JPEG to a 250x150 PNG with maximum radius cropping, which generates the ellipse shape with a transparent background:

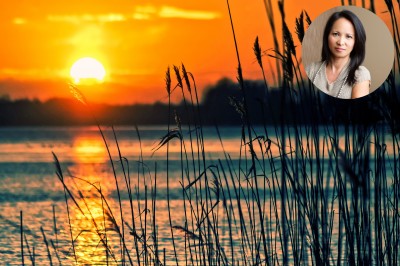
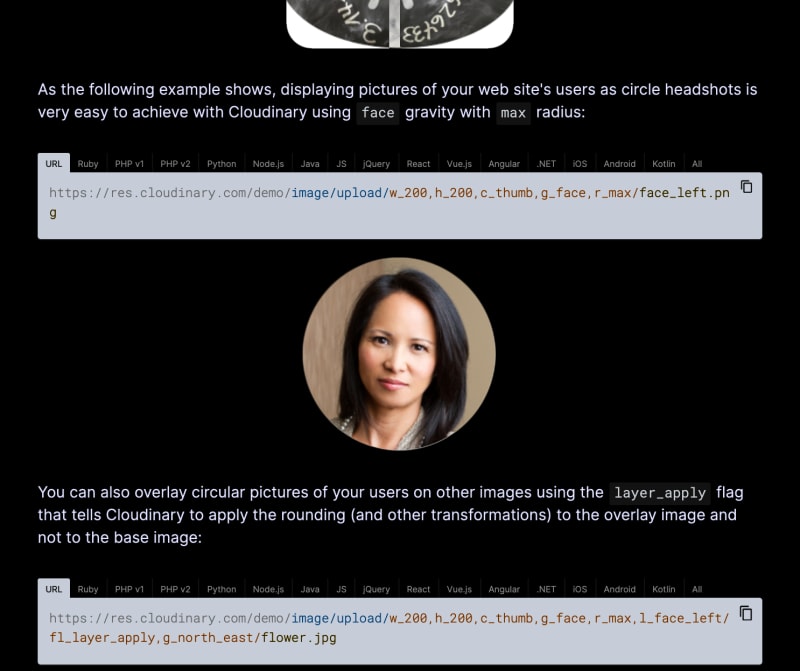
As the following example shows, displaying pictures of your web site's users as circle headshots is very easy to achieve with Cloudinary using face gravity with max radius:

You can also overlay circular pictures of your users on other images using the layer_apply flag that tells Cloudinary to apply the rounding (and other transformations) to the overlay image and not to the base image:
See full syntax: r (round corners) in the Transformation Reference.
Try it out: Round corners.
Shadow
There are two ways to add shadow to your images:
- Use the shadow effect to apply a shadow to the edge of the image.
- Use the dropshadow effect to apply a shadow to objects in the image.
Shadow effect
The shadow effect (e_shadow in URLs) applies a shadow to the edge of the image. You can use this effect to make it look like your image is hovering slightly above the page.
In this example, a dark blue shadow with medium blurring of its edges (co_rgb:483d8b,e_shadow:50) is added with an offset of 60 pixels to the top right of the photo (x_60,y_-60):

If your image has transparency, the shadow is added to the edge of the non-transparent part, for example, adding the same shadow to the lipstick in this image:
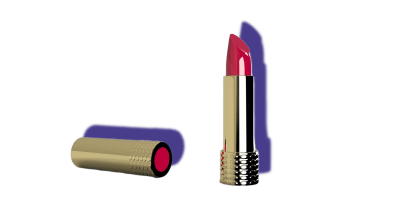
For a more realistic shadow, use the dropshadow effect.
See full syntax: e_shadow in the Transformation Reference.
Dropshadow effect
The dropshadow effect (e_dropshadow in URLs) uses AI to apply a realistic shadow to an object or objects in the image.
You can use this effect to apply consistent shadows across a set of product images, where background removal has been used.
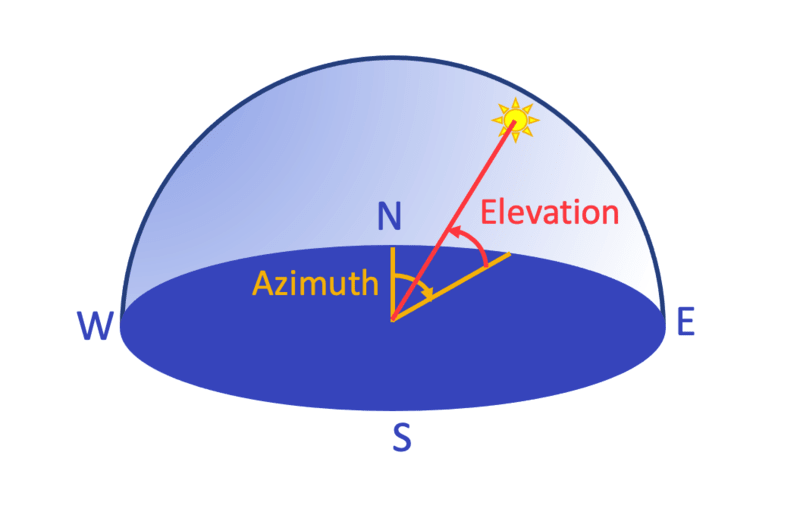
To create the shadow, specify the position of the light source, using azimuth and elevation as shown in this diagram, where north (0 / 360 degrees) is behind the object:
You can also specify a spread from 0 to 100, where the smaller the number, the closer the light source is to 'point' light, and larger numbers mean 'area' light.
The following example has a light source set up at an azimuth of 220 degrees, an elevation of 40 degrees above 'ground' and where the spread of the light source is 20% (e_dropshadow:azimuth_220;elevation_40;spread_20):
- Either:
- the original image must include transparency, for example where the background has already been removed and it has been stored in a format that supports transparency, such as PNG, or
- the
dropshadoweffect must be chained after the background_removal effect, for example:
- The dropshadow effect is not supported for animated images, fetched images or incoming transformations.
See background removal and drop shadow being applied to product images on the fly in a React app.
See full syntax: e_dropshadow in the Transformation Reference.
Try it out: Drop shadow.
Dropshadow effect demo
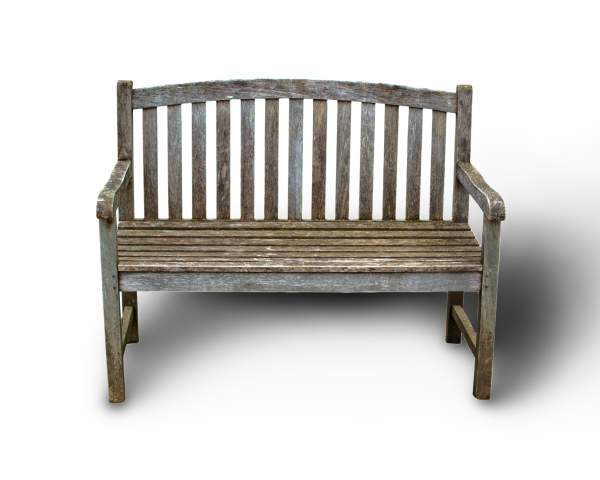
Try out the different dropshadow effect settings on an image of a bench.
Use the controls to set up the light source, then generate the shadow!
May take a few seconds to generate*
*It can take a few seconds to generate a new image on the fly if you've tried a combination of settings that hasn't been tried before. Once an image has been generated though, it's cached on the CDN, so future requests to the same transformation are much faster. You can learn more about that in our Service introduction.
Shape cutouts
You can use a layer image with an opaque shape to either remove that shape from the image below that layer, leaving the shape to be transparent (e_cut_out), or conversely, use it like a cookie-cutter, to keep only that shape in the base image, and remove the rest (fl_cutter).
You can also use AI to keep or remove certain parts of an image (e_extract).
Remove a shape
The following example uses the cut_out effect to cut a logo shape (the overlay image) out of a base ruler image. There's a notebook photo underlay behind the cutout ruler, such that you can see the notebook paper and lines through the logo cutout:

Keep a shape
The following example uses the cutter flag to trim an image of a water drop based on the shape of a text layer (l_text:Unkempt_250_bold:Water/fl_cutter,fl_layer_apply). The text overlay is defined with the desired font and size of the resulting delivered image:
.jpg)
Use AI to determine what to remove or keep in an image
You can use the e_extract transformation to specify what to remove or keep in the image using a natural language prompt.
For example, start with this image of a desk with picture frames:
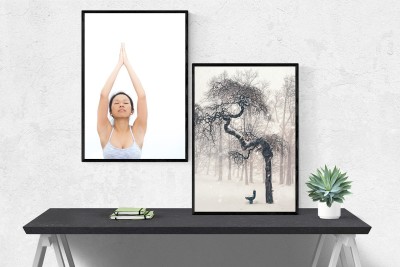
You can extract the picture of the tree (e_extract:prompt_the%20picture%20of%20the%20tree):

Everything but the picture of the tree is now considered background, so you can then generate a new background for this picture, let's say an art gallery (e_gen_background_replace:prompt_an%20art%20gallery):

Or, you can invert the result of the extract transformation (invert_true), leaving everything but the picture of the tree:

And then generate a new picture in that space (e_gen_background_replace:prompt_a%20sketch%20of%20a%20tree):

To use a pre-determined background, you can use the extract effect in a layer. In this example, the multiple parameter is used to extract all the cameras in the image, and overlay them on a colorful background.
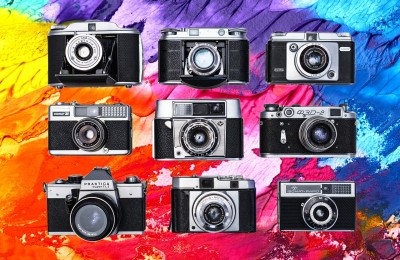
And this is the inverted result:

Using the extract effect in mask mode, you can achieve interesting results, for example, blend the mask overlay with the colorful image using e_overlay:

If your original image has transparency, you can keep the transparency in the output by using the preserve-alpha flag. For example, keep the transparent background when extracting the watch dial and inverting the result to keep only the strap:
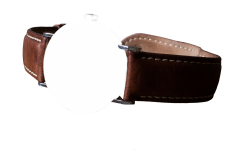
Then you can achieve an interesting effect by using the extract effect again to keep only the dial and making it semi-transparent (e_extract:prompt_$prompt/o_30), then layering the first image, saved to a variable ($bracelet_current), on top of that. You can use a variable for the prompt too so you can easily reuse it ($prompt_!the%20watch%20dial!):

- During processing, large images are downscaled to a maximum of 2048 x 2048 pixels, then upscaled back to their original size, which may affect quality.
- This transformation changes the image's visual appearance by adjusting only the alpha channel, which controls transparency. The underlying RGB channel data remains unchanged and fully preserved, even in areas that become fully transparent.
- When you specify more than one prompt, all the objects specified in each of the prompts will be extracted whether or not
multiple_trueis specified in the URL. - There is a special transformation count for the extract effect.
- The extract effect is not supported for animated images, fetched images or incoming transformations.
- User-defined variables cannot be used for the prompt when more than one prompt is specified.
- When Cloudinary is generating a derived version, you may get a 423 response returned until the version is ready. You can prepare derived versions in advance using an eager transformation.
- When Cloudinary is generating an incoming transformation, you may get a 420 response returned, with status
pendinguntil the asset is ready. - If you're using our Asia Pacific data center, you currently can't apply the extract effect.
See full syntax: e_extract in the Transformation Reference.
Try it out: Content extraction.
Theme
Use the theme effect to change the color theme of a screen capture, either to match or contrast with your own website. The effect applies an algorithm that intelligently adjusts the color of illustrations, such as backgrounds, designs, texts, and logos, while keeping photographic elements in their original colors. If needed, luma gets reversed (so if the original has dark text on a bright background, and the target background is dark, the text becomes bright).
In the example below, a screen capture with a predominantly light theme is converted to a dark theme by specifying black as the target background color:
See full syntax: e_theme in the Transformation Reference.
Tint
The tint:<options> effect enables you to blend your images with one or more colors and specify the blend strength. Advanced users can also equalize the image for increased contrast and specify the positioning of the gradient blend for each color.
By default,
e_tintapplies a red color at 60% blend strength.-
Specify the colors and blend strength amount in the format:
amountis a value from 0-100, where 0 keeps the original color and 100 blends the specified colors completely.The
colorcan be specified as an RGB hex triplet (e.g., rgb:3e2222), a 3-digit RGB hex (e.g., rgb:777) or a named color (e.g., green).For example:
-
To equalize the colors in your image before tinting, set
equalizeto true (false by default). For example: -
By default, the specified colors are distributed evenly. To adjust the positioning of the gradient blend, specify a
positionvalue between 0p-100p. If specifying positioning, you must specify a position value for all colors. For example:
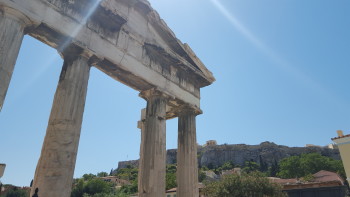 Original
 default red color at 20% strength
 red, blue, yellow at 100% strength
 equalized, mutli-color, 80%, adjusted gradients
1Equalizing colors redistributes the pixels in your image so that they are equally balanced across the entire range of brightness values, which increases the overall contrast in the image. The lightest area is remapped to pure white, and the darkest area is remapped to pure black.
See full syntax: e_tint in the Transformation Reference.
Vectorize
The vectorize effect (e_vectorize in URLs) can be used to convert a raster image to a vector format such as SVG. This can be useful for a variety of use cases, such as:
- Converting a logo graphic in PNG format to an SVG, allowing the graphic to scale as required.
- Creating a low quality image placeholder that resembles the original image but with a reduced number of colors and lower file-size.
- Vectorizing as an artistic effect.
The vectorize effect can also be controlled with additional parameters to fine-tune it to your use case.
See full syntax : e_vectorize in the Transformation Reference.
Below you can see a variety of potential outputs using these options. The top-left image is the original photo. Following it, you can see the vector graphics, output as JPG, with varying levels of detail, color, despeckling and more. Click each image to open in a new tab and see the full transformation.
Converting a logo PNG to SVG
If you have a logo or graphic as a raster image such as a PNG that you need to scale up or deliver in a more compact form, you can use the vectorize effect to create an SVG version that matches the original as closely as possible.
The original racoon PNG below is 256px wide and 28kb.
If you want to display this image at a larger size, it will become blurry and the file size will increase with the resolution, as you can see in the below example which is twice the size of the original.
To avoid the issues above, it's much better to deliver a vector image for this graphic using the vectorize effect.
The example below delivers an SVG at the maximum detail (1.0) with 3 colors (like the original) and an intermediate value of 40 for the corners. This yields an extremely compact, 8 KB file that will provide pixel-perfect scaling to any size.

Creating a low quality image placeholder SVG
When delivering high quality photos, it's good web design practice to first deliver Low Quality Image Placeholders (LQIPs) that are very compact in size, and load extremely quickly. Cloudinary supports a large variety of compressions that can potentially be used for generating placeholders. You can read some more about those here.
Using SVGs is a nice way to display a placeholder. As an example, the lion jpeg image below with Cloudinary's optimizations applied, still gets delivered at 397 KB.

Instead, an SVG LQIP can be used while lazy loading the full-sized image.
The placeholder should still represent the subject matter of the original but also be very compact. Confining the SVG to 2 colors and a detail level of 5% produces an easily identifiable image with a file size of just 6 KB.

Vectorizing as an artistic effect
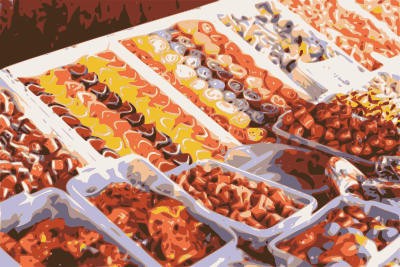
Vectorizing is a great way to capture the main shapes and objects composing a photo or drawing and also produces a nice effect. When using the vectorize effect for an artistic transformation, you can deliver the vectorized images in any format, simply by specifying the relevant extension.
For example, the image of a fruit stand below has been vectorized to create a nice artistic effect and subsequently delivered as an optimized jpg file.
Zoompan
Use the zoompan effect to apply zooming and/or panning to an image, resulting in an animated image.
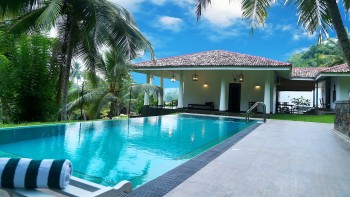
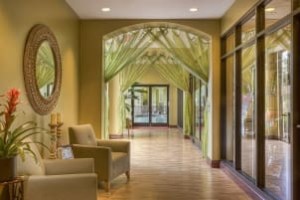
For example, you could take this image of a hotel and pool:
...and create an animated version of it that starts zoomed into the right-hand side, and slowly pans out to the left while zooming out:
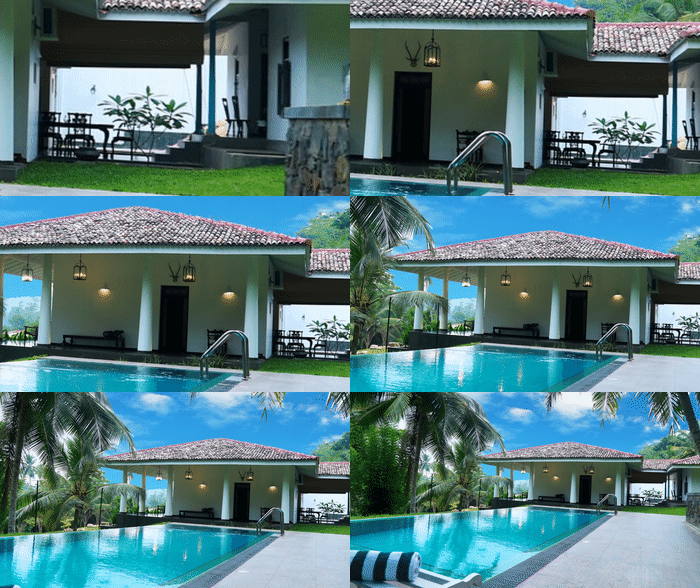
Or, you can specify custom co-ordinates for the start and end positions, for example start from a position in the northwest of the USA map (x=300, y=100 pixels), and zoom into North Carolina at (x=950, y=400 pixels).
;to_(zoom_4;x_950;y_400);du_8;fps_30/e_loop/w_400/docs/usa_map.gif)
If you want to automate the zoompan effect for any image, you can use automatic gravity (g_auto in URLs) to zoom into or out of the area of the image which Cloudinary determines to be most interesting. In the following example, the man's face is determined to be the most interesting area of the image, so the zoom starts from there when specifying from_(g_auto;zoom_3.4):
/e_loop/w_300/docs/guitar-man.gif)
There are many different ways to apply zooming and panning to your images. You can apply different levels of zoom, duration and frame rate and you can even choose objects to pan between.
See full syntax: e_zoompan in the Transformation Reference.
-
Read this blog to see some more applications of the
zoompaneffect.
 Ask AI














/c_scale,h_250/docs/woman-in-shirt.jpg)
