Programmable Media

Create image collages

Last updated: Jan-17-2025

Overview

Image collages are composed of several different images, combined together in a specific layout.

You can programmatically create image collages by combining assets that you've already uploaded to your Cloudinary storage. By defining a template, and specifying spacing and colors, you can choose the composition of the overall collage.

This collage is composed of four images in one row, with black spacing between each:

Fashion collage

To create a collage using the create_collage method, you need to supply a manifest_json to the create_collage endpoint of the Upload API.

Note
Any images that you want to use in the collage must be publicly accessible.

You can also create collages on the fly using overlays.

Try create_collage in Postman

There is no SDK support yet for create_collage so you need to call the REST API directly. To help you, you can use our Postman collection.

Collage composition

There are two ways to specify the layout of the collage:

Predefined templates

One predefined template is currently supported: grid.

With this template you specify the number of columns and rows, then provide the public ID for each of the assets in the grid. Each image within the grid layout is of equal dimensions.

In the following example we specify a 3x3 grid with a total height and width of 500 px. The assets are spaced 1 pixel apart, with a blue background. The public IDs of nine assets are specified and each asset is cropped to fill the available space with auto gravity.

The manifest_json looks like this:

And the whole create_collage request looks like this:

The resulting collage is delivered with the URL that is returned in the response:

Cat collage

Custom templates

Custom templates let you create collages in layouts that allow for different dimensions of images. For example:

Cat collage of different sizes

To achieve this layout, specify a two dimensional matrix for template, using numbers to represent the same asset and the area of the canvas that the image will cover.

So, for a canvas that looks like this:

Template layout

Use a matrix that looks like this:

Each number refers to an asset in the assets array. So, for the assets defined below, 1 refers to the asset with public ID docs/sample, 2 refers to the asset with public ID docs/sample1, and so on.

Notes
  • You cannot use the same number in different areas of the canvas. To use the same asset in a different position, specify more than one entry in the assets array with the same public ID. For example, making the image at positions 1, 4 and 6 the same asset (docs/sample):
  • Each defined area must be a whole square or rectangle.

Here's the whole manifest_json for the cat collage above:

This is the full create_collage request to create the collage:

Individual assets

The assetDefaults parameter specifies the default settings for each of the assets. These can be overridden on a per-asset basis by specifying the asset settings in each asset entry, for example:

In the following example, the corner and center images use the asset default settings ("crop": "fill", "gravity": "center"), but the other images are padded using different gravities and colors:

Collage of houses

Note
The creation of one image collage counts as one transformation, regardless of the number of images contained within it.

Asynchronous handling

Although collage creation usually only take a few seconds, it is still handled asynchronously. Therefore, the immediate response to the create_collage request indicates that the status is processing:

To receive a webhook notification when the collage is ready, add the optional notification_url parameter to the call. The notification JSON response includes the new url and secure_url:

Reference

These settings apply to the manifest_json parameter of the create_collage method.

See examples of a manifest_json for predefined templates, custom templates, and custom templates with individual asset specifications.

Global settings

Parameter Description
template Required. The name of the predefined template (currently only grid is supported) or a two dimensional custom matrix.
width Required. The total width of the output image collage.
height Required. The total height of the output image collage.
columns Required. The number of columns in the template.
rows Required. The number of rows in the template.
spacing Required. The space (in pixels) between individual images in the collage and from the outer boundaries. Specify 0 for no spacing.
color Required. The background (canvas) color. Specify any color name or a 3-, 4-, 6- or 8-digit RGB hex number with a hash (e.g. #FEB61F).
assetDefaults Required. Default asset parameters to apply to all assets unless overwritten in the asset entry.

Asset settings

Parameter Description
media Required. The public ID of an asset.
kind The delivery type of the asset. Specify upload, restricted or fetch.

Default: upload.

crop The type of crop. Specify fill or pad. For details of the cropping modes see fill and pad.

Default: pad.

gravity The gravity of the crop. Specify center, north_west, north_east, south_west, south_east, north, west, south, east, or auto.

Default: center.

color The background color of the asset if pad is used. Specify any color name, a 3-, 4-, 6- or 8-digit RGB hex number with a hash (e.g. #FEB61F) or auto for the predominant color.

Default: auto.

Interactive demo and code explorer

This demo allows you to drag and drop images to create collages with different layouts. Click the card to try out the demo and check out the code behind it.

This code is also available in GitHub.

Learn more
  • Read this blog to discover all the Cloudinary features in this demo.

Tip
Enjoy interactive learning? Check out more code explorers!

Create your own collage

Create your own collage and JSON manifest with the Cloudinary Collage Creator.

Upload your own images and drag them to the collage cells. Merge cells by dragging and dropping one to the next.

You can save your collage and copy the manifest JSON.

Click the card to try out the demo and check out the code on GitHub.

Create collages using overlays

Another way to create collages with Cloudinary is to use overlays.

By specifying the positions of the images to be adjacent to one another, rather than overlaying the images on top of each other, you can create collages on the fly.

Here's an example of four images of an apartment combined as a collage using overlays:
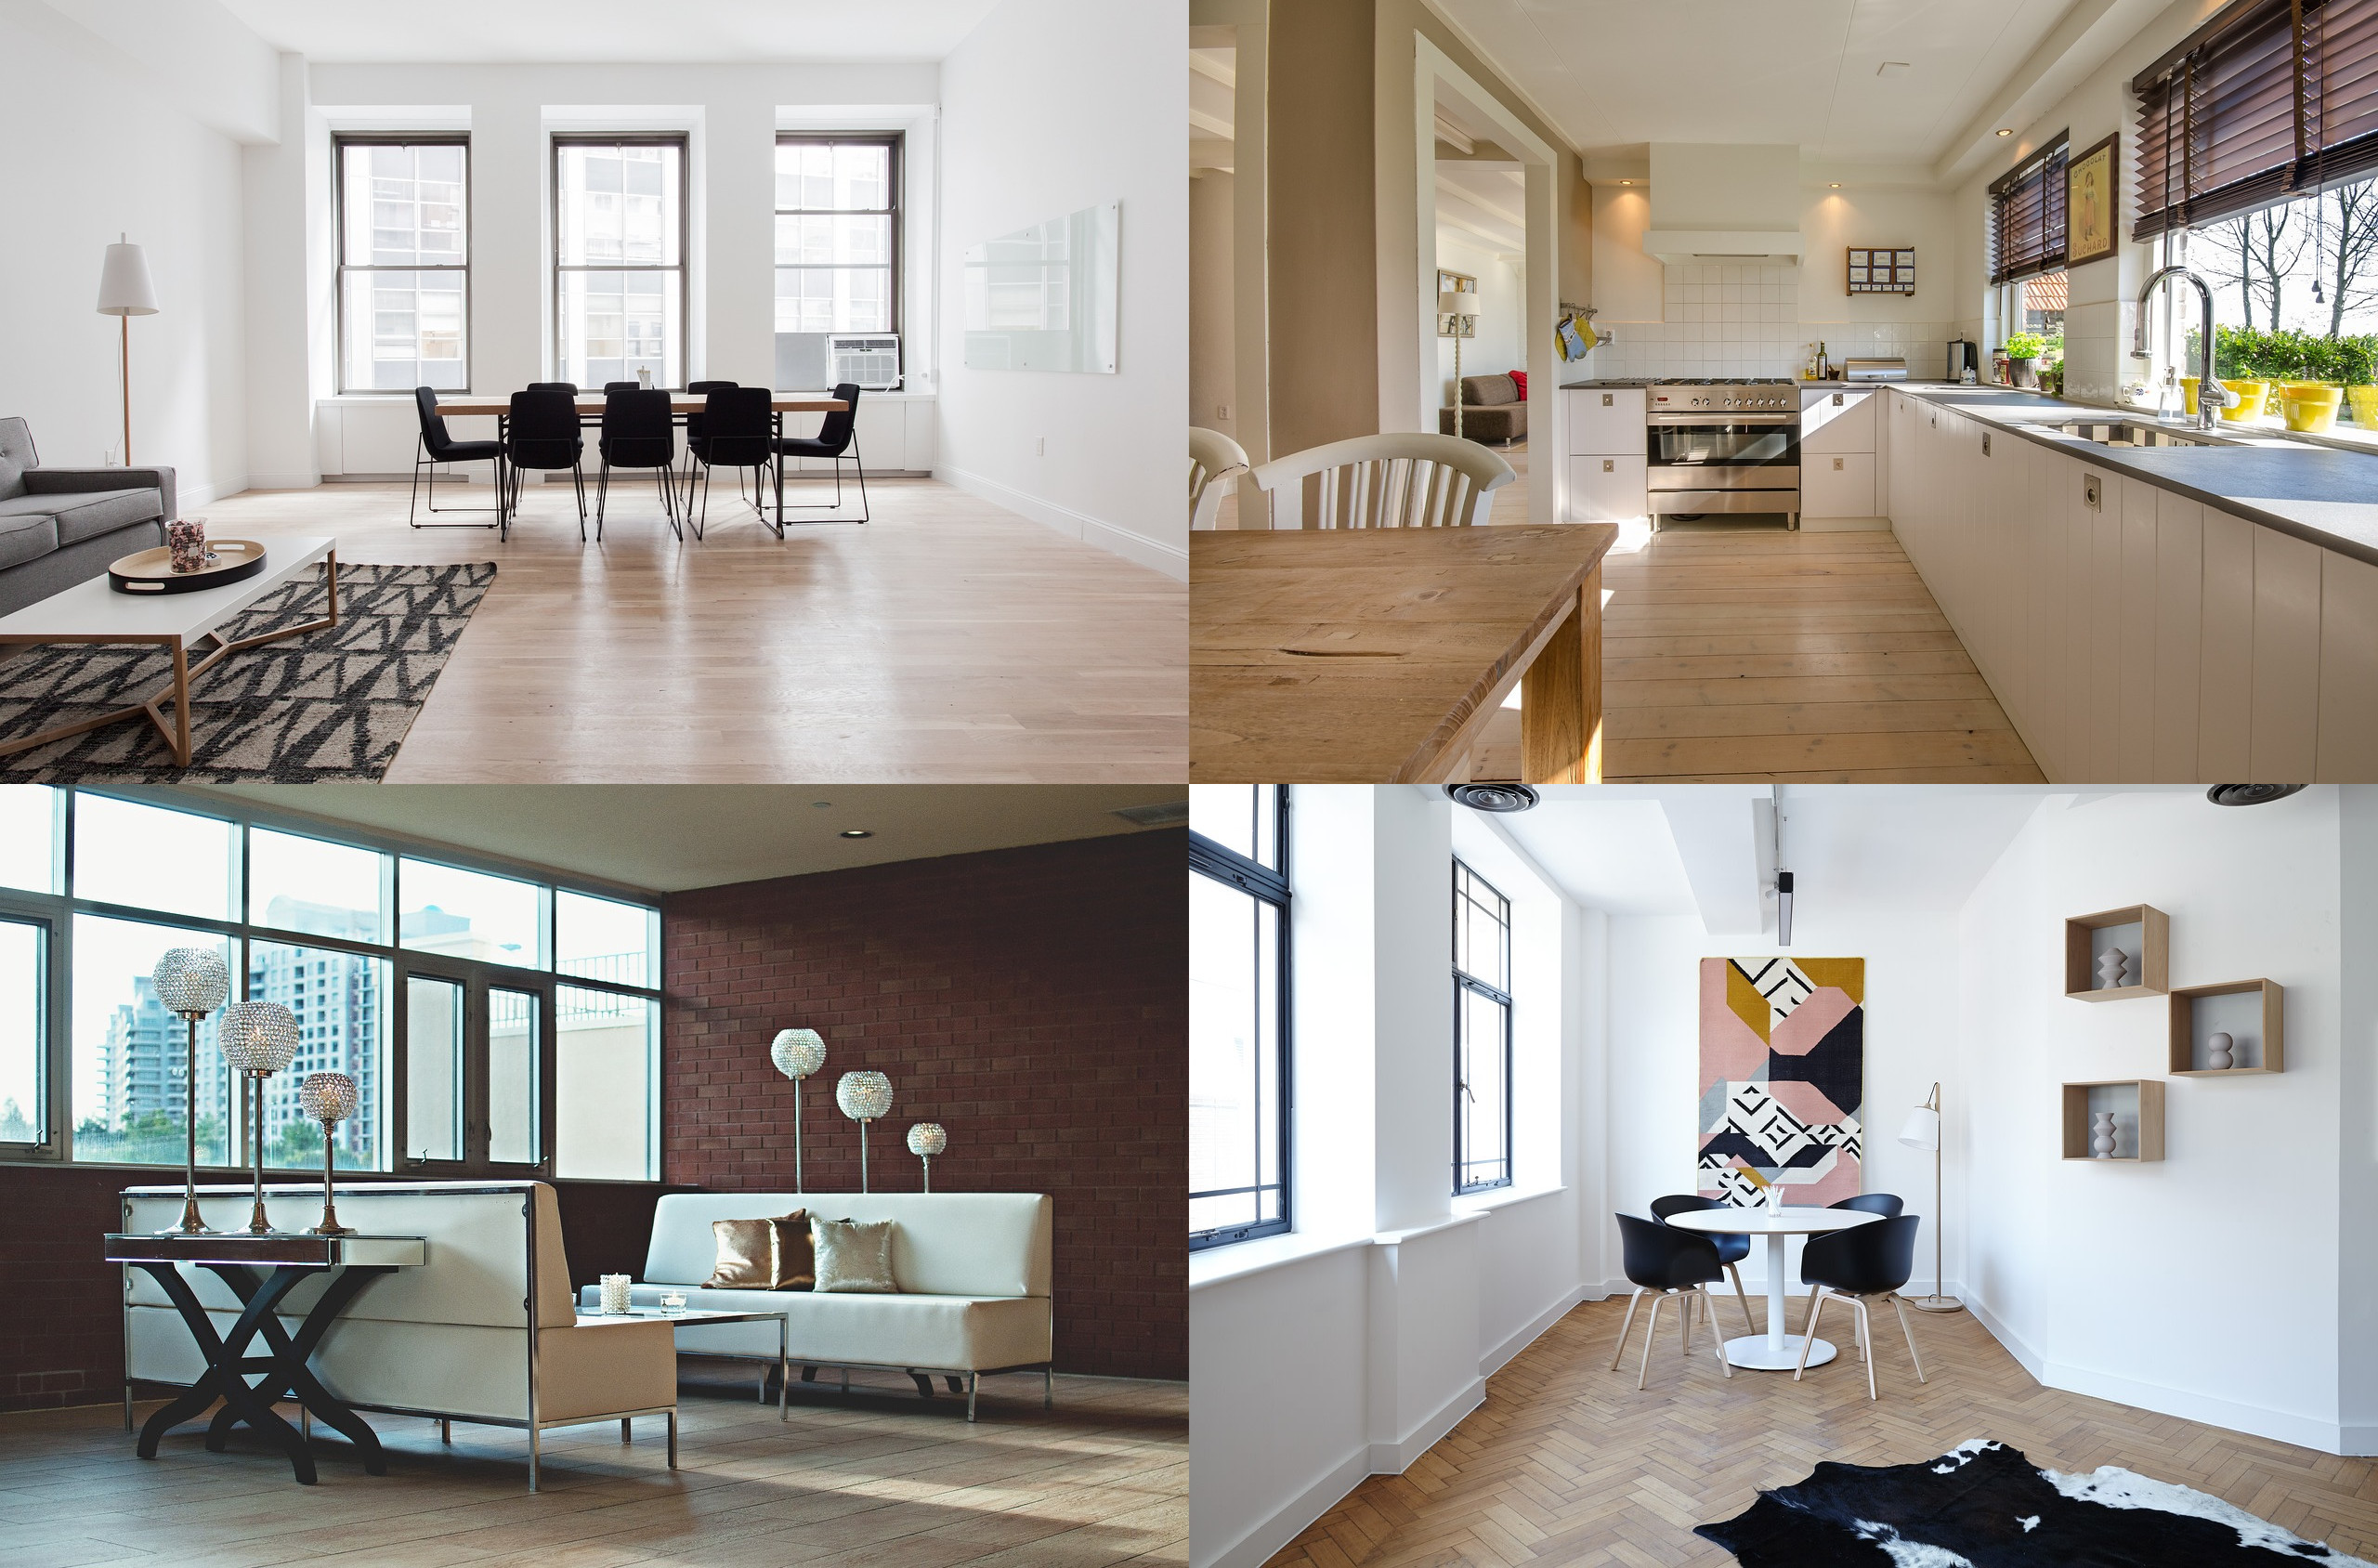
Apartment collage


  • The base image is the one in the top left (docs/dining-apartment).
    Base image of the apartment collage
  • The kitchen image is applied to the right of it using the width of the initial image as the x offset ($w_iw/l_docs:kitchen-apartment/fl_layer_apply,x_$w)
    • $w_iw sets the $w variable to the initial width of the base image.
    • fl_layer_apply,x_$w positions the image to the right of the base image.
      Top two images of the apartment collage
  • The study image is positioned below the kitchen image, by using east gravity and the height of the base image as the y offset ($h_ih/l_docs:study-apartment/fl_layer_apply,g_east,y_$h)
    • $h_ih sets the $h variable to the initial height of the base image.
    • fl_layer_apply,g_east,y_$h positions the image below the kitchen image.
      Three images of the apartment collage
  • The lounge image is positioned using south_west gravity to fill the bottom left corner.
    Apartment collage

You can also set specific dimensions for each of the images, and use different x and y offsets with a background color to space out the images.

For example, in the following collage:

  • Each of the images are cropped to a 250 x 250 pixel square, using c_auto,g_auto to focus on the most interesting part of each image
  • 30 pixels are added to the x and y offsets to space out the images (fl_layer_apply,x_$w_add_30)
  • The background color is set to burlywood
  • The whole collage is padded using the limit padding mode to form a border around it.

Apartment collage

✔️ Feedback sent!

Rate this page: