Get started with Assets
Last updated: Feb-17-2026
Overview
Assets is a digital asset management (DAM) product built for big businesses and enterprises. With powerful features designed for enterprise use, Assets simplifies managing digital resources. From streamlined asset organization to dependable support, you can rely on Assets for efficient digital asset management.
This product is tailored to the needs of two different personas:
- Administrators: They handle system configuration and maintenance.
- Users: Responsible for asset management, including searching, retrieval, collaboration and transformation.
While a single individual can take on both roles, they usually concentrate on one role at any given time.
Assets product highlights
Assets offers a range of robust features that streamline digital asset management. Seamlessly tailored to the needs of enterprises and large businesses, our platform ensures efficient management of extensive digital resources, including:
Smart Organization: Assets simplifies asset management through advanced metadata tagging and intuitive search capabilities. Locate your assets quickly and categorize them efficiently for effortless retrieval.
Collaboration Tools: Our platform supports teamwork with version control, access permissions, and customizable metadata fields. You can easily communicate by commenting on assets and tagging teammates. Plus, you can enhance collaboration by sharing collections, ensuring the right people have access to the right assets.
Personalization: Create asset variations at scale by applying customized transformations and AI-driven actions, ensuring your assets are optimized for their intended use. Adapt assets to your unique requirements without the need for extensive technical knowledge.
Bulk Management: Simplify operations with bulk asset management. Implement changes, tags, and permissions across multiple assets simultaneously, saving valuable time and effort.
Dedicated Support: We understand the complexities of large-scale adoption. With dedicated support, our team assists in setup, integration, and addressing any queries, guaranteeing a smooth experience.
Integration with Cloudinary's other products
Assets leverages Cloudinary's other products to facilitate asset management from creation to delivery and the end-to-end workflow between marketing and creative teams and developers. This integration ensures a streamlined workflow, enhancing efficiency throughout the asset lifecycle.
Tailored for Enterprises
Assets is purpose-built for enterprises and large businesses. Its features are curated to handle the complexities of managing extensive digital collections. With emphasis on seamless organization, collaboration, and support, Assets is an indispensable tool for enhancing your asset management workflow.
Getting started for Assets administrators
If you don't have an account yet and you want to try Assets out using our free plan, go to the Cloudinary pricing page, click the Digital Asset Management tab, and sign up for free. Follow the sign-up instructions.
Once you're in your new product environment, make sure the Assets icon is selected from the Product Selector on the left side bar. You can navigate to all your Preference and Settings pages from the Product Navigation menu and sidebar.
Follow the Guided workflow for Assets administrators below to swiftly immerse yourself in the platform's capabilities and create an environment that reflects Assets' true potential. This process provides an essential starting point, ensuring you make the most of the platform's features.
Guided workflow for Assets administrators
-
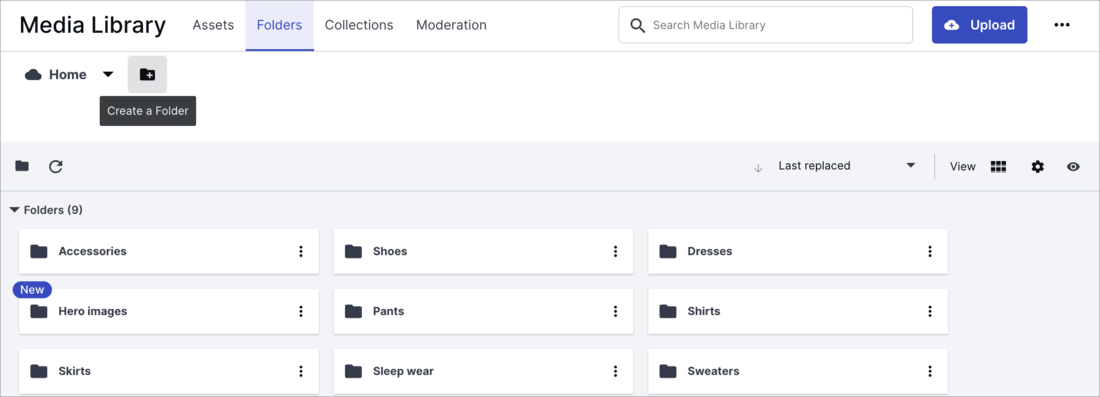
Set up the folder hierarchy: Leverage Assets' advanced folder management capabilities to establish hierarchical structures that enforce your organization's governance policies. You'll later define permissions for your folders to ensure that departments, groups, and users can access assets efficiently within a well-organized framework.
Go to the Folders tab of the Media Library.
-
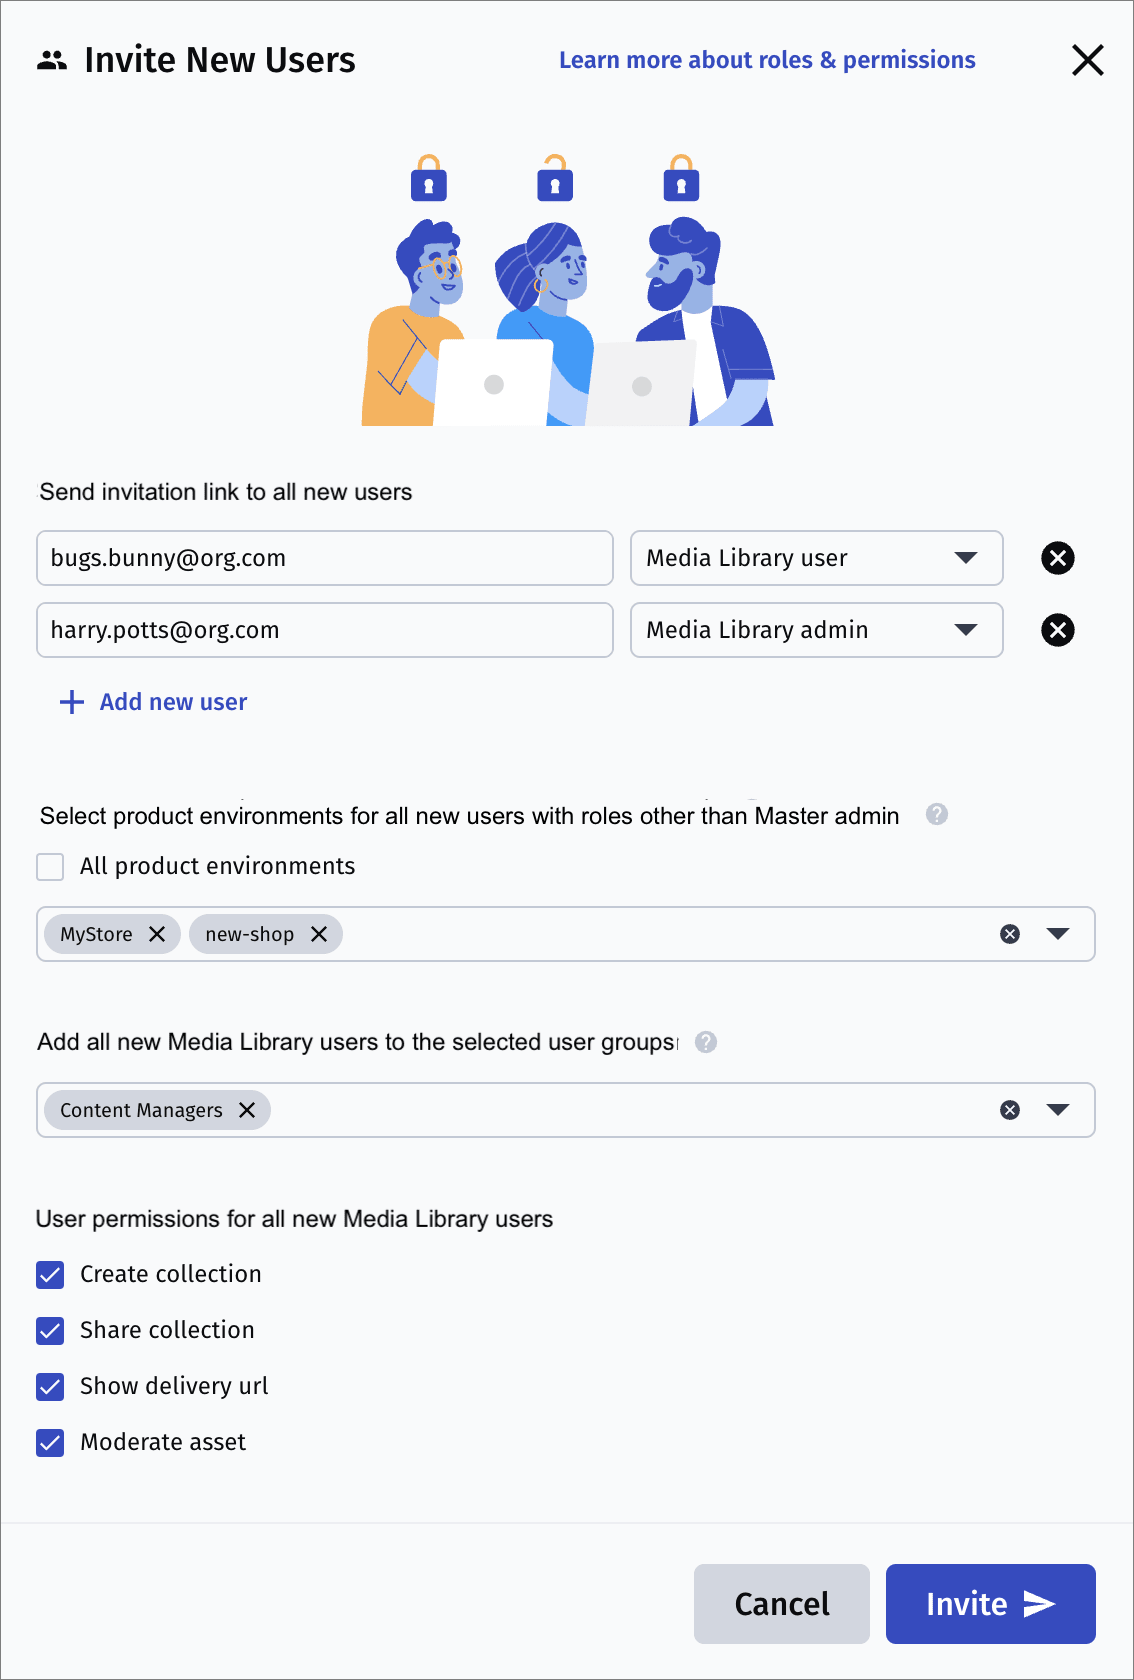
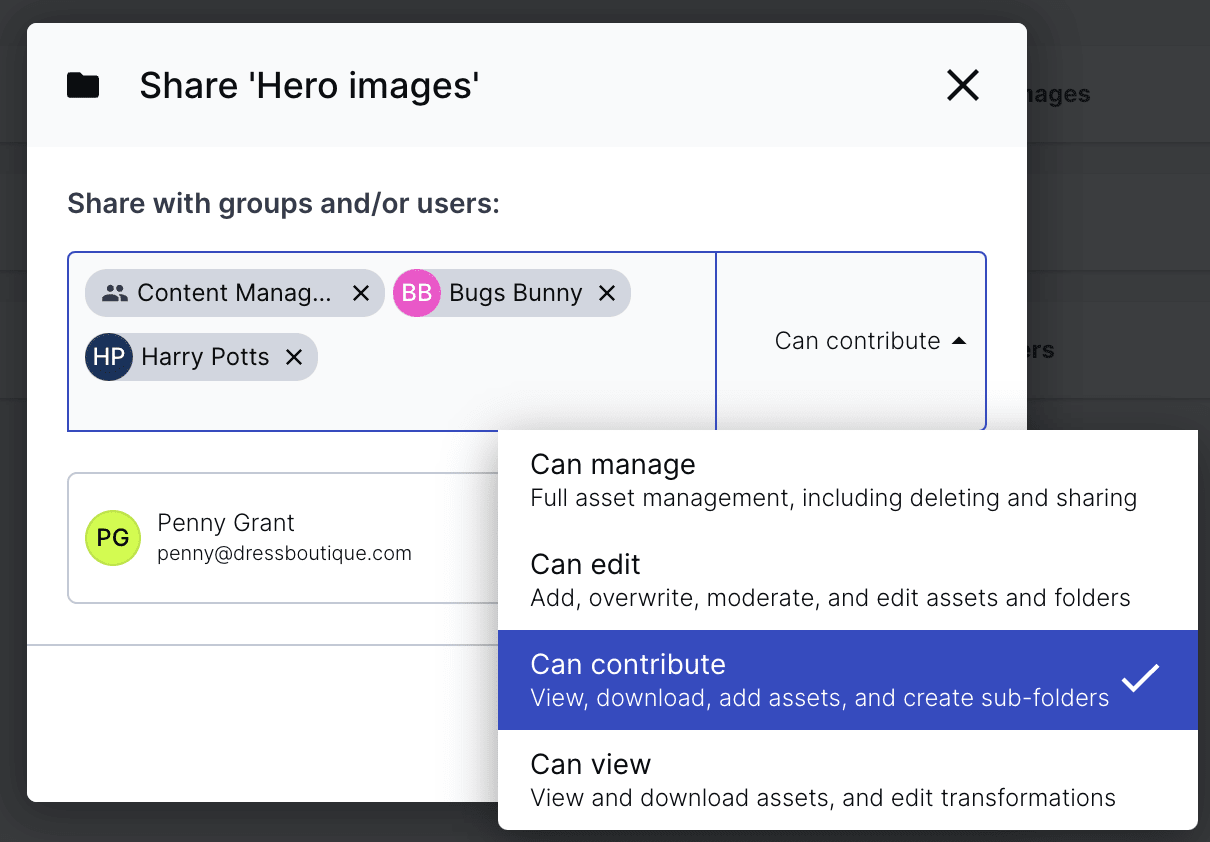
Manage users: Establish governance across different departments and teams using Assets' enterprise-level user management features. Invite new users and assign them roles and permissions, then grant them access permissions to assets via folder sharing to enhance security and control.
To invite new users, click the Add Users icon in the left sidebar.
To share folders and grant permissions, go to the Folders tab in the Media Library and select Share from the folder's kebab menu.
To manage users and user group, go to the User Management page of the Console Settings.
-
Customize account behavior: Tailor Assets' behavior to align with your organization's workflows. Customize user interfaces, security options and asset handling options to create a seamless experience that reflects your unique processes. In particular, you may want to:
- Enable or require two-factor authentication for the users in your account from the Security Settings page.
- Select the filters that will be permanently displayed on the Advanced Search from the Search page of the Media Library Preferences.
- Opt for automatic backup from the Upload page of the Console Settings so that you can always revert to a previous version of an asset.
- Enable DAM Apps to extend your core Assets functionality from the App Marketplace.
- Enable or require two-factor authentication for the users in your account from the Security Settings page.
-
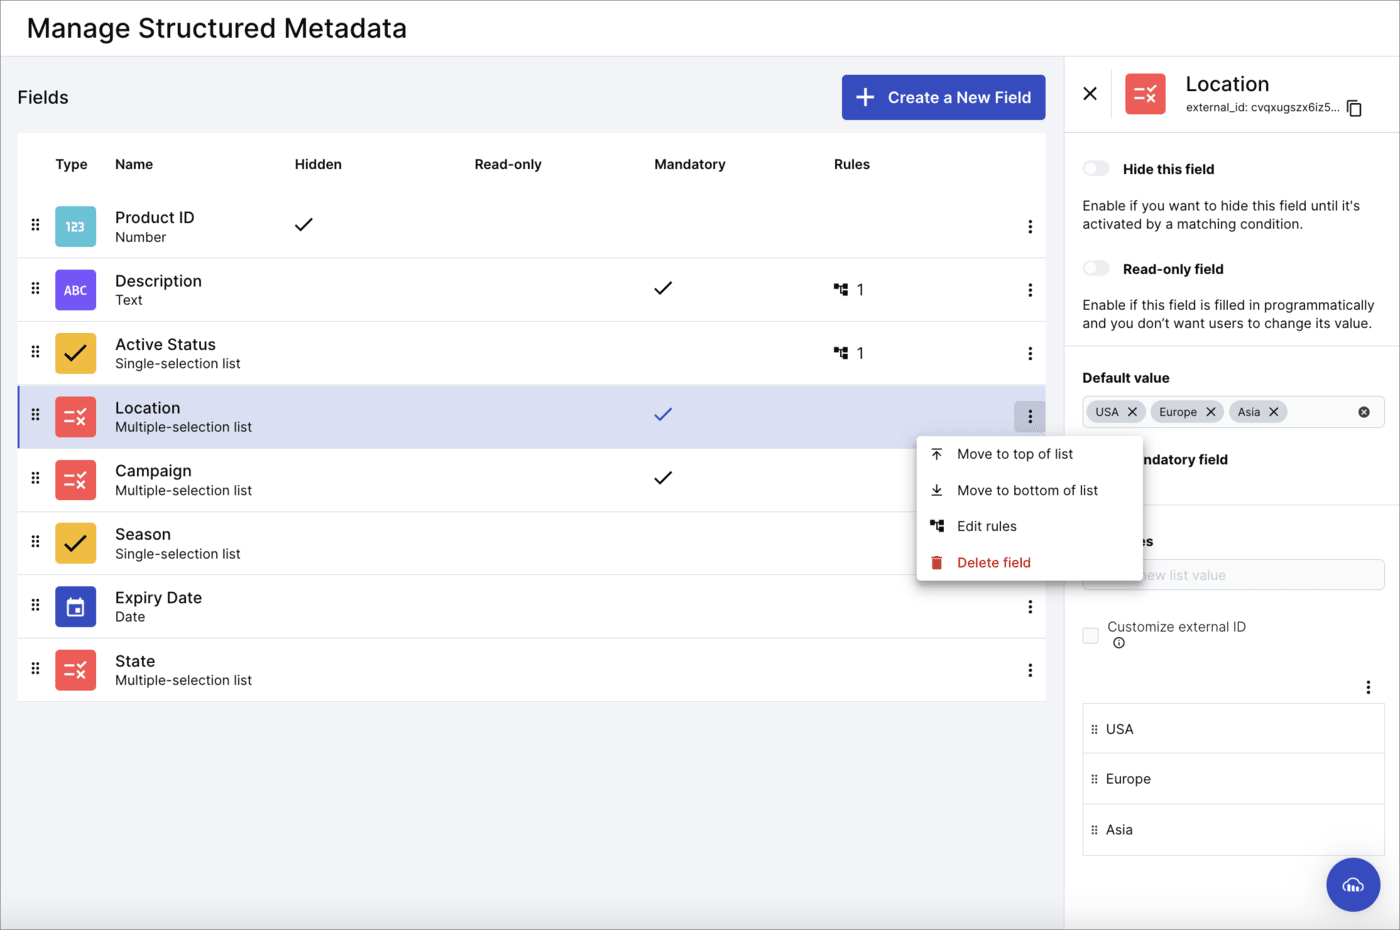
Manage metadata: You can define and manage an extensive array of structured metadata fields. This ensures assets are accurately classified and simplifies the process of locating assets through efficient search capabilities.
Go to the Structured Metadata page.

-
Set up asset personalization: Streamline content editing and maintain brand consistency by creating transformation templates. These enable standardized edits and ensure that your organization's visual identity remains intact across various assets.
Keep in mind that any transformations you apply in Studio, as well as any templates applied by you or other uses later on, will create asset variations without changing the original asset.
To get started, go to the Assets or Folders tab of the Media Library. Select one or more assets and click the Open Studio icon from the assets toolbar. Inside Studio, apply your desired transformations and then save them as a template.
NoteTo configure templates using the full range of available transformations, see Transformation templates.
-
Next Steps: While the above steps cover the essential setup and configuration aspects, there are more advanced options available for refining your Assets experience, for example:
Configure advanced upload behavior: Configure what happens when assets are uploaded is done by defining upload presets, centrally defined sets of asset upload options which can be applied to assets as they are uploaded. Within your upload preset, you can opt for auto-tagging using AI-powered algorithms to automatically assign relevant tags to uploaded assets, saving time and effort. Additionally, enable content moderation to ensure only appropriate assets are published.
Subscribe to add-ons: Explore the option to register for add-ons that can enhance your Assets experience further. These additional features can provide specialized functionalities to cater to your organization's unique requirements, such as automatic moderation, background removal, OCR and more.
With these steps, you're well on your way to harnessing the full potential of Assets for your organization's digital asset management needs. If you need more help or have any questions, your Customer Success Manager is available to guide you through the process.
Check out the Introduction to Cloudinary Assets pathway in the Cloudinary Academy for free self-paced courses on DAM topics.
Getting started for Assets users
Once you're in your new product environment, navigate to the Media Library from the Product Navigation menu.
Follow the 'Guided workflow' below to become familiar with Assets' capabilities, including its AI-powered features, so that you can jump right into your tasks and fully utilize what Assets has to offer.
Guided workflow for Assets users
Once you're in your new product environment, navigate to the Media Library from the Product Navigation menu.
Follow the Guided workflow for Assets users below to become familiar with Assets' capabilities, including its AI-powered features, so that you can jump right into your tasks and fully utilize what Assets has to offer.
-
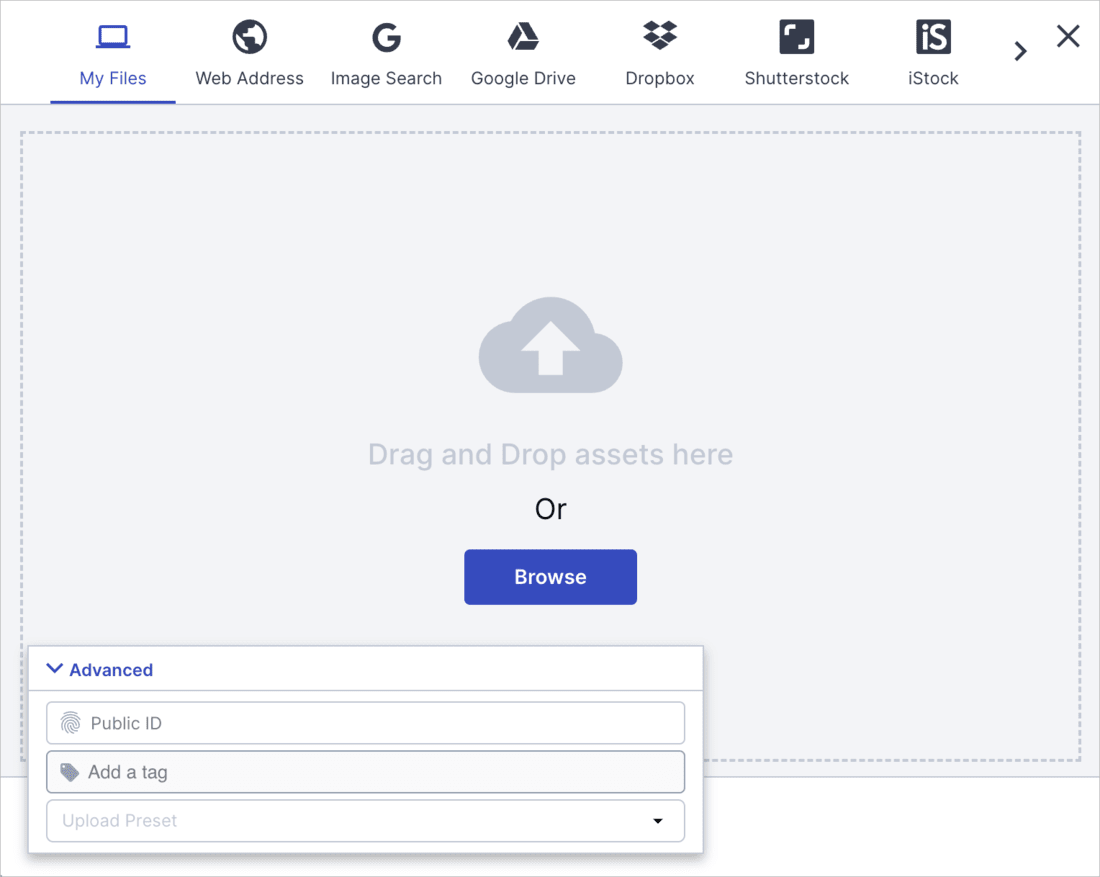
Upload assets: Leverage robust upload features to streamline the process of uploading and categorizing large quantities of assets, including AI-driven auto-tagging and automatic moderation which needs to be set up by your administrator. This empowers you to efficiently manage your digital resources, ensuring a well-organized repository.
Click Upload to open the widget or simply drag and drop files into a destination folder.
-
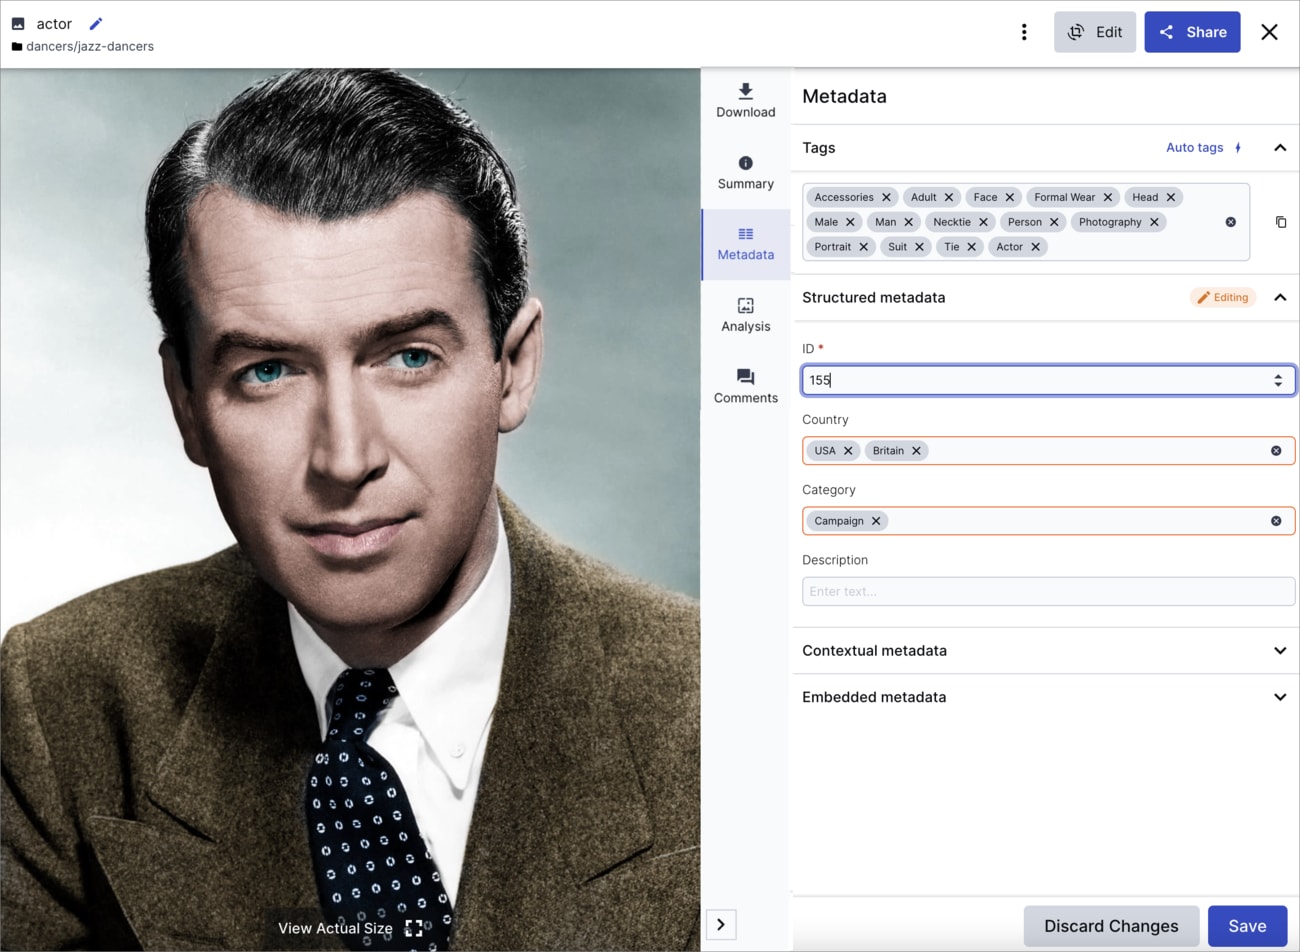
Manage metadata: Utilize the extensive metadata fields in Assets to capture detailed information about your assets to make them more discoverable.
You can import your metadata in bulk from a CSV file by clicking Bulk Update Metadata from the kebab menu at the top right corner of the Media Library.
To manually add or edit the tags or structured metadata for individual assets, double click the asset to open the asset management drill-down page and then select the Metadata tab.
-
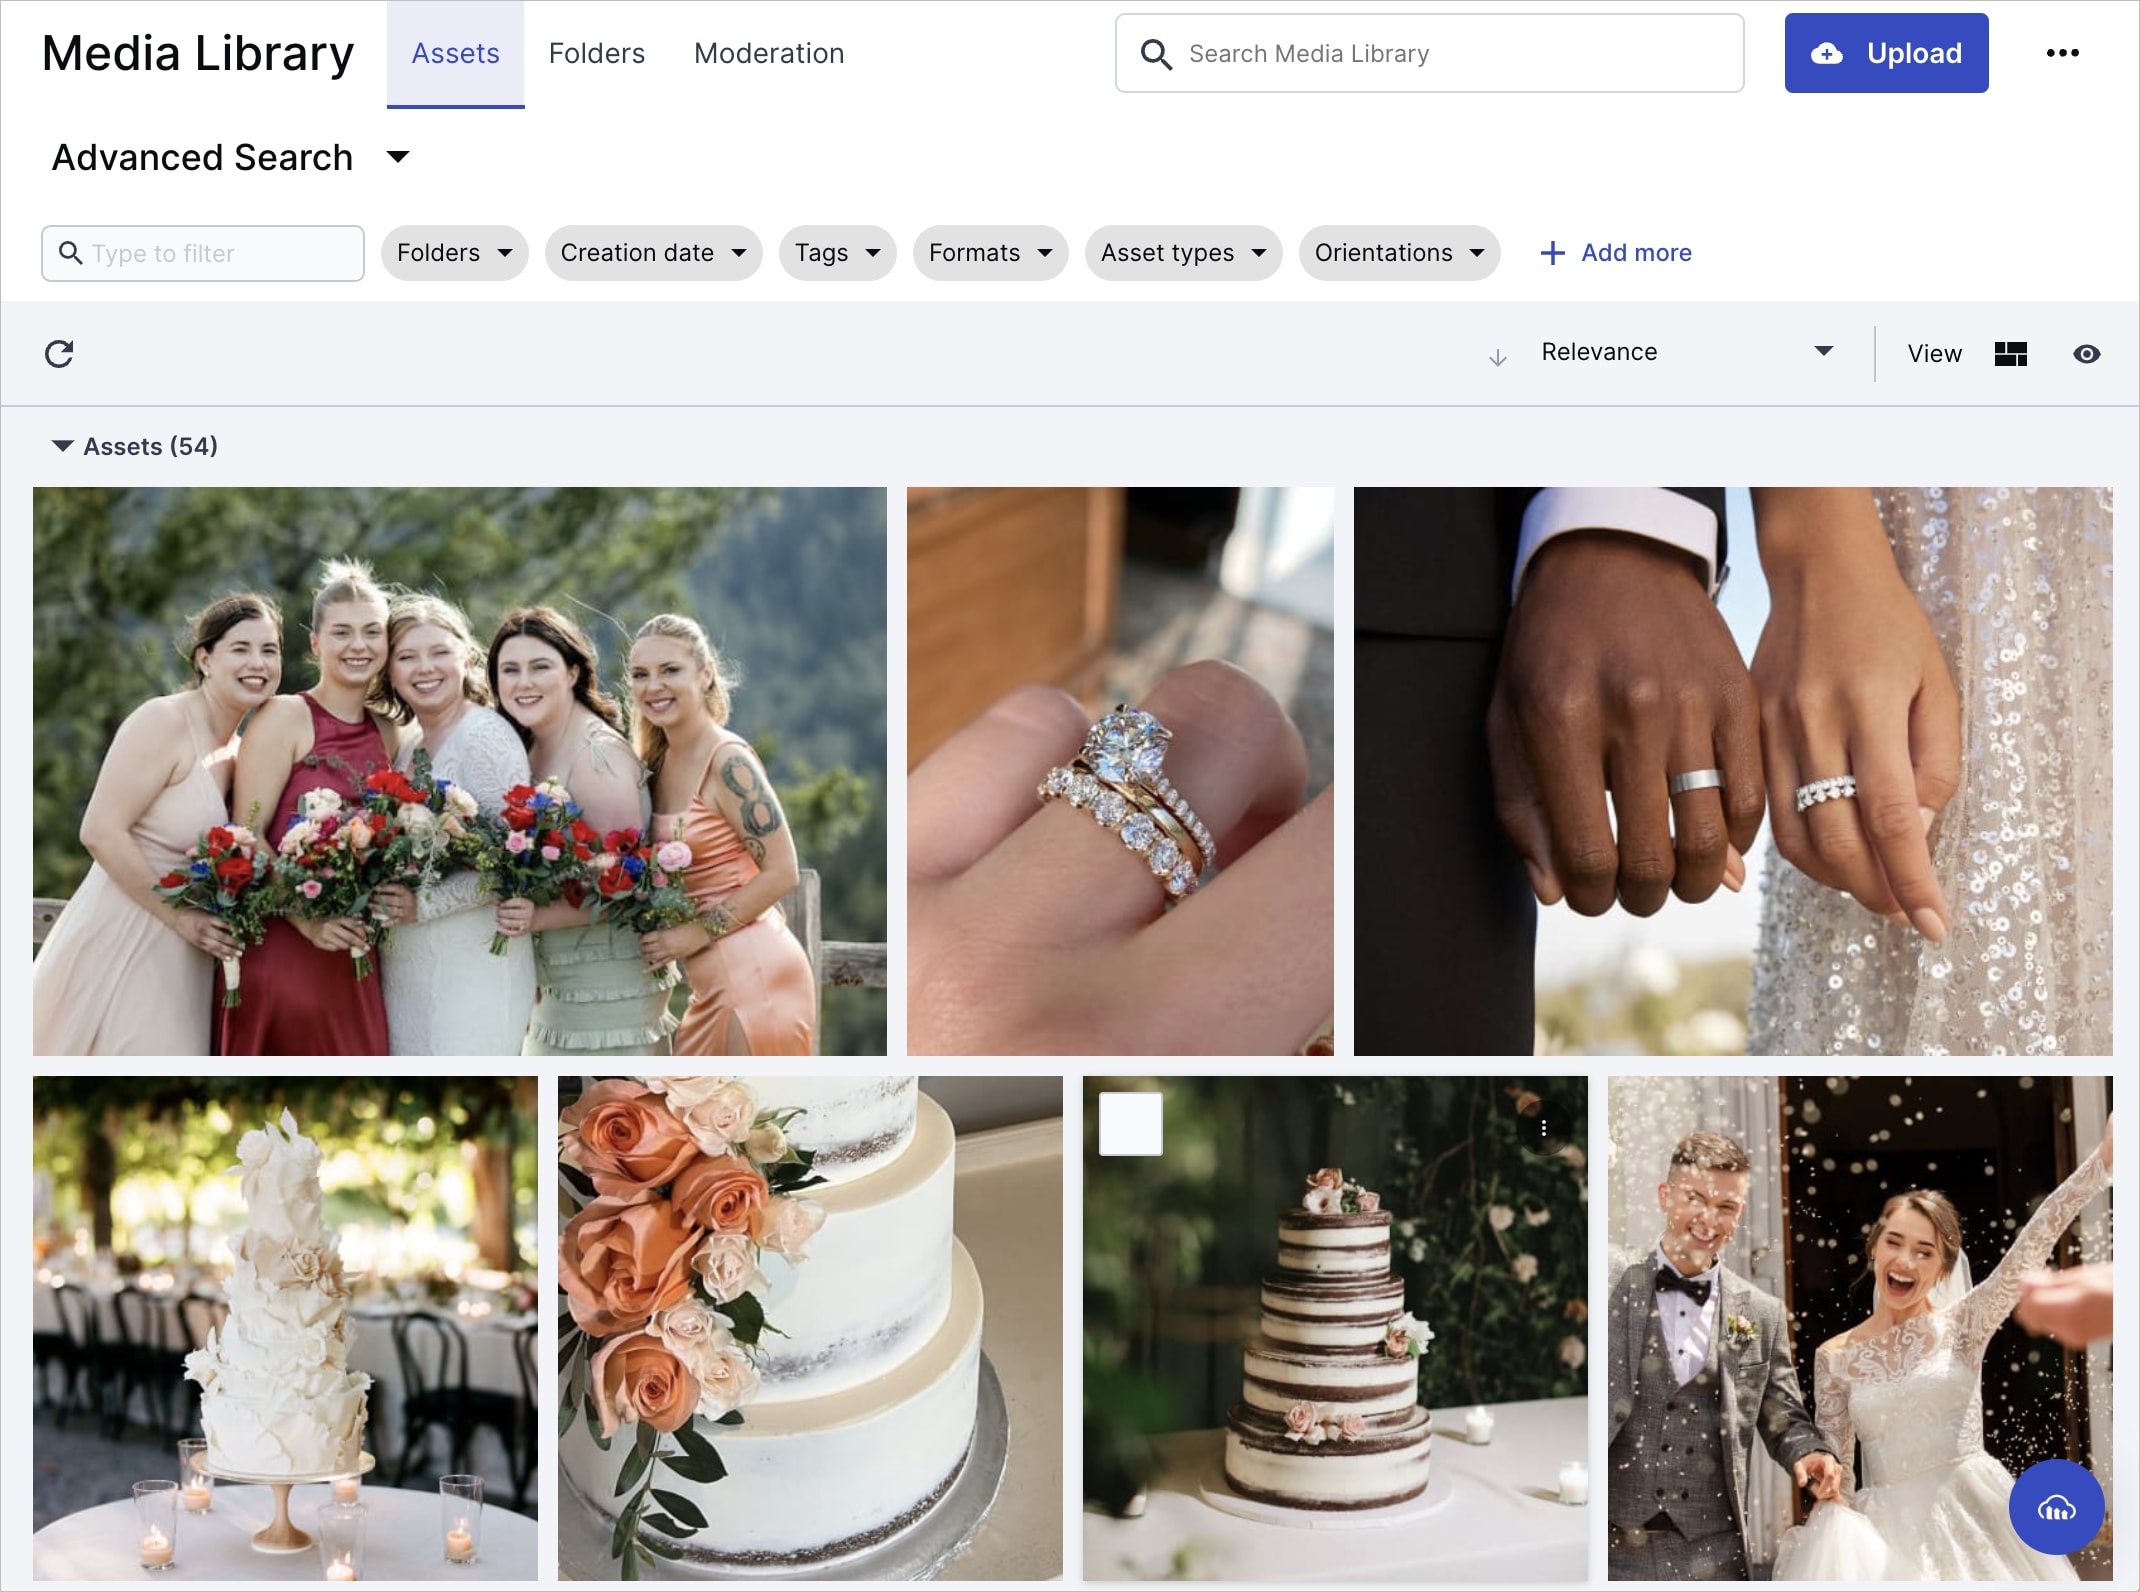
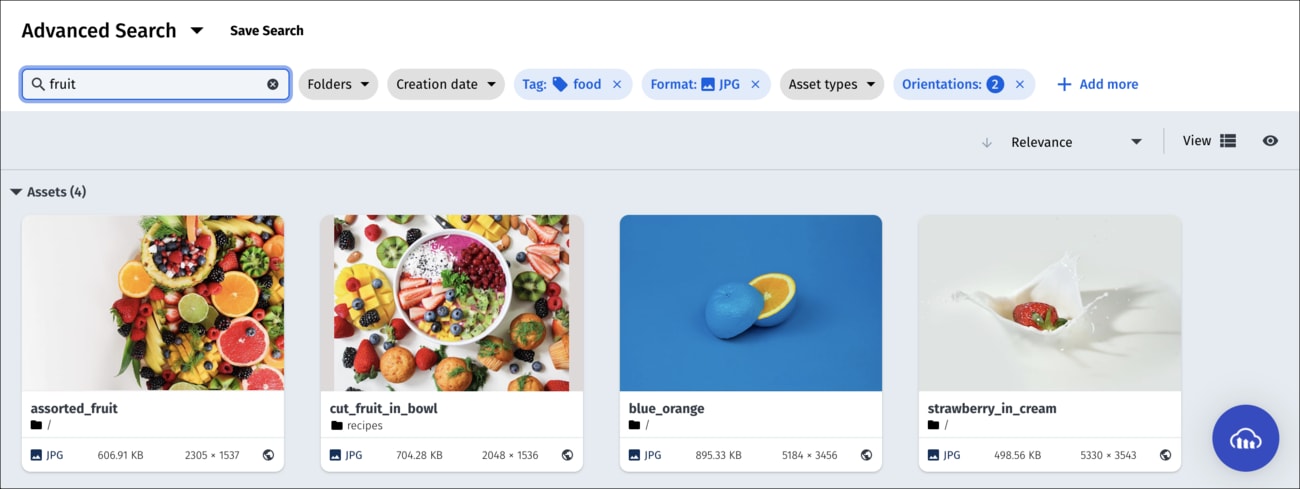
Search for assets: Use the Advanced Search to find the assets you need based on a variety of characteristics, including asset name, resolution, video duration, colors, automatically assigned tags, face detection, and more. You can also perform searches based on structured metadata field values. Enriching your metadata with relevant information will make it simpler to find assets tailored to your specific content and company needs.
Go to the Assets tab at the top of the Media Library.
TipBoost the effectiveness of your asset discovery with the AI-powered Visual Search (available for Assets Enterprise plans).
-
Personalize assets at scale: Make the most of Studio to execute complex transformations in bulk and personalize and optimize images for diverse use cases. This empowers you to tailor your images to your specific needs with ease. When you're done, you can download the transformed images as a ZIP file.
In the Media Library, select the images you want to transform and click the Open Studio icon from the asset toolbar. In studio, apply transformations and then download or export the results.
-
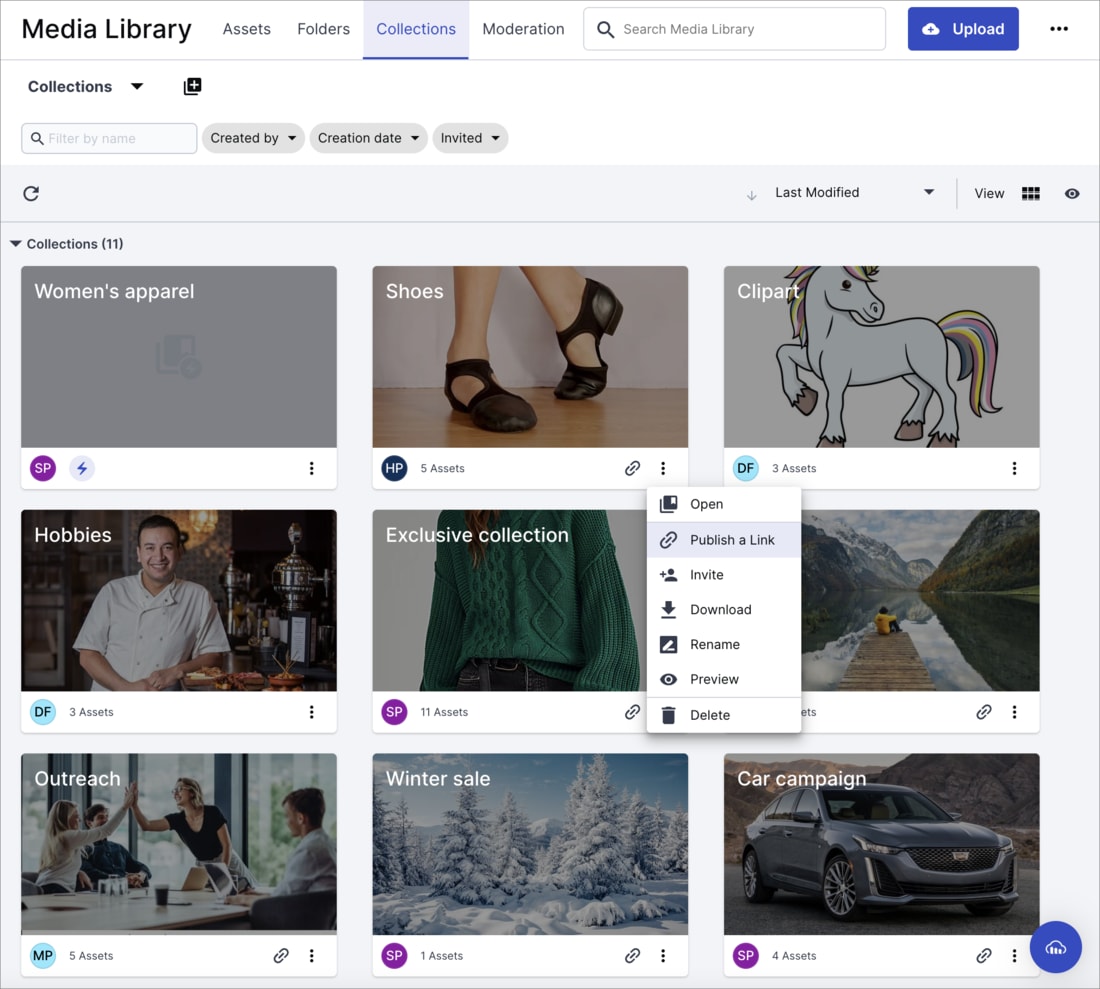
Collaborate and approve: Assets includes powerful collaboration tools for enterprises. Using collections, you can easily share groups of assets with teammates at different permission levels, and provide external stakeholders with a link for viewing and commenting.
Select Collections from the tabs at the top of the Media Library.
-
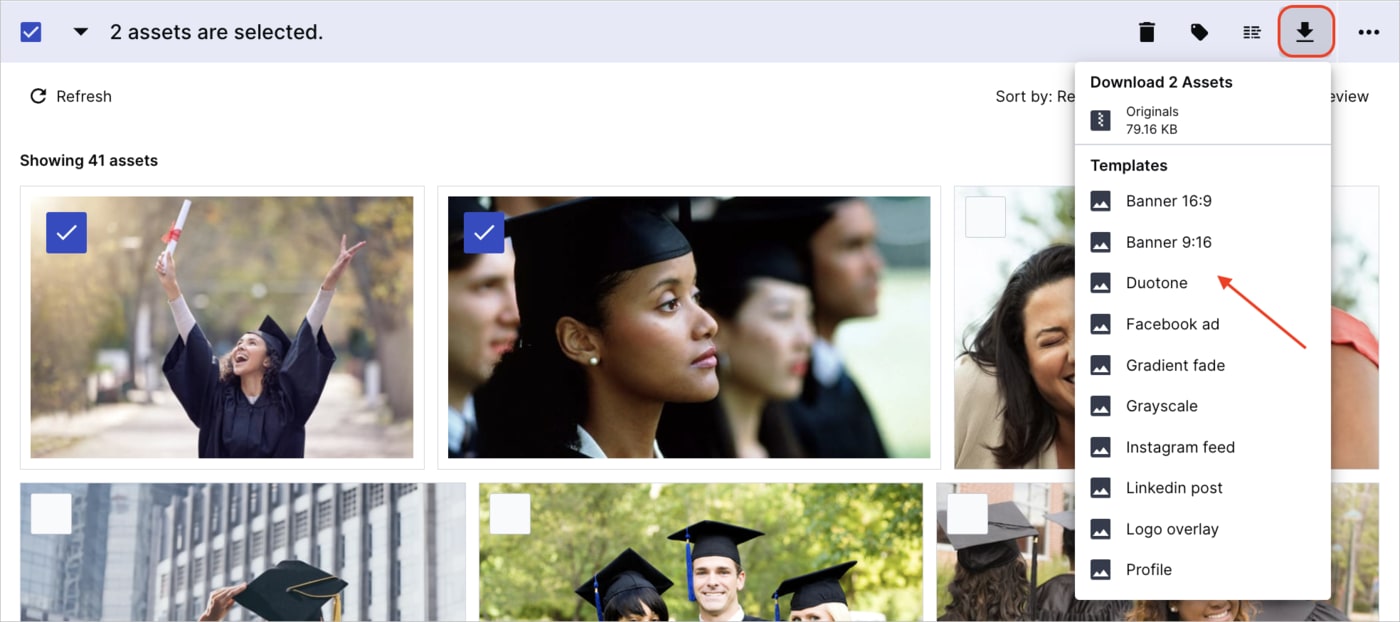
Transform and download: Your administrator has most likely created transformation templates to streamline content editing and maintain brand consistency. These templates allow consistent edits and safeguard your organization's visual identity across assets. You can download assets in bulk, applying templates, all with just one click.
Select the assets you want to download. Hover over the download icon in the assets toolbar and choose the template you want to apply.
-
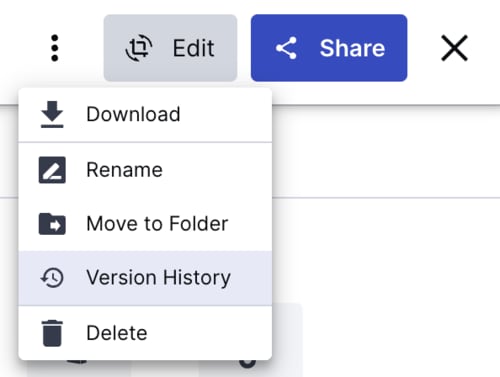
Manage versions: If the need comes up, you can revert to previous versions of an overwritten asset using the Version History feature for enhanced content management.
Double click the asset to open the asset management drill-down page. Select Version History from the kebab menu at the top right corner.
NoteTo make this feature available, your administrator must enable the automatic backup setting.
- Next steps: As you become accustomed to the essential features of Assets, you might want to explore the platform's advanced tools that can enhance your asset management. Dive deeper into AI-powered workflows, such as asset analysis, to automate repetitive tasks and optimize your processes. Learn about relating assets to find them by association, and discover how you can view an asset's access control mode.
Check out the Introduction to Cloudinary Assets pathway in the Cloudinary Academy for free self-paced courses on DAM topics.
Sample use cases
Discover how Assets plays a pivotal role in aiding enterprises, unlocking efficient management of digital assets for various scenarios. These use cases illustrate how Assets' capabilities can be harnessed to achieve streamlined operations and enhanced outcomes.
Use Case 1: Managing all product assets for large e-commerce business
An enterprise company with an e-commerce website aims to streamline its product asset management.
Their key requirements include easily categorizing, tagging, and organizing bulk images and videos, creating collections for streamlined collaborating on assets of the same or similar products, generating diverse product visuals, ensuring alignment with brand guidelines and creating a spectacular visual experience for website users.
The company uses Assets to execute the following steps:
Images and videos are systematically categorized and tagged based on visual content using Assets' advanced AI features. This facilitates efficient organization by product and category.
Content managers create collections based on these categorizations and share the collections with the relevant stakeholders.
The marketing team utilizes Assets' Studio to rapidly generate diverse variations of product visuals, creating visually pleasing and consistent presentations.
Collaboration among teams is streamlined as Assets aids in the content approval process. Stakeholders review assets, make comments, tag other teammates, and finally green-light assets within the platform, ensuring alignment with brand guidelines and quality standards before distribution.
The marketing team designs a fully customized Cloudinary Product Gallery with the Product Gallery app. This app generates code for an interactive user interface that displays products. The development team uses the generated code to integrate the design into the company website or app.
When the assets are ready, the asset delivery URLs and their desired location on the website are transferred to the development team for implementation.
Use case 2: Global marketing campaign management
The large business aims to streamline complex marketing campaigns across diverse regions by utilizing Assets as the centralized source for their images and videos.
Their key requirements include automatically moderating assets and filing them in folders when uploading into the system, using structured metadata to map assets to their corresponding campaigns in a detailed and accurate way, ensuring brand alignment throughout campaigns, facilitating the collaboration and approval process, and efficiently distributing finalized assets to their respective campaigns.
The company uses Assets to execute the following steps:
Marketers upload new assets using upload presets to apply relevant upload behavior settings, such automatic moderation, upload to specified folders, background removal, and more.
Use the Bulk update metadata feature, the team populates structured metadata fields from a CSV file, enriching assets with all the information needed to designate the right asset for the right region, language, demographic and campaign. This ensures appropriate content and messaging on a global scale.
Marketers use Assets' Studio to apply transformations and templates to media assets, aligning them with campaign branding guidelines.
Collections are created based on specific campaign prerequisites or target audience segments, facilitating collaboration and enabling real-time asset approval among teams for agreement on content choices.
Finalized assets, uniquely identified by their public IDs and delivery URLs, are distributed to their designated campaigns.
Use case 3: Using UGC for advertising travel
A large travel company plans to use user-generated content on its website for advertising.
Their key requirements involve automating the preparation of user-uploaded images for publication on the company website. This includes auto-tagging, moderation to exclude legally questionable images, smart resizing and cropping and the removal of unwanted elements from the images.
The company uses Assets to execute the following steps:
Users upload assets showcasing their travel experiences. Upload presets apply the desired upload behavior settings to the uploaded images, including automatic moderation and auto-tagging.
The marketing team uses Studio to remove unwanted objects from the images, and resize and crop images to fit a standard size while keeping the focal point centered.
The delivery URLs for the user-generated images are transferred to the development team for embedding in the website.
Developers use the auto-tags to place the refined user-generated content thematically in the website.
 Ask AI
