Add-ons
Last updated: Feb-17-2026
Enhance your Assets (Digital Asset Management) capabilities with a range of add-ons, offering advanced features for managing, processing, and delivering your digital assets effectively. Some leverage advanced Cloudinary AI functionality, while others provide unique features from various vision and media processing partners. Seamlessly integrated into your Assets product, these add-ons offer tailored functionalities, simplifying your workflow.
Only administrators can register for and upgrade add-on plans, as well as configure them for application on upload via upload presets. For subscription and setup instructions, see Add-ons in the Admin Guides. After registration and setup, integrate them into your Assets workflow for improved digital asset management.
The following sections describe add-ons commonly used within the Assets product.
Guidelines for all add-ons
To utilize any add-on, please contact your administrator, as only administrators can register for add-ons. For more information on add-on registration, see Registering to add-ons in the Admin Guide.
-
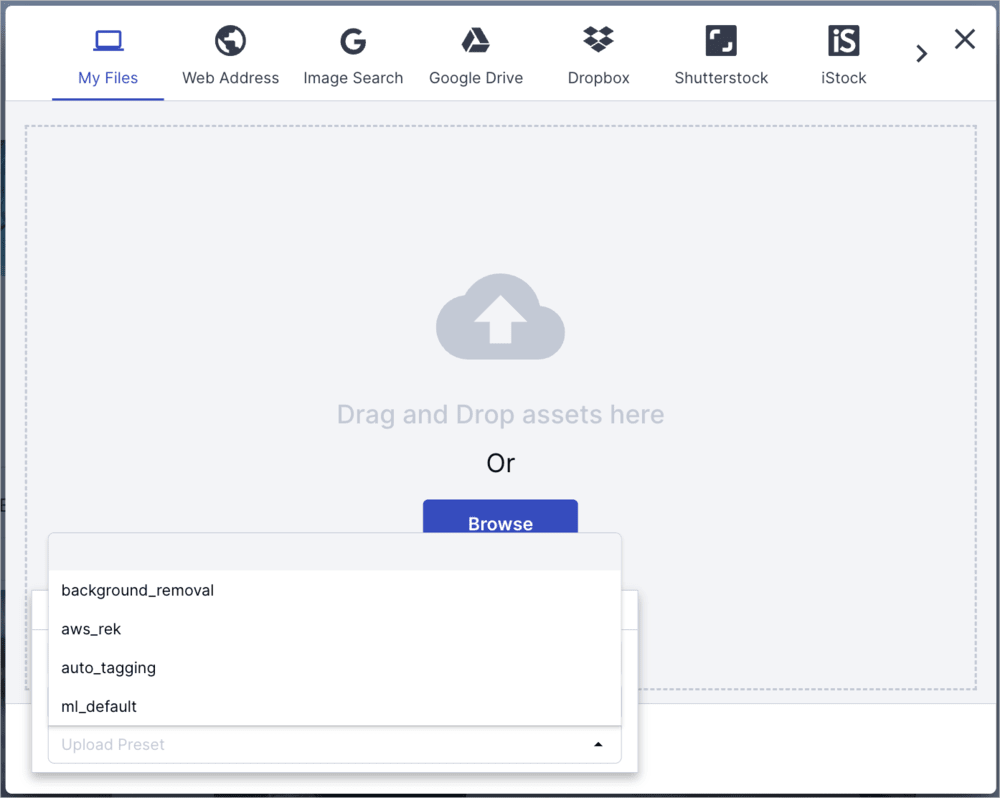
Most add-ons can be applied to assets on upload using an upload preset, which administrators can configure. An upload preset is a set of predefined options that streamline the upload process by automatically applying specified actions or configurations when uploading assets. For instructions on setting up add-ons as upload presets, see Applying add-ons using upload presets in the Admin Guide. Once configured, apply the upload preset as follows:
- If the upload preset is set as one of the Media Library upload preset defaults, any asset uploaded from the Console (via the Upload button or by dragging and dropping files) will automatically undergo the add-on's specified action.
-
If not set as default, upload your assets by clicking the Upload button. In the Upload widget that opens, select the relevant preset within the Advanced options, then select the files to upload. (If the Upload Preset option in the Advanced options of the Media Library Upload Widget is hidden, contact support to enable it.)

When you apply upload presets, only assets you upload are affected, not existing assets. To apply an add-on to existing assets, do so within the Media Library, following the instructions below. In some cases, application within the Media Library can only be done one asset at a time. For large-scale application, consider applying the add-on programmatically using the explicit method of the Upload API or contact your Customer Success Manager for assistance.
Pixelz - Remove the Background
Pixelz is a leading vendor of image editing solution components, including powerful background removal of photos, done by a team of human experts. Cloudinary provides a Remove-The-Background add-on for using Pixelz's image editing capabilities, fully integrated into Cloudinary's image management and transformation pipeline.
With the Pixelz - Remove the Background add-on, you can extend Cloudinary's image transformation capabilities with automatic background removal from your photos, resulting in a transparent-background image focusing on the main object of your photo.
Contact your administrator to register for the Pixelz - Remove the Background add-on and optionally set up an upload preset. For instructions, see Add-ons in the Admin Guides.
To apply the add-on during upload:
- Apply the upload preset configured by your administrator using the Upload widget. If the upload preset is a Media Library default, the add-on will be applied on upload automatically. For instructions, see Guidelines for all add-ons.
- View the new asset in the Media Library to verify that it was uploaded with its background removed.
To apply the add-on to existing assets within the Media Library one at a time:
- Double-click the asset in the Media Library to open the asset management drill-down page.
- Click Remove Background (Pixelz) in the (3-dots) options menu.
Cloudinary AI Content Analysis
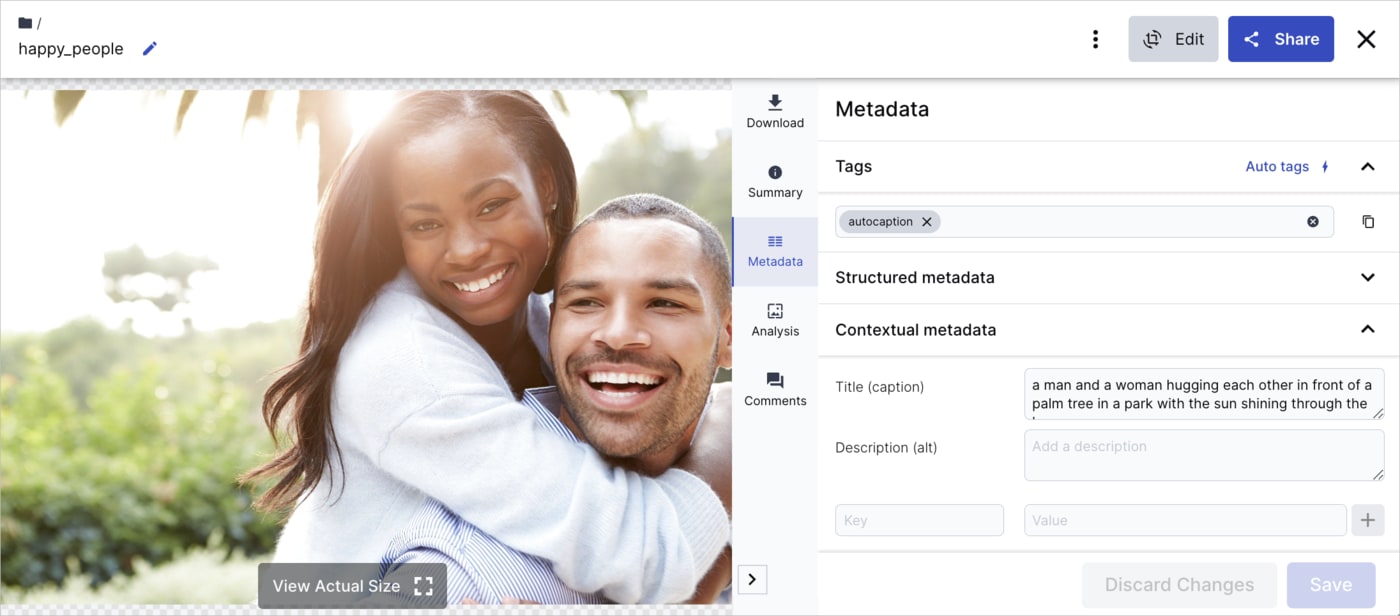
The Cloudinary AI Content Analysis add-on utilizes AI-based object detection and content-aware algorithms to offer image captioning suggestions based on to the image's contents.
Contact your administrator to register for the Cloudinary AI Content Analysis add-on and optionally set up an upload preset. For instructions, see Registering for add-ons.
To apply the add-on during upload:
- Apply the upload preset configured by your administrator using the Upload widget. If the upload preset is a Media Library default, the add-on will be applied on upload automatically. For more information, see Guidelines for all add-ons.
- In the Metadata tab of the asset management drill-down page, verify the auto-generated caption under the Title (caption) key in the Contextual metadata section and the
autocaptionvalue in the Tags section.

Google Auto Tagging
The Google Auto Tagging add-on automates the process of categorizing and tagging images by analyzing image data. This saves significant time and resources compared to manual tagging efforts. The analysis continuously improves over time, enhancing accuracy with the introduction of new concepts.
Contact your administrator to register for the Google Auto Tagging add-on and optionally set up an upload preset. For instructions, see Add-ons in the Admin Guides.
To apply the add-on during upload:
Apply the upload preset configured by your administrator using the Upload widget. If the upload preset is a Media Library default, the add-on will be applied on upload automatically. For more information, see Guidelines for all add-ons.
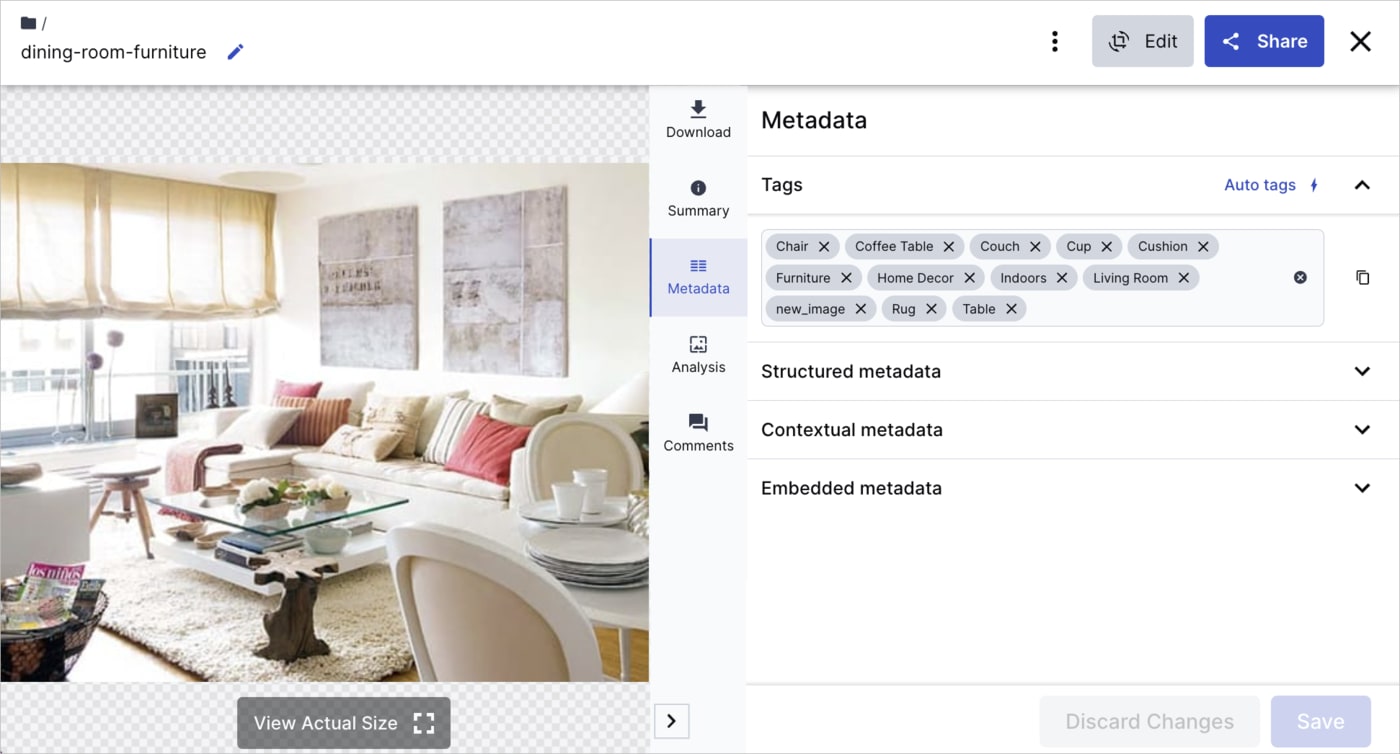
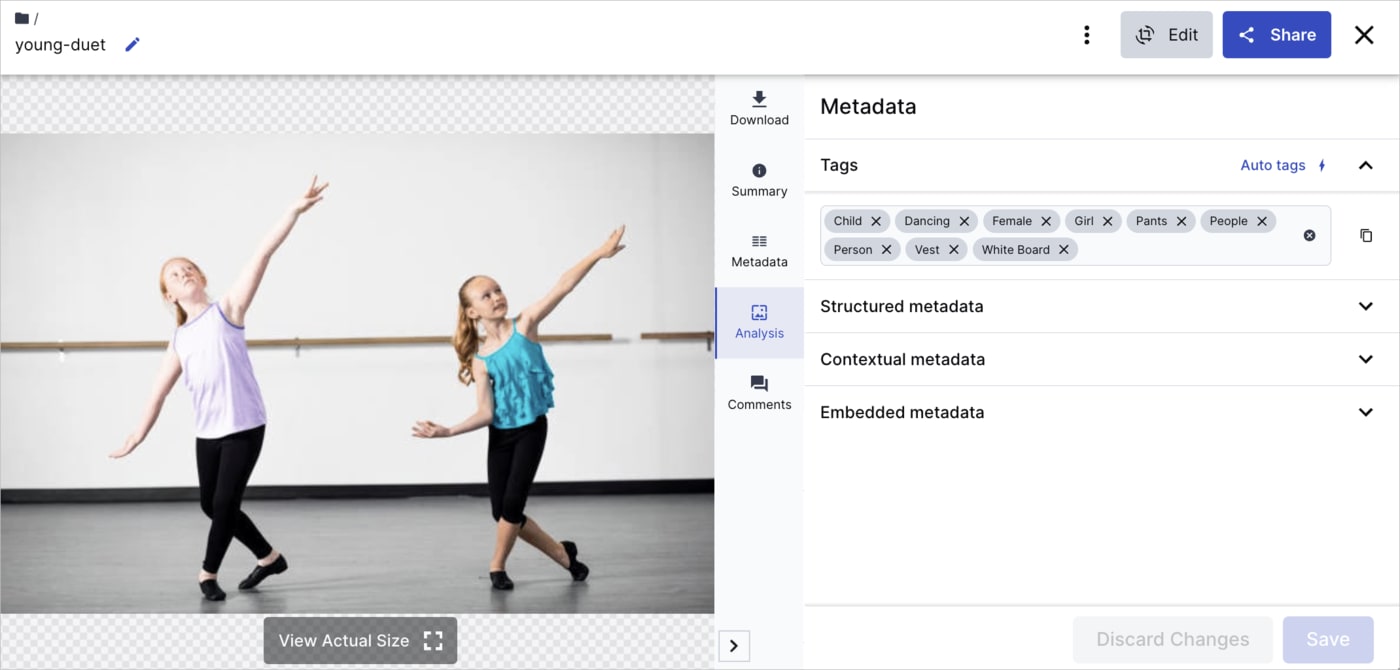
In the Metadata tab of the asset management drill-down page, verify the auto-generated tags under the Tags section.

To apply Google Auto Tagging to existing assets within the Media Library one at a time:
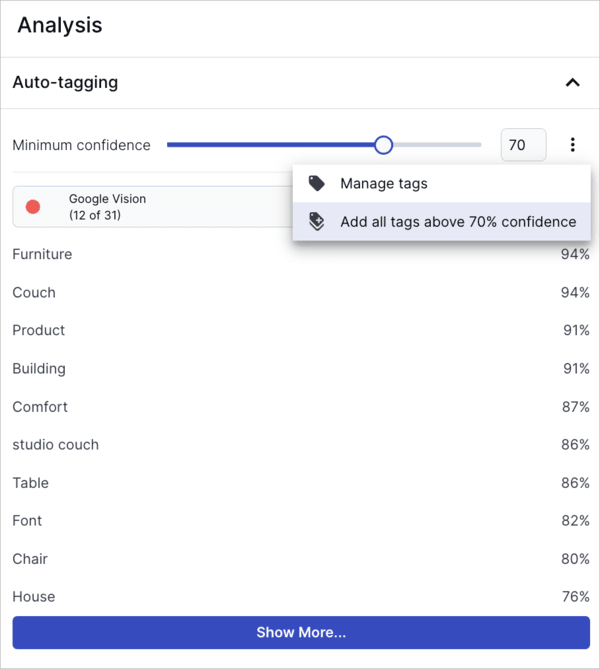
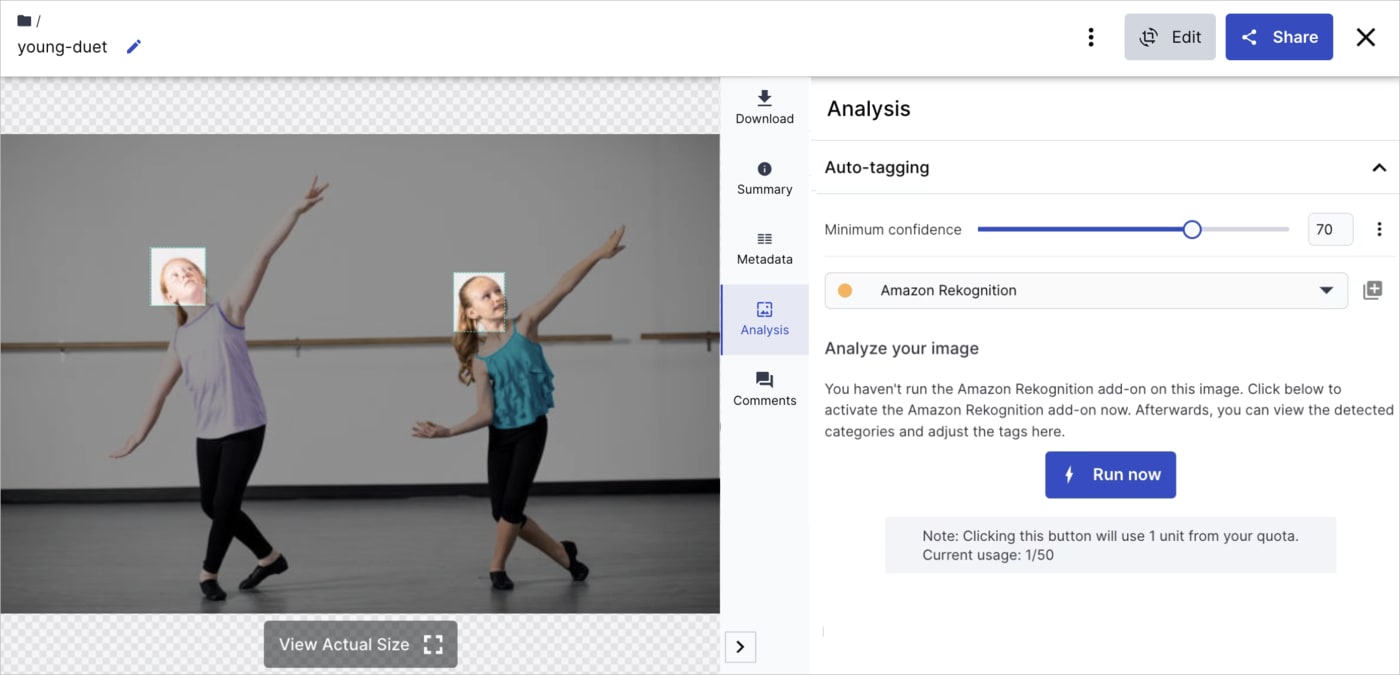
- Select the asset in the Media Library and then navigate to the Analysis tab in the asset management drill-down page.
- In the Auto-tagging section, select the Minimum confidence score of a detected category that should be suggested as a tag.
- Select Google Vision from the drop-down.
- Click Run now. A list of suggested tags is displayed.
- Take a look at the suggested tags. If they seem good, select the Add all tags... option from the (3-dots) options menu next to the Minimum confidence slider.

- View the auto-generated tags under the Tags section in the Metadata tab of the asset management drill-down page.
Amazon Rekognition Auto Tagging
The Amazon Rekognition Auto Tagging add-on automates the process of categorizing and tagging images by analyzing image data. This saves significant time and resources compared to manual tagging efforts. The analysis continuously improves over time, enhancing accuracy with the introduction of new concepts.
Contact your administrator to register for the Amazon Rekognition Auto Tagging add-on and optionally set up an upload preset. For instructions, see Add-ons in the Admin Guides.
To apply the add-on during upload:
Apply the upload preset configured by your administrator using the Upload widget. If the upload preset is a Media Library default, the add-on will be applied on upload automatically. For instructions, see Guidelines for all add-ons.
View the auto-generated tags under the Tags section in the Metadata tab of the asset management drill-down page.

To apply Amazon Rekognition Auto Tagging to existing assets within the Media Library one at a time:
- Select the asset in the Media Library and then navigate to the Analysis tab in the asset management drill-down page.

- In the Auto-tagging section, select the Minimum confidence score of a detected category that should be suggested as a tag.
- Select Amazon Rekognition from the drop-down.
- Click Run now. A list of suggested tags is displayed.
- Take a look at the suggested tags. If they seem good, select the Add all tags... option from the (3-dots) options menu next to the Minimum confidence slider.
- View the auto-generated tags under the Tags section in the Metadata tab of the asset management drill-down page.

OCR Text Detection and Extraction
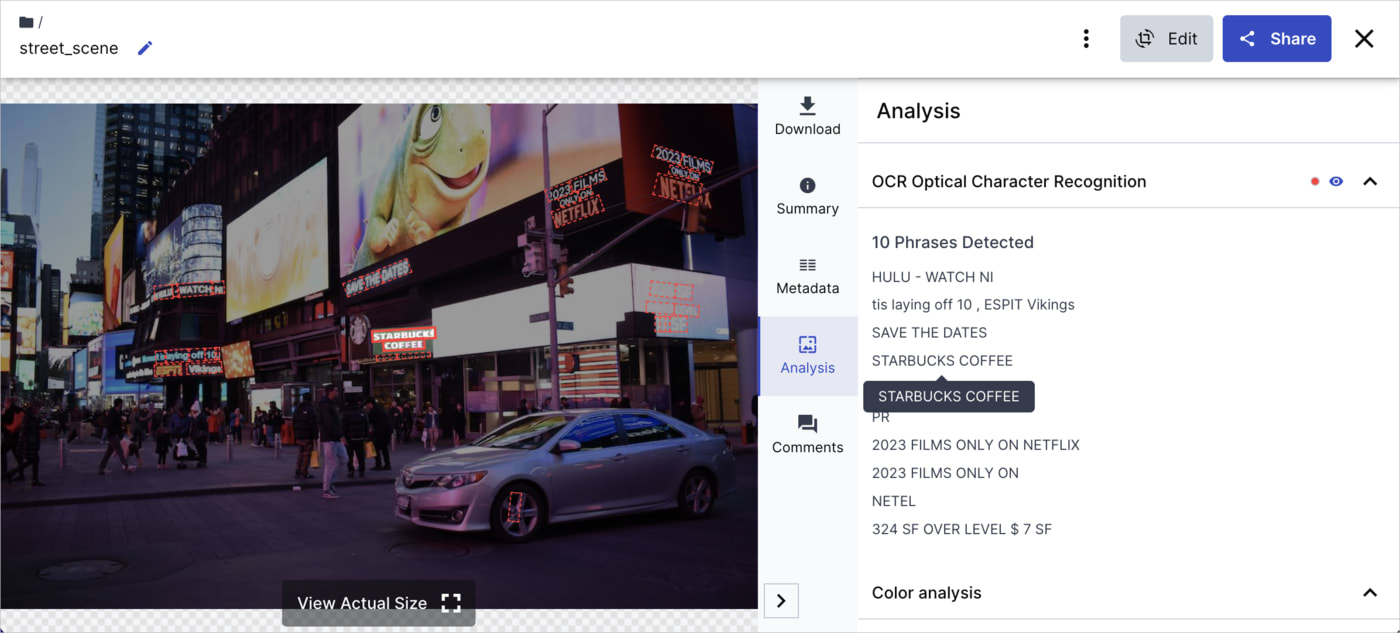
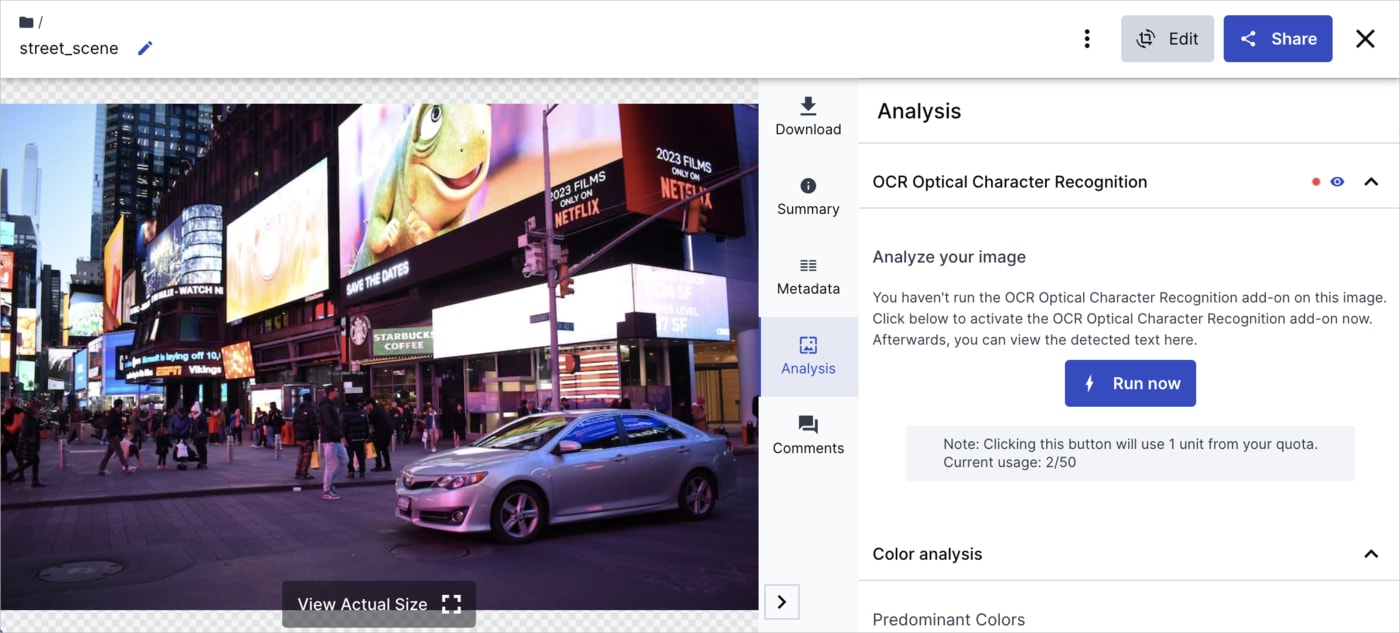
The OCR Text Detection and Extraction add-on extracts all identified texts from images, including multi-page documents like TIFFs and PDFs. Upon activation through an upload preset or within the Analysis tab of asset management drill-down page, you can access and review all of the detected texts in the Analysis tab.
Contact your administrator to register for the OCR Text Detection and Extraction add-on and optionally set up an upload preset. For instructions, see Add-ons in the Admin Guides.
To apply the add-on during upload:
Apply the upload preset configured by your administrator using the Upload widget. If the upload preset is a Media Library default, the add-on will be applied on upload automatically. For instructions, see Guidelines for all add-ons.
View the extracted texts in the OCR Optical Character Recognition section in the Analysis tab of the asset management drill-down page. Hover over each text to see it highlighted in the image.

To apply OCR Text Detection and Extraction to existing assets within the Media Library one at a time:
- Select the asset in the Media Library and then navigate to the Analysis tab in the asset management drill-down page.

- In the OCR Optical Character Recognition section, click Run now. The extracted texts are displayed.
- Hover over each extracted text to see it highlighted in the image.
Aspose Document Conversion
Aspose is a leading vendor of development components, including a powerful set of file management and conversion products. Cloudinary provides an add-on for using Aspose's Office document conversion capabilities, fully integrated into Cloudinary's image management and transformation pipeline.
With Aspose's Document Conversion add-on, you can extend Cloudinary's powerful format conversion and image transformation capabilities with automatic conversion of your Microsoft Office documents, spreadsheets and presentations to PDF documents and image thumbnails. Using Aspose's Document Conversion will result in both the original format and a PDF version being stored in your product environment.
Contact your administrator to register for the Aspose Document Conversion add-on and optionally set up an upload preset. For instructions, see Add-ons in the Admin Guides.
To apply the add-on during upload:
When uploading Microsoft Office files, apply the upload preset configured by your administrator using the Upload widget. For instructions, see Guidelines for all add-ons.
-
View both the original and the PDF versions in your Media Library. Notice that within the URL, the PDF is designated as an
imagewhereas the original Microsoft Office format is designated asraw. Both assets share the same public ID, with the Microsoft Office extension appended to the PDF's public ID, and have the same version number. For example:
 Ask AI
