Digital rights management
Last updated: Feb-09-2026
The Cloudinary Assets product provides ways to control digital rights for the assets in your product environment, including watermarks, asset expiration, access control, and roles and permissions.
In addition, Assets enterprise customers can request access to FADEL’s Rights Cloud platform directly within Cloudinary.
Access control modes
When working with Cloudinary's API, there are a few ways you can control who can access an asset and when:
Setting a delivery type: You can store an asset with an authenticated or private delivery type to control who can access it. If you apply this delivery type, the asset’s delivery status displays in the Media Library with an icon. However, you can only apply or change this setting programmatically via the API, not through the Media Library. For more details, see Media access control on delivery.
Applying the
access_controloption: You can apply an access control policy to an asset, allowing you to set whether it's publicly accessible or restricted, and optionally schedule when those settings apply. You can manage this option programmatically or directly from the Media Library.
The rest of this section focuses on working with the access_control option.
Setting access control from the Media Library
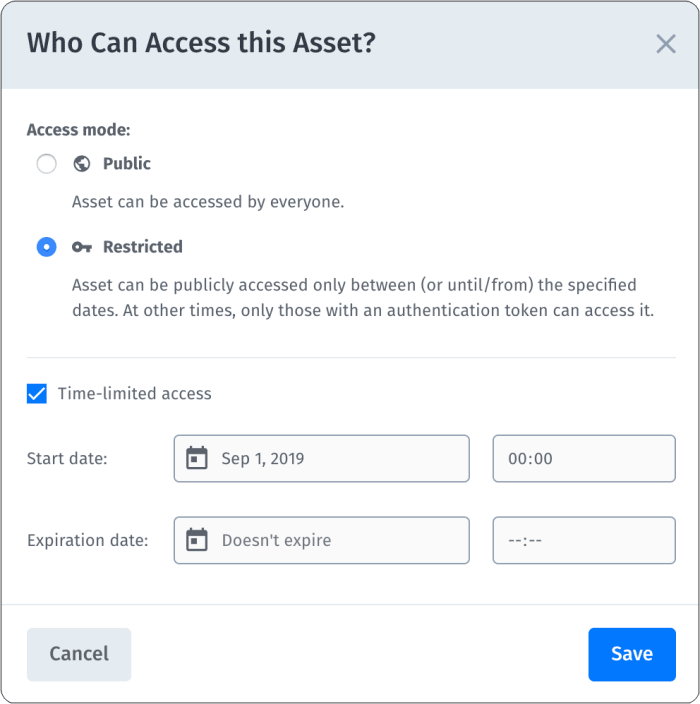
If the access control option is enabled for your account or product environment, a DAM administrator can change any asset's access control mode between Public and Restricted directly from the Media Library.
Setting an asset as Restricted means that people can only view that asset outside the Media Library if they have both the asset URL and an authentication token (a special type of validation for ensuring that a person requesting a URL is allowed to access it). Downloads are also restricted if you've turned on the Block restricted asset downloads option in the Asset Visibility page of the Media Library Preferences. The restrictions apply except during an optional time-limited date range when the asset is defined as publicly accessible.
If your users need to allow someone access to a restricted asset via a URL outside the time range that an asset is set as public, work with the developers on your team to generate and distribute the required authentication token. For more details on authentication tokens, see Authenticated access to media assets.
Time-limited restricted access can be useful:
- If you have an image or video that's intended for a special campaign or that shows a new product design, and it's imperative that no one shares the asset outside the organization prior to an official launch date.
- If you no longer want the public to be able to view or share an asset after the content is obsolete.
- If you need to enforce asset expiration dates. For more information, see Asset expiration.
When working with the access_control option, you can change assets from public to restricted, and add or change the time-limited access dates or times without changing the asset's URL in any way. This means that your developers don't need to change the URLs in their code when the access settings for that asset change.
To view or modify access control settings:
-
For a single asset, open the access control settings dialog box (shown above) by clicking the Public
 or Restricted
  access control button in one of the following locations:
- The Summary tab of the Media Library Preview pane
- The Asset Management Summary tab
-
For multiple assets, select the assets you want to update and choose Set Access Control from the (3-dots) option menu on the assets toolbar.
NoteYou can update access control for up to 300 assets at a time, including any derived assets generated from the originally selected assets. Derived assets are generated when you apply transformations and then use the resulting variations outside the Media Library (open in a browser tab, download, deliver in a website or app, etc.). From the dialog box that opens, you can view or change the access control mode between public and restricted, or adjust the time-limited access for restricted assets.
When updating multiple assets, you'll receive an email notification upon completion, including a list of assets that couldn't be updated, if there are any.
Uploading with access control
To apply the same access control settings to a set of assets uploaded to the Media Library, configure one or more upload preset(s) with the desired restrictions. Set these presets as the default Media Library upload presets, and Cloudinary automatically applies the required access control settings to all uploaded assets. You can designate different upload presets for video, image, and raw files.
If you don't set default Media Library upload presets, users can still apply restricted access control settings by uploading assets through the Media Library Upload Widget and selecting the appropriate Upload Preset.
Asset expiration
Managing asset expiration helps ensure outdated or licensed content isn't used beyond its intended timeframe. This is important for:
- Preventing accidental use of expired/licensed content, reducing legal risk.
- Keeping your DAM system clean by archiving or restricting outdated assets.
- Ensuring teams access only current, approved content.
As a basis for restricting expired assets, you can set access control mode to Restricted with a defined time range for being Public, label assets as expired using metadata fields, and move them to Expired folders. Cloudinary provides several tools to support these approaches, including:
- EasyFlows: Automate actions like restricting access, updating metadata, moving assets to folders, or sending expiration reminder emails based on metadata dates or folder activity.
- Saved searches: Track upcoming expirations by filtering on metadata dates. You can save and share these searches to keep teams aligned.
Automate expiration with EasyFlows
For added flexibility, use EasyFlows to automate expiration-related actions based on changes in structured metadata, folder location, or other triggers.
EasyFlows setup
- Navigate to MediaFlows by selecting the MediaFlows icon from the left sidebar of your Console. Then, click Create New and select EasyFlow.
- Select triggers and actions using the intuitive, real language instructions within the interface. You can follow the examples below.
- To use structured metadata for expiration, first create specific fields of the appropriate type, such as a
datefield labeled Expiration date or asingle selectfield labeled Visibility with list values like Visible and Hidden. For more information about creating structured metadata fields, see Structured metadata. - To read the full EasyFlows documentation, see Build an EasyFlow.
Examples
Here are a few ways to trigger expiration workflows automatically using EasyFlows:
Example 1: When an asset reaches its expiration date
When the value of a specified metadata field of type date, such as the Expiration date field, matches today’s date:
- Set the asset's access control to Restricted
- Move the asset to a restricted folder (e.g., Expired assets)
- Update the asset's structured metadata field value (e.g., Status = Expired)
- If you set the Expiration date field as the primary attribute, each asset's expiration date is visually marked to users in all Media Library views.
- Depending on your account setup, you can determine that Restricted access control also applies to downloading assets from the Media Library in the Asset Visibility page of the Media Library Preferences.
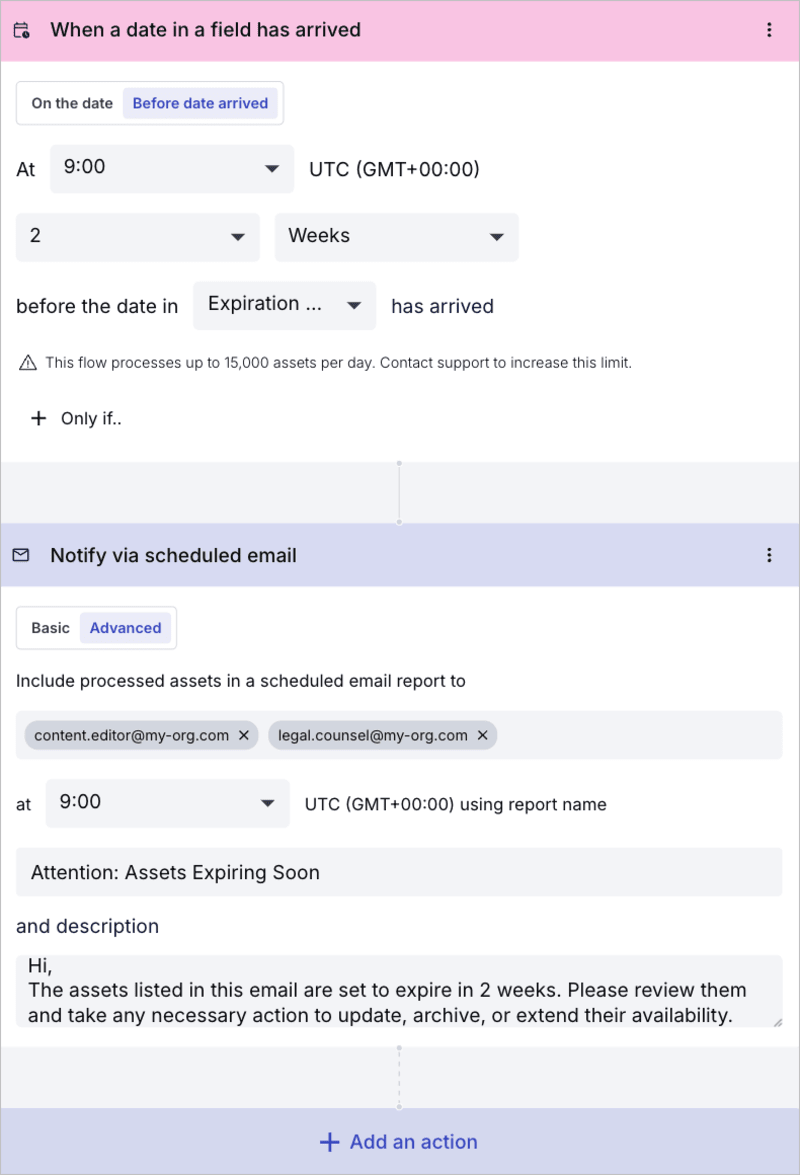
Example 2: When assets approach their expiration date
When the value of the expiration field falls within a set time range, such as 2 Weeks:
- Automatically send a summary email listing assets that are about to expire
- Customize the email content to notify the appropriate teams
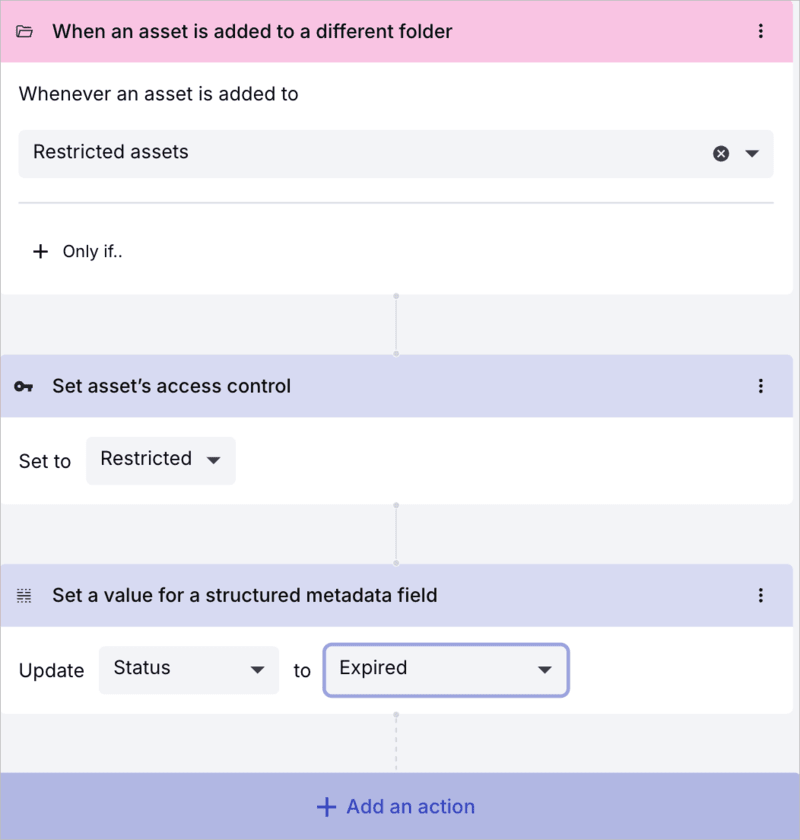
Example 3: When an asset moves to a specific folder
For example, when an asset moves to the Expired assets folder:
- Set access control to Restricted
- Update a structured metadata field value (e.g., Status = Expired)
Track expirations with saved searches
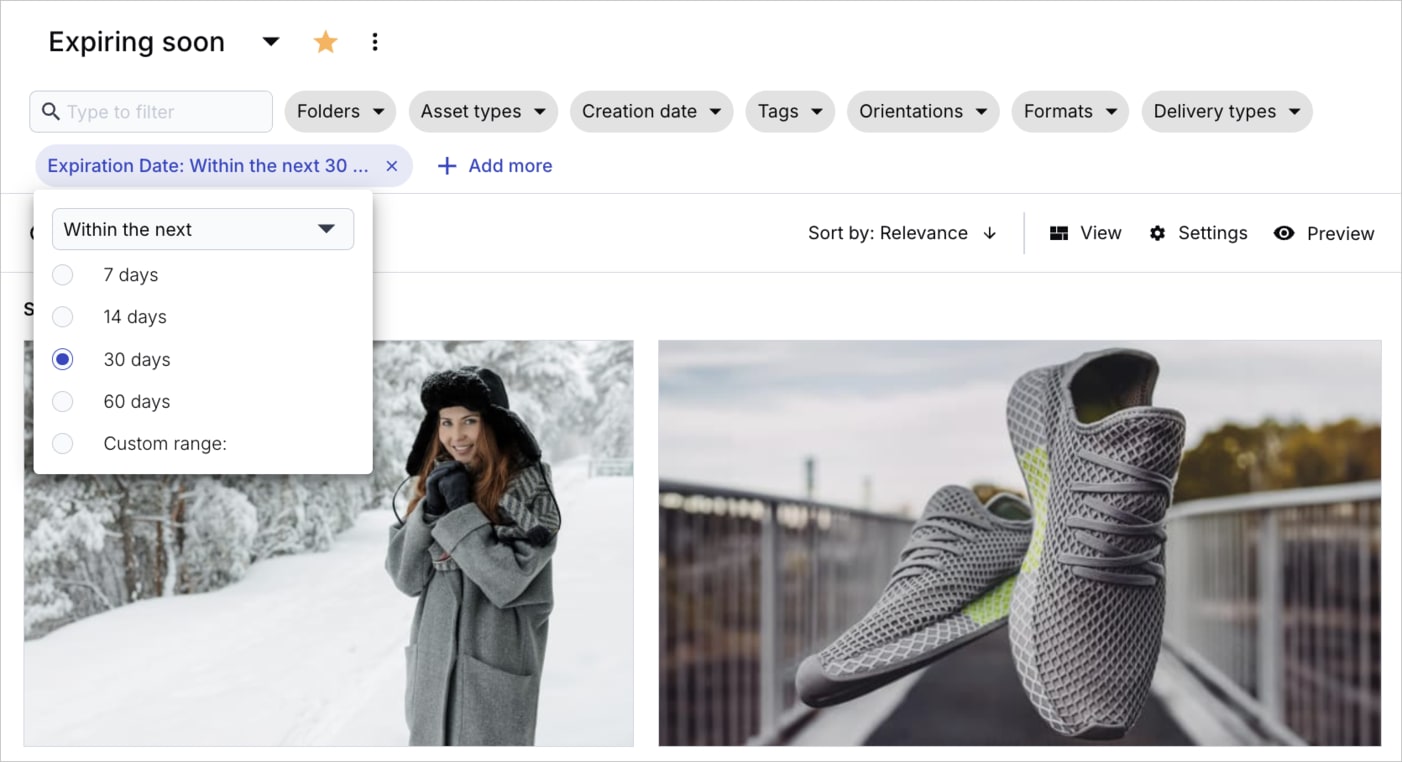
Users can create saved searches to help users easily keep track of assets that are about to expire. Saved searches provide a consistent, easy-to-access way to monitor time-sensitive assets without requiring users to manually rebuild search filters every time.
Example: Save a search called Expiring soon to display all assets expiring within 30 days:
- Go to the Assets tab of the Media Library.
- Click Add more to make sure the relevant structured metadata field (e.g., Expiration date) is visible.
- In the filters, click the structured metadata field you want to filter by (e.g., Expiration date), select Within the next, and select the range (e.g., 30 days).
- Click Save Search and give it a meaningful name.
- In the Save Your Search dialog box, you can select to Invite teammates if you want to make the saved search available to others.
- If you have an Assets Enterprise plan, you can display the saved search on your Homepage and in the left navigation menu by clicking the star next to its name to mark it as a favorite.
- Access your saved search anytime in the Advanced Search drop-down list.
- To use structured metadata in a saved search, first create specific fields of the appropriate type, such as a
datefield labeled Expiration date. - For more information about saved searches, see Saved searches.
Watermarks
Apply watermarks to your assets to help prevent unauthorized reuse and ensure branding or licensing requirements are visible.
There are a few ways to incorporate watermarks as part of your digital rights management strategy:
-
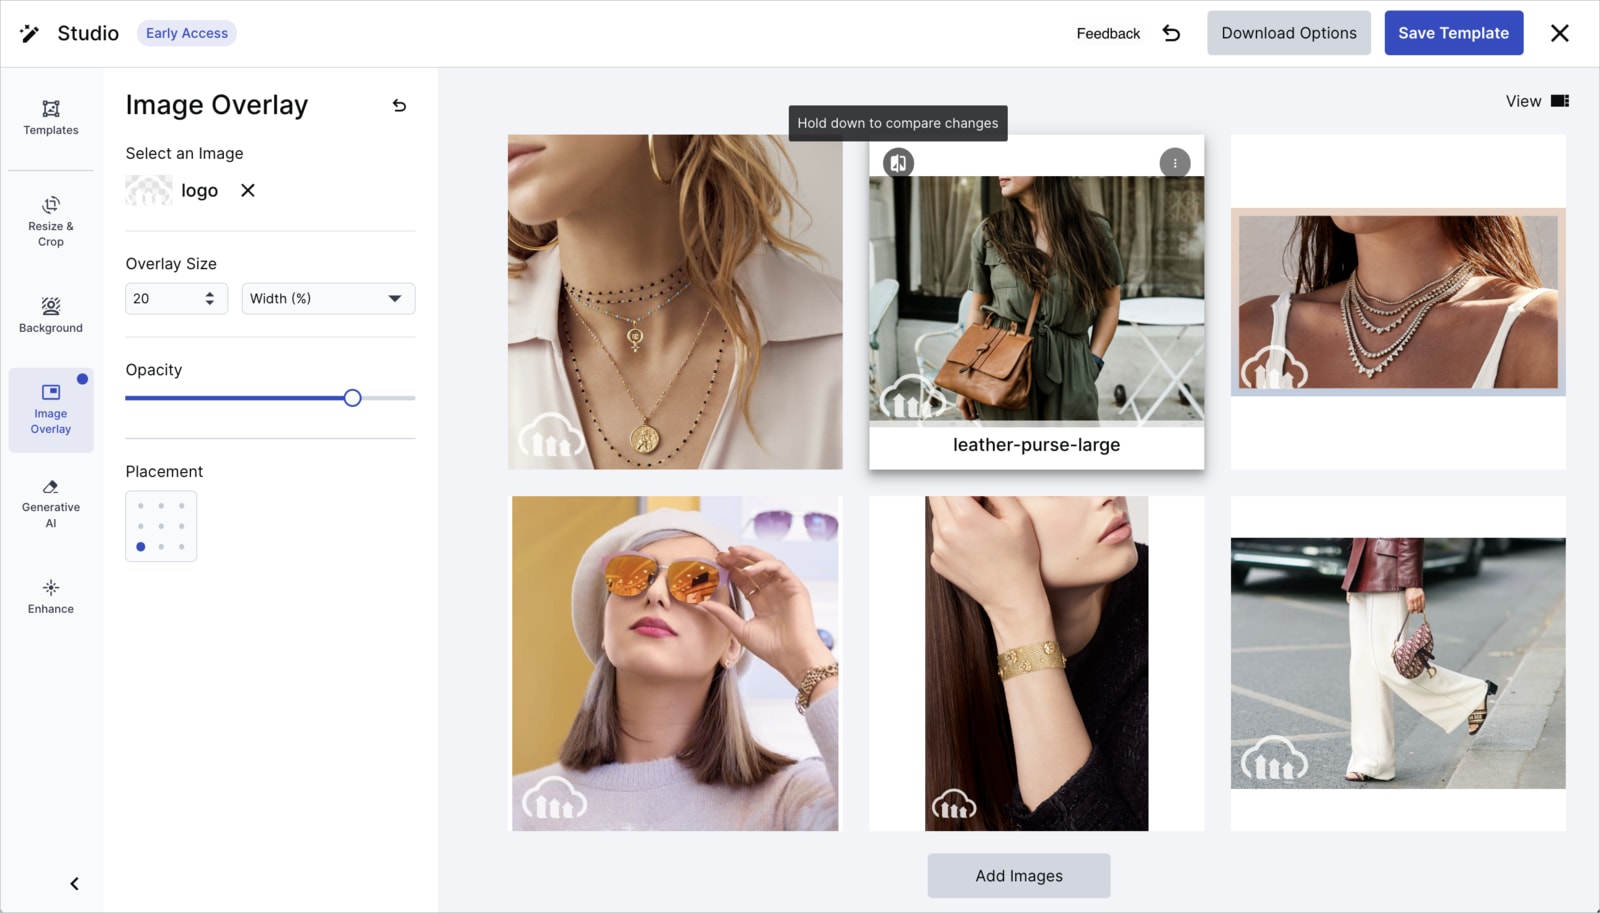
Transformation templates: Apply watermark overlays using named transformations. You can define and reuse these templates in the Image Overlay tab in Studio to ensure consistent application across assets.
Here's an example of managing watermarks in Studio:
For more information, see Studio. -
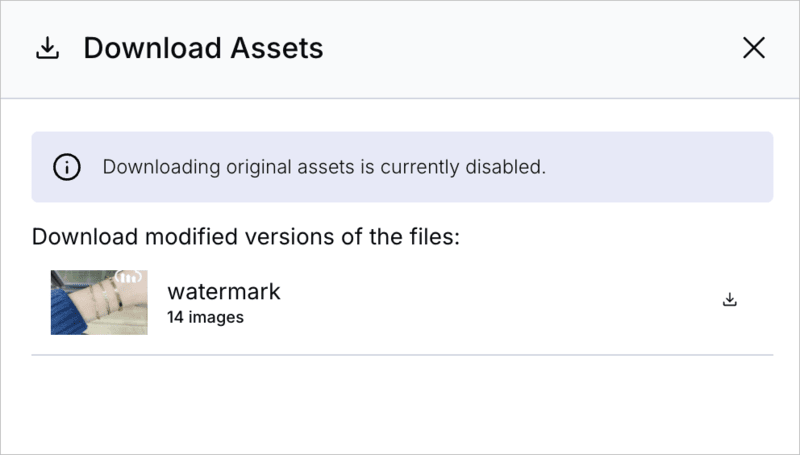
Collection webpages: When sharing collection webpages, you can prevent downloads of original assets and apply watermark transformations to all displayed versions.
Here's an example of a publicly shared collection webpage that only allows downloading watermarked assets:
For more information including how to set this up, see Sharing collections externally via public links. -
Portals: Use Portals to display only watermarked versions of assets, especially when asset protection is a priority for external sharing.
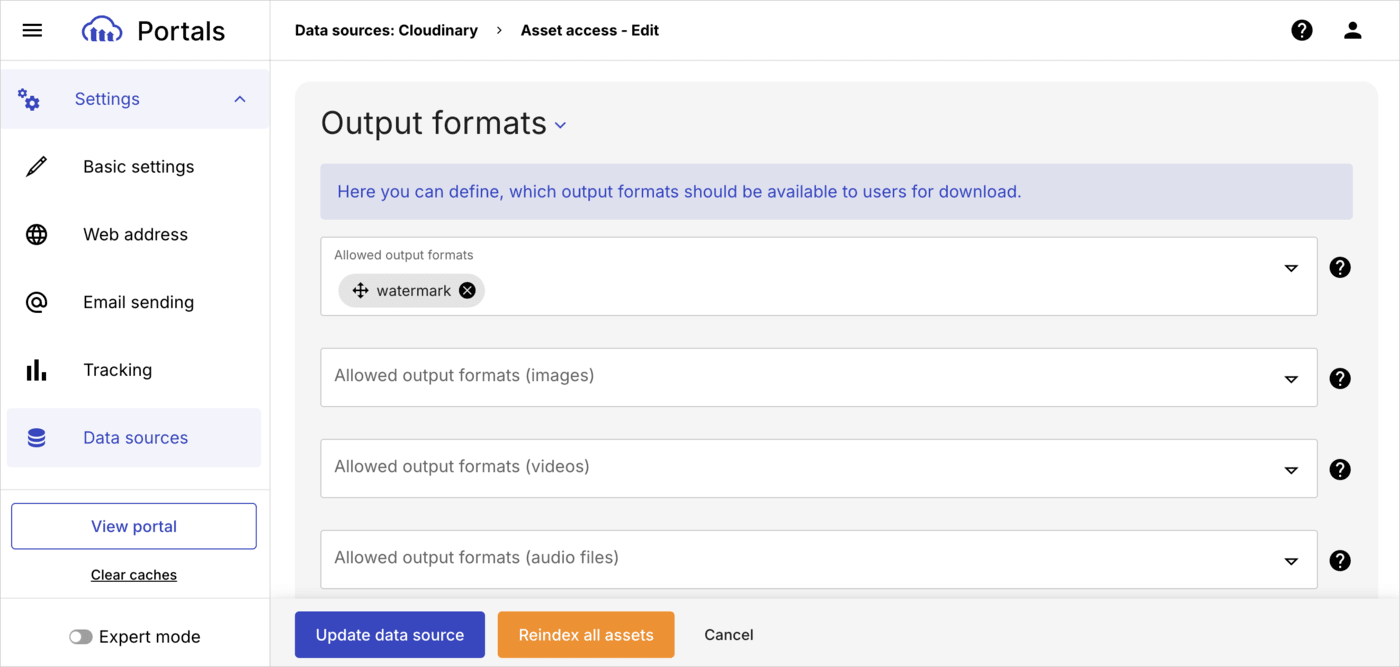
To allow only watermarked asset downloads in your portal, select the Allowed output format that applies a watermark transformation template.
To set this up:
- In the left navigation, expand Settings and select Data sources.
- Select Asset access for the relevant Cloudinary data source.
- Scroll down to the Output formats section and choose the format that applies the watermark.
For more information, see Portals.
Roles and permissions
Controlling who can view, edit, or share assets is a core part of digital rights management. By assigning roles and setting folder-level permissions, you can ensure only the right people have access to the assets they need for their work—nothing more.
This helps:
Prevent unauthorized access or changes to licensed or restricted assets
Support team-specific workflows and content governance
Reduce the risk of misuse or accidental distribution
For more information, see User and group management.
Manage access to assets on your website programmatically
Cloudinary offers several options for protecting your assets at the delivery stage. For more information on how developers can manage digital rights when delivering media on your website, see Media access methods.
 Ask AI
