Shopify App user guide
Last updated: Apr-23-2025
In place of the deprecated Shopify integration, we invite you to try MediaFlows as a fresh way to connect your Shopify assets with Cloudinary. MediaFlows, a low-code workflow engine, enables seamless integration between Cloudinary and third-party services like Shopify, empowering you to streamline media processing across platforms. For more information, see the MediaFlows Sync assets to Shopify page.
For customers on Enterprise plans: Cloudinary now offers an upgraded Shopify integration through our professional services team. Contact our sales team to learn more about this new upgraded offering and how it can benefit your Shopify integration needs.
This user guide explains how to get started with the Cloudinary app for Shopify. You will learn how to upload your product media from Shopify to Cloudinary, add media from Cloudinary into your themes, and start seeing the benefits of optimized, responsive and customized media on your storefront.
- Operational concepts
- Installation
- Pre-requisites
- Upload your Shopify product media to Cloudinary
- Display images and videos on your site
- Verify that media is delivered from Cloudinary
- Change your Cloudinary domain
- Manage product media
- Uninstall the Cloudinary app for Shopify
- Appendix A - tags, metadata and metafields
Operational concepts
This animation shows how the Cloudinary app for Shopify operates at a high level:
| As a Shopify user, you create a product and upload your images and videos to that product in Shopify. You can add tags to the product and decide on the order of the images in Shopify to determine the main image for the product. | |
| The app gives you the ability to upload each of those media files to your Cloudinary Media Library with the push of a button. The assets in Cloudinary are tagged, and metadata fields are set, with information provided by Shopify, such as the product handle and tags set on the product. | |
| Cloudinary responds back to Shopify with information about the assets, which is stored in product metafields in Shopify. | |
| The Cloudinary app Liquid snippets reference the metafields to display the images and videos on your Shopify store. You need to include these snippets in the appropriate places in your theme code. The media is delivered from Cloudinary in the optimal way for the viewing device. |
See also the Shopify app video tutorial.
Installation
The official Cloudinary integration for Shopify is available as a Shopify custom app that can be installed in your Shopify store. Enabling the app for your store requires help from our support team.
Create a support request stating your myshopify URL for help installing and enabling the app in your store.
Pre-requisites
These instructions assume that:
- You have a Cloudinary account. If you don't have one yet, you can quickly register for free.
- You already have a store set up in Shopify. If you don't, you should do that first.
- You have the Cloudinary app installed in Shopify.
- You've linked the app to Cloudinary. If not:
- In Shopify, open the Cloudinary app from the Apps menu item.
- Click Connect to Cloudinary to log into Cloudinary.
Upload your Shopify product media to Cloudinary
To unleash the power of the images and videos on your storefront, you must first upload your product media to Cloudinary.
Run these steps to upload your Shopify product media to Cloudinary, both when you're getting started and also when you add new product media to Shopify:
- In Shopify, open the Cloudinary app from the Apps menu item.
-
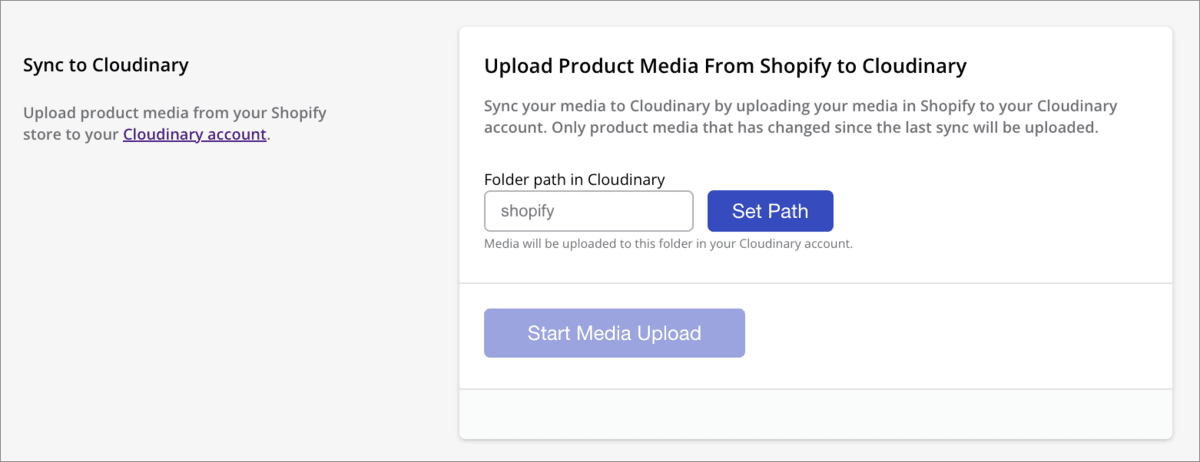
(First time only:) In the Sync to Cloudinary section of the Settings page, enter the folder path in Cloudinary to which you want to upload your media from Shopify. If the path doesn't exist in Cloudinary, it will be created when media is uploaded. Once set, you cannot change this.

-
Click Start Media Upload to start uploading your product images and videos from Shopify to Cloudinary. This process may take some time.
CautionDo not update any product assets in Shopify while the upload is in progress.
You can see the uploaded assets in your Cloudinary Media Library in the folder that you specified. For each product, a new folder is created, which contains the product assets.
As part of the sync feature, tags and metadata are set on the assets in Cloudinary, and metafields are populated in Shopify. For details, see Appendix A - tags, metadata and metafields.
- Remember to use this sync feature each time you add new product media to Shopify or change an existing product's media. Only new or modified assets are uploaded to Cloudinary (this includes changes to metadata such as the alt text, tags or position).
- Videos that you have associated with your product via links, for example to YouTube or Vimeo, are not synced to Cloudinary. You can manually upload these videos to Cloudinary, then use Cloudinary Media Manager to associate them with products in Shopify.
Display images and videos on your site
Whether you're using an Online Store 2.0 theme or a vintage theme, you can add Cloudinary images and videos to your site by editing your theme's code.
On installation, the Cloudinary app adds various Liquid snippets to your store's theme. The snippets provide the functionality to display images and videos on your site:
- cloudinary-image-tag.liquid: Builds an image tag with multiple sources to render product images on your site lazily, applying transformations, and with appropriate responsive breakpoints set.
- cloudinary-pgw.liquid: Renders the Product Gallery Widget on a page to display product images and videos in a customizable, responsive and accessible user interface.
- cloudinary-product-media.liquid: Uses cloudinary-image-tag or cloudinary-video-tag to render product images or videos on your site, with optional transformations, and automatically optimized for quality and format.
- cloudinary-url.liquid: Lets you build a Cloudinary URL to deliver an image or video on your site, from an asset's public ID and any transformations that you want to apply.
- cloudinary-video-tag.liquid: Renders a video on your site, applying transformations, either using the video player, if enabled, or by building a video tag.
You can use these snippets in your theme's code, referencing them in other snippets or sections.
Add Cloudinary Liquid snippets to a new theme
If you change the theme that you're using for your store, and already have the Cloudinary app installed, you need to add the Cloudinary snippets into the active theme. You can do this by clicking Get Latest Snippets in the Settings page of the app.
You can use the same mechanism to update the snippets to the latest code issued by Cloudinary.
Display media using the Cloudinary Product Gallery
Include images and videos on your product description pages using the highly customizable Cloudinary Product Gallery.
To display the Product Gallery on a product page follow the steps below.
In the relevant Liquid template in your theme's code:
- Avoid duplicating images and videos on your page by removing any code from your current theme that already displays them on the page.
-
Assign the
productmediaJSON from the metafields to a local variable: -
Render the Product Gallery where you want it to appear on the page, using the cloudinary-pgw.liquid snippet and passing the local variable from step 1:
Set the look and feel of the Product Gallery
To set the look and feel of the Product Gallery:
- Use the Product Gallery demo to customize the Product Gallery as required, then copy the JSON from the Code tab.
- In Shopify, go to your active theme and click Customize.
- Click Theme settings and scroll to the CLOUDINARY settings.
- In Product Gallery configurations, paste the copied JSON.

Display product media on a page
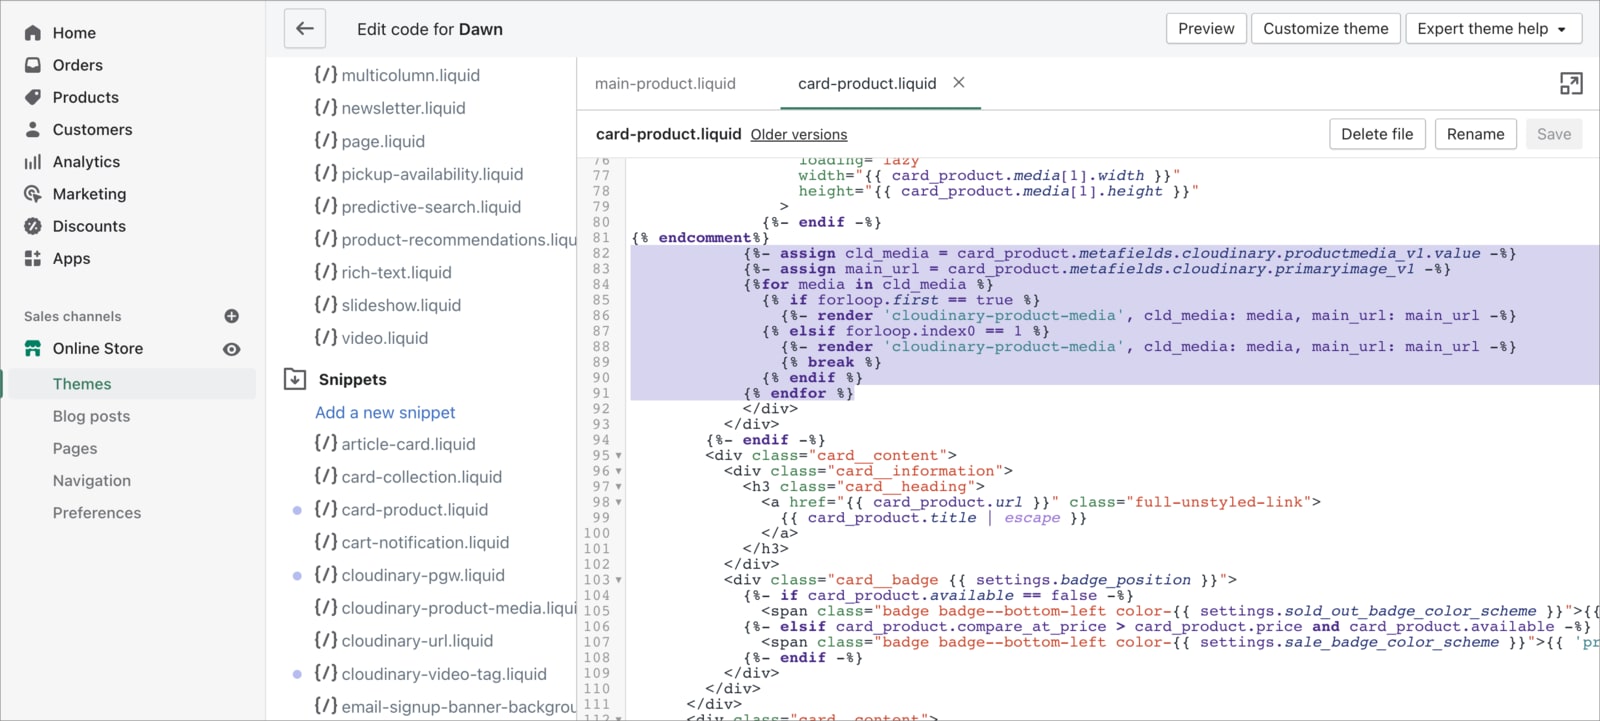
You can display product media on a page without using the gallery, by using the cloudinary-product-media.liquid snippet.
In the relevant Liquid template in your theme's code:
- Avoid duplicating images and videos on your page by removing any code from your current theme that already displays them on the page.
-
Assign the
productmediaJSON from the metafields to a local variable: -
Assign the
primaryimagestring from the metafields to a local variable: -
You may want to iterate through the media items in your product media, in which case, set up a
forloop to render all the media for a product:
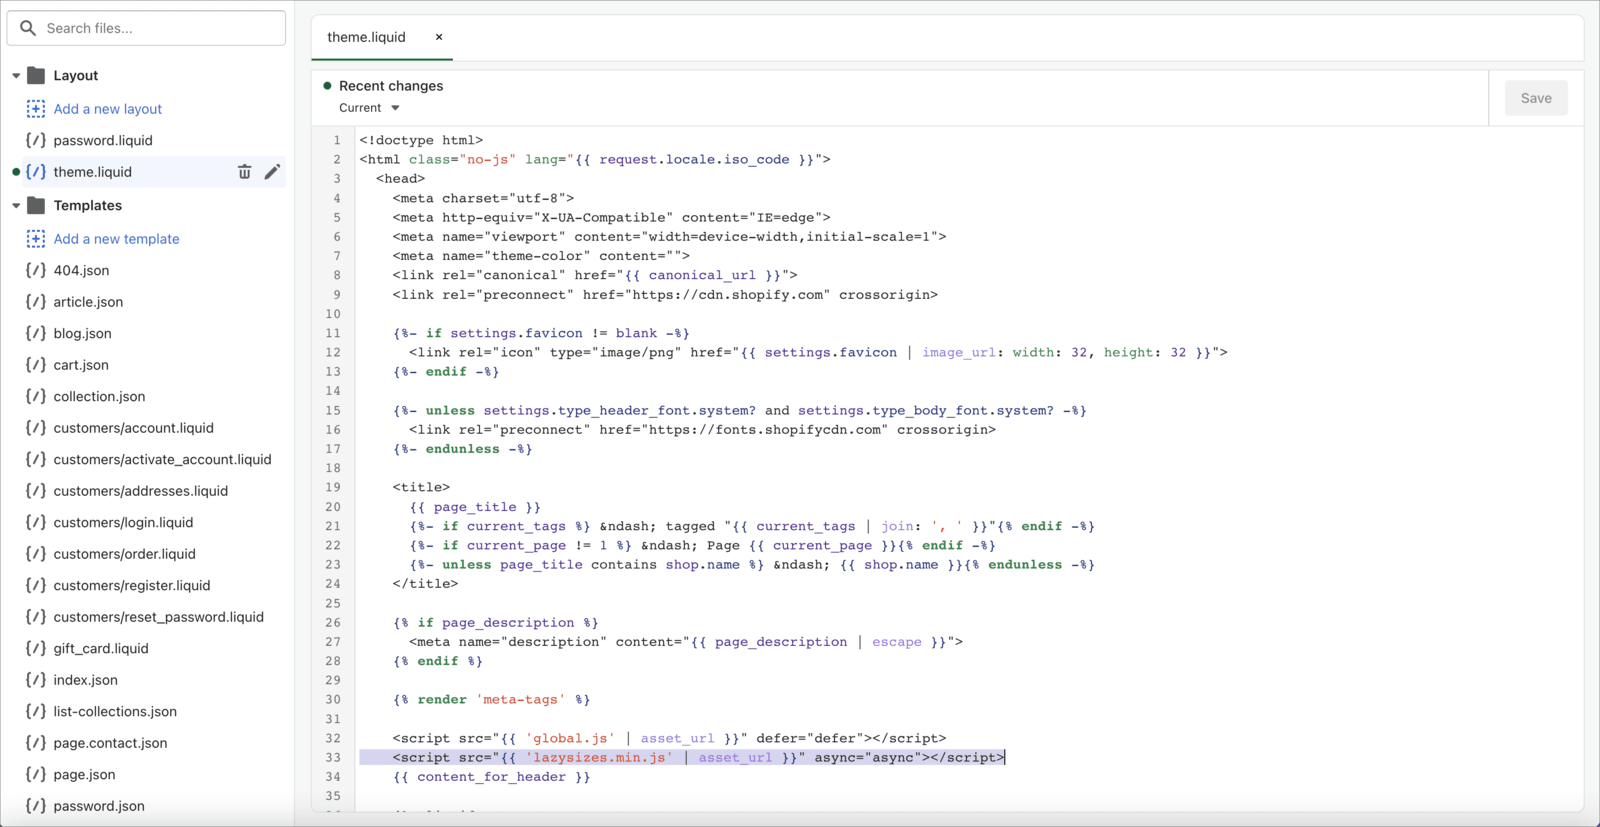
You also need to enable responsive functionality, as follows:
-
In the theme.liquid file, in the
<head>section, add this line of code:
See also: Apply transformations to product media.
Display any Cloudinary media on page
If you've got images or videos stored in Cloudinary that aren't part of a product, you can use the cloudinary-url.liquid snippet to build a URL that you can then use as the src attribute for an image or video tag in your templates.
You can apply Cloudinary transformations to optimize your media, add overlays, apply visual enhancements and more, by passing the necessary URL syntax in the transformations parameter.
For example, to optimize for quality (q_auto) and format (f_auto):
Apply transformations to product media
The default transformations added to product images and videos by the cloudinary-product-media.liquid snippet are auto format and auto quality.
You can apply additional Cloudinary transformations to enhance your media, add overlays, apply visual enhancements and more, by passing the necessary URL syntax to the cloudinary-product-media.liquid snippet (in the image_transformations and video_transformations parameters).
For example, to round the corners (r_100) and apply an effect to improve the appearance of images (e_improve), and remove audio from videos (ac_none):
Make product images responsive
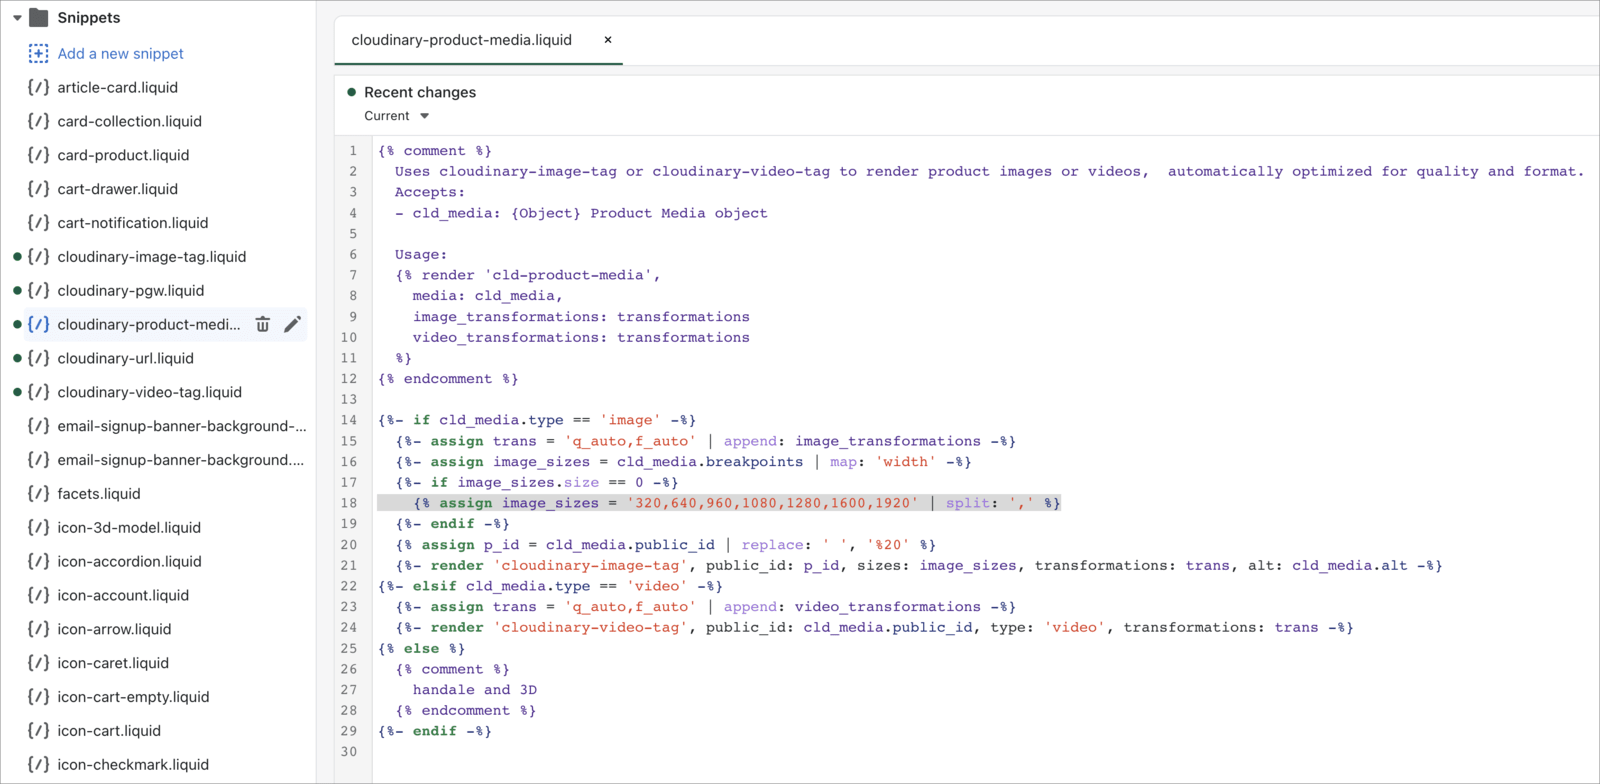
A default set of responsive breakpoints is used by the cloudinary-product-media.liquid snippet to ensure that the optimal image size is delivered to each user based on the available space on their viewing device, be that mobile, desktop or other.
You can change the set of breakpoints by editing the image_sizes variable in the snippet.
Display videos using Cloudinary's Video Player
Enable Cloudinary's customizable HTML5-based Video Player to display videos on your storefront in the way you want.
To enable and customize the Cloudinary Video Player on your site:
- In Shopify, go to your active theme and click Customize.
- Click Theme settings and scroll to the CLOUDINARY settings.
- Select the Use the Cloudinary Video Player for product videos checkbox.
- Use the Video Player Studio to customize the Video Player as required, then copy the JSON from the code box.
- Paste the JSON into Video Player configuration.
-
You can also set the version of Video Player JavaScript and CSS that you want to use, but it is recommended to use the defaults.
 NoteThe Cloudinary app supports the Video Player version 1.09 and above.
If you do not enable the Video Player then videos are displayed using HTML video tags.
Verify that media is delivered from Cloudinary
You can inspect media URLs on your site using browser tools. For example, in Chrome:
- Right-click an image and select Inspect.
- In the panel that appears, click Network.
- Select the Filter icon and click Img.
- Reload the page, and see the images being requested.
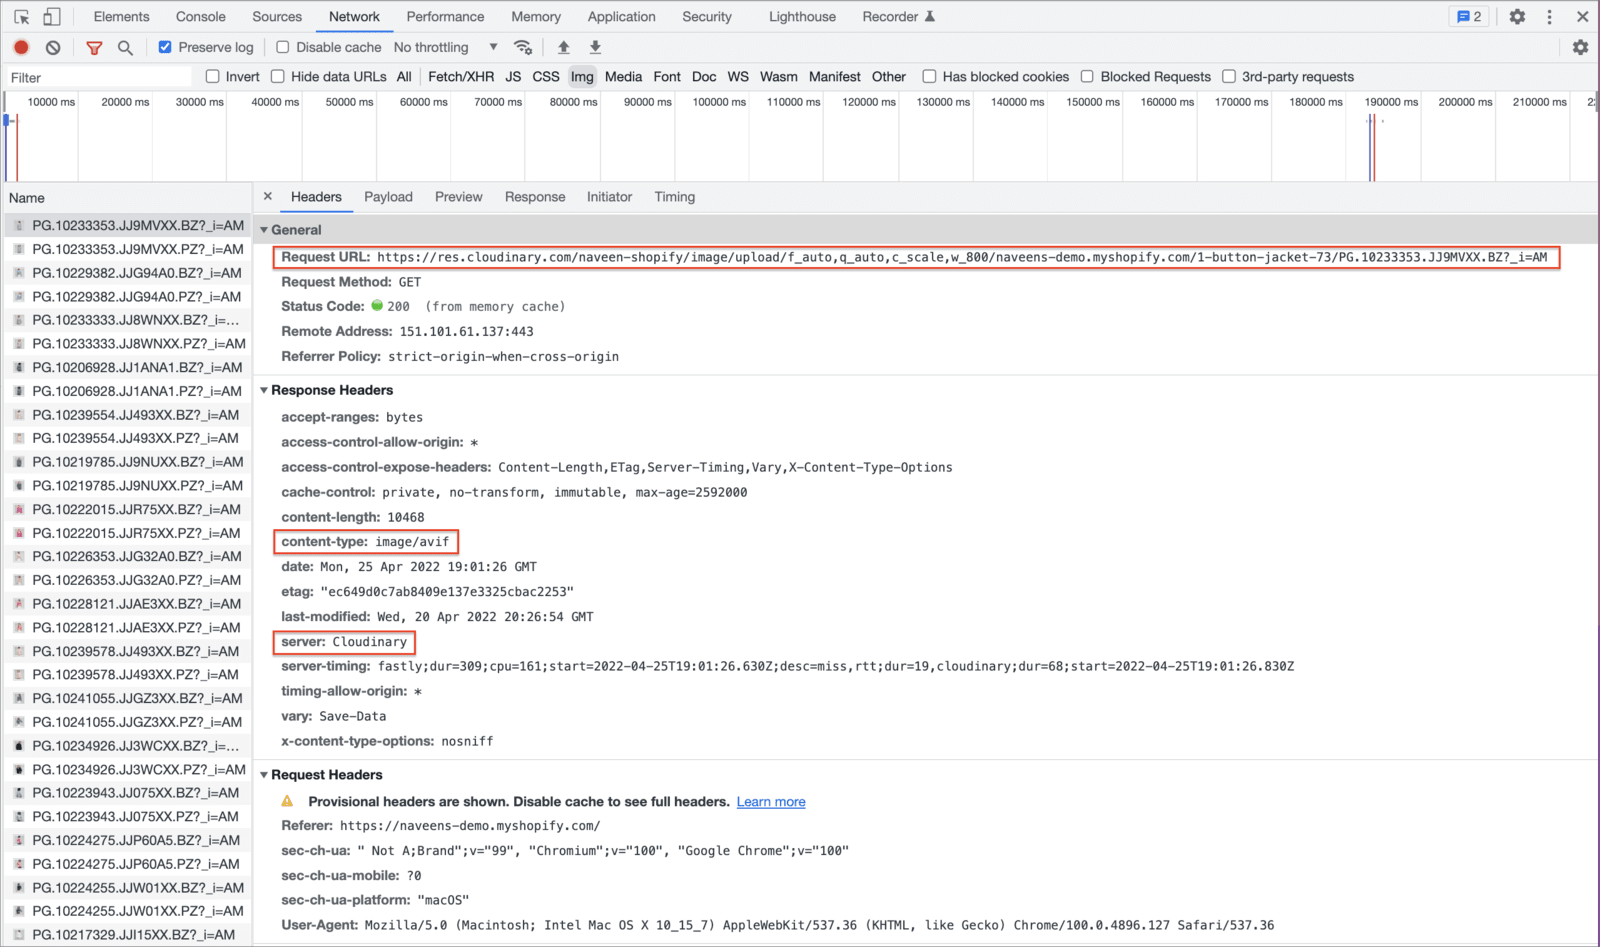
- Click the name of an image to see the details:

If the image is being delivered from Cloudinary, you will see:- The Request URL showing the Cloudinary delivery URL with the applied transformation (
f_auto,q_auto,c_scale,w_800in the above screen capture). - The content-type most likely being different from your original due to automatic format being applied (AVIF, rather than JPG in this case).
- The server stating Cloudinary.
- The Request URL showing the Cloudinary delivery URL with the applied transformation (
Change your Cloudinary domain
Cloudinary allows you to set up a private CDN or custom delivery hostname (CNAME) to replace the default Cloudinary domain used for asset delivery URLs.
You can see the domain that the Cloudinary Shopify app expects in the Cloudinary app settings. If you change the Cloudinary domain after you've logged into the app, you need to update the app by clicking the Update Domain button in the Cloudinary Domain section of the app settings.
Manage product media
There are two different ways to manage your product media with the Cloudinary app for Shopify. You can choose to either:
- Continue with Shopify as the source of product media: Upload and manage your media in Shopify, but continue to sync to Cloudinary for fast media delivery with the ability to transform and optimize media on the fly.
- Or, make Cloudinary the source of product media: Manage all your media in Cloudinary, leveraging the full DAM capabilities of the Assets product, along with fast delivery and on-the-fly transformation and optimization..
Continue with Shopify as the source of product media
If you don't want to use Cloudinary as the source of your media, you can continue to add media to your products in Shopify in the usual way. You need to remember to use the sync functionality after adding or making changes to your product media.
Make Cloudinary the source of product media
Initially, you need to migrate your Shopify product media to Cloudinary, as explained in Uploaded your Shopify product media to Cloudinary.
Following this, you can choose to make Cloudinary the source of product media, by storing all your assets in your Cloudinary Media Library, and adding them to Shopify via the Cloudinary Media Manager.
You can access the Cloudinary Media Manager by selecting a product from the Products page, then clicking More actions > Cloudinary Media Manager.
Click Add Media to open the Cloudinary Media Library. You can then search for and select the media you want to insert. If the media is not already in your Media Library, you can upload it to Cloudinary from here too.
The Cloudinary Media Manager shows any media that you uploaded to Cloudinary during the initial migration, in addition to media added directly from Cloudinary.
You can use the Cloudinary Media Manager to preview the media, update the alt text for each item, as well as delete media that you no longer require.
You can also rearrange the order of media here, which determines the order of media shown in the Product Gallery.
- Media deleted from Shopify is not automatically deleted from the Cloudinary Media Library.
- You can only delete media that you've added from Cloudinary. If media was originally added within Shopify, you cannot delete it here.
- If you make any changes to the media in Cloudinary, these changes will be reflected in your Shopify media and may result in Shopify media being overwritten.
- Images inserted through the Cloudinary Media Library are also uploaded to Shopify, however videos are not. For both images and videos, references are maintained in the Shopify metafields.
- The order of media in the product management page may not reflect the order of media in the Cloudinary Media Manager.
- If you do happen to add media to your products through the usual Shopify interface, then you need to remember to use the sync functionality.
Commonly used Media Library features
When you click Add Media to open the Cloudinary Media Library, you may be asked to log in to Cloudinary. You can access almost all of the same functionality that is available in the full Media Library in your Cloudinary Console.
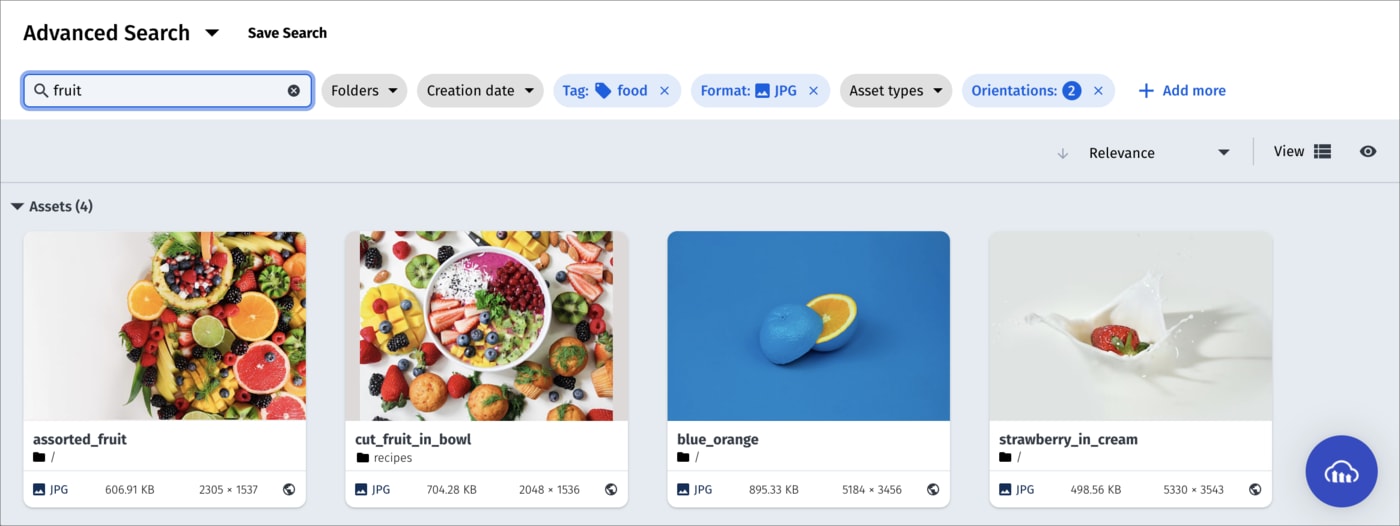
Advanced Search
The Advanced Search feature lets you search by filters such as tags, metadata, format, orientation, resolution, or (if supported for your account), even by image analysis characteristics, such as prominent colors, presence of faces, or image location.
For more details, see Advanced Search in the Assets user guide.
Collections
Collections are ad-hoc groupings of assets. Assets can be added to and from collections without affecting or moving the asset itself, and assets can be included in multiple collections. You can create your own collections (assuming you have the required permissions) or other Cloudinary users can share collections with you. You can also share collections with external stakeholders by sending a URL to a dedicated collection webpage, which is available to those with a link during an optionally specified date range.
Collections can often be a convenient way to group all assets that you might want to use on a particular project or campaign.
For more details, see Collection management in the Assets user guide.
Tagging and metadata
Assets that have tags and other metadata enable all Media Library users to better organize and search for assets in the Media Library.
In addition to the option to specify tags when you upload an image or video, you can also add or edit tags and other metadata after images and videos are uploaded via the embedded Media Library, and even set the same tags or metadata on multiple images and videos at once.
You can view and set this data using the Asset toolbar or in the Asset management page.
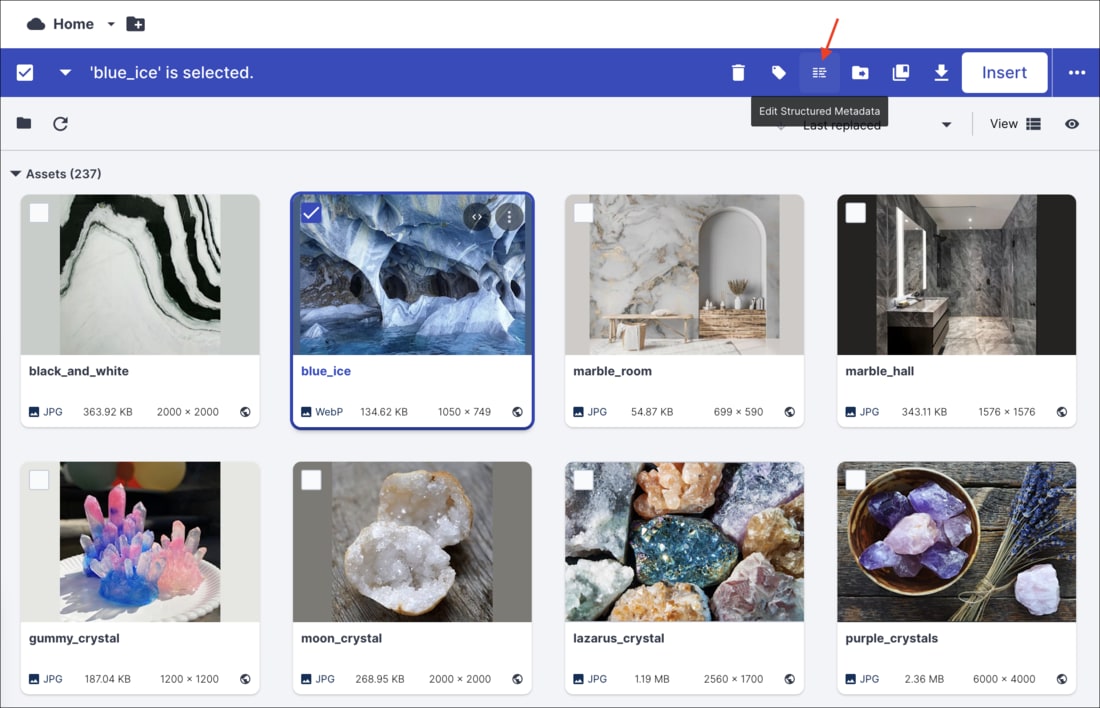
Asset toolbar
You can set tags and metadata for several selected assets at once from the Media Library using the Tag or Edit Structured Metadata options in the asset toolbar. You can Edit Contextual Metadata via the (3-dot) options menu. The type of metadata available for editing (contextual or structured) depends on the setup for your organization's account.
Asset management page
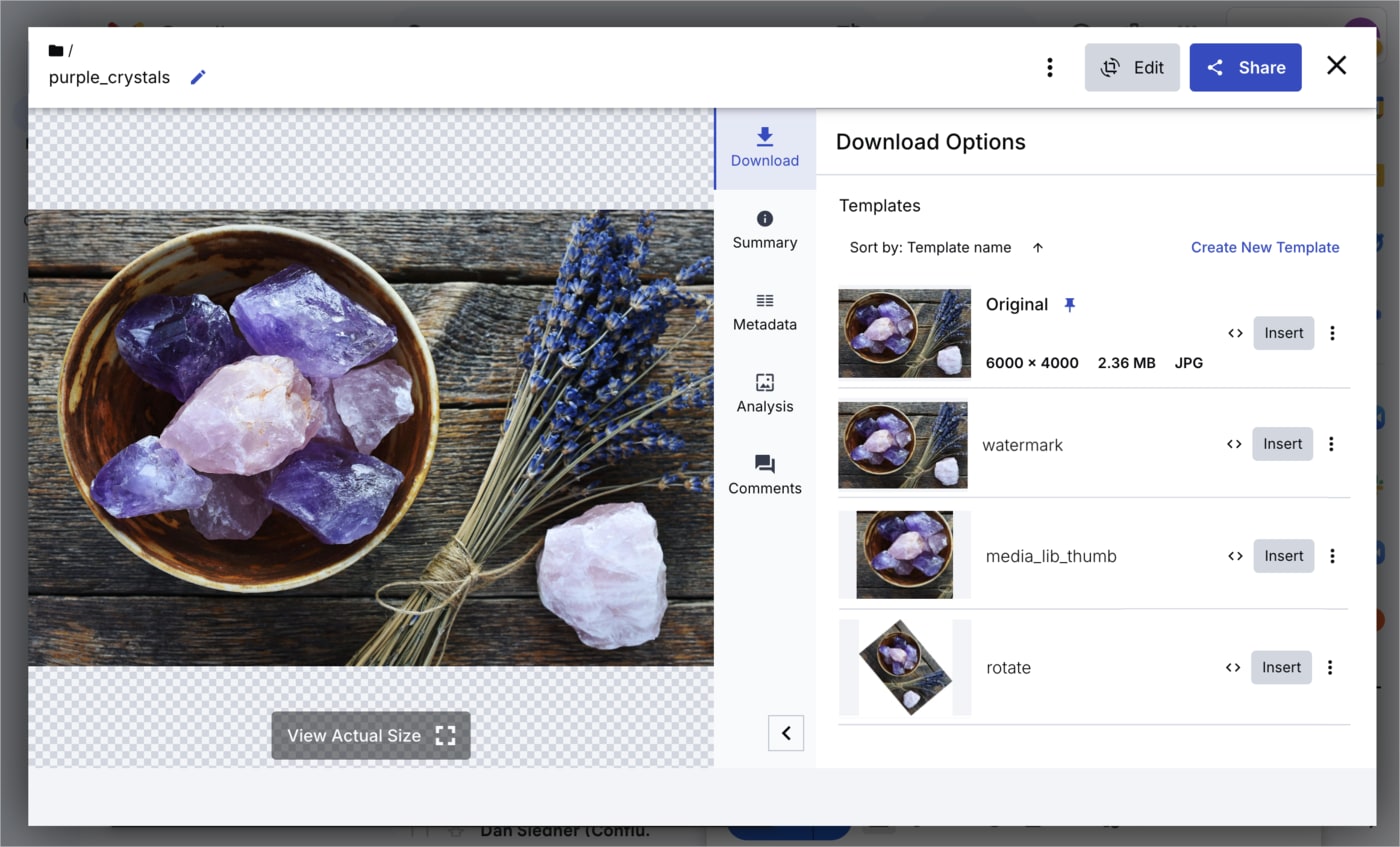
You can view or edit tags and metadata as well as view embedded image metadata for a specific asset from the Summary and Metadata tabs of the Asset management page.
To open the Asset management page either double-click the asset or select Open from the asset's context (right-click) menu.
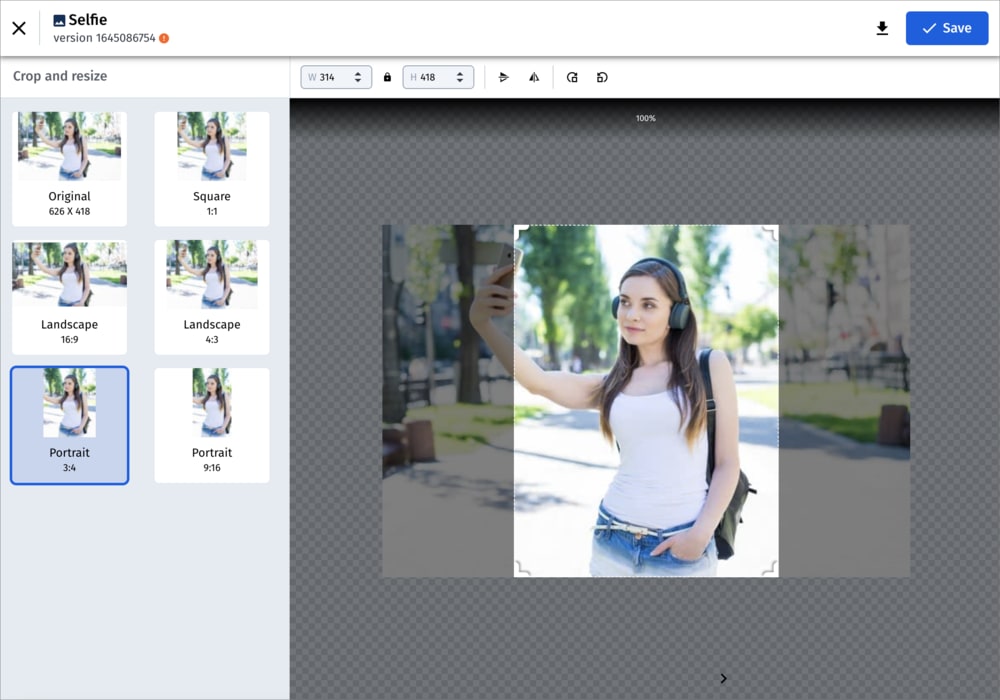
Media Editor
The Media Editor is only applicable to images and is accessible from the Asset management page, by clicking the Edit Image button.
In the Media Editor, you can crop and resize your image to suit your design. If you save the modified image, your current asset will be overwritten. You can retrieve the original if you have backups enabled. Otherwise, you may prefer to download the modified image and upload it as a new asset.
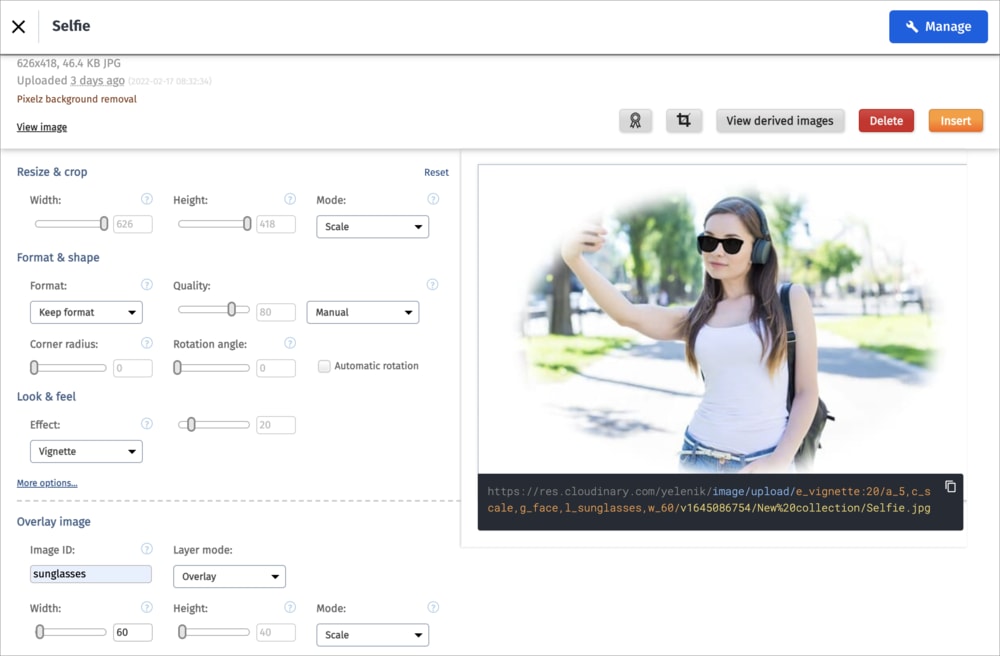
Transformation editor
The transformation editor is accessible from the Asset management page. To open it, select Edit Transformation from the kebab menu next to the original asset or the transformation you want to edit further.
In the transformation editor you can apply and preview various transformations. Once you are satisfied with the adjustments, click Insert to use this transformed asset as your media item. Unlike the Media Editor, your original asset remains unmodified.
For more details, see Asset and transformation editing in the Assets user guide.
Uninstall the Cloudinary app for Shopify
When you uninstall the Cloudinary app for Shopify, note that:
- The Cloudinary snippets added to your theme's code are not removed. If you are not referencing these snippets in your code then you can delete these snippets manually.
- You may want to clean up your metadata and tags in Cloudinary if you plan to reinstall the app at a later date.
- On uninstall, all metafields in the
cloudinarynamespace are deleted. This may impact any other apps that also happen to use the same namespace.
Appendix A - tags, metadata and metafields
As part of the sync feature, and when adding media through the Cloudinary Media Manager, tags and metadata are set on the assets in Cloudinary, and metafields are populated in Shopify.
Tags
The following tags are automatically added to the assets in Cloudinary that are uploaded from Shopify or added to a product using the Cloudinary Media Manager:
| Tag | Description |
|---|---|
| The Shopify product handle. | A unique product identifier that can be used for displaying assets in the Product Gallery. |
| The Shopify variant ID if applicable. | The identifier of a product variant that can be used for displaying assets for variants in the Product Gallery. |
Additionally, you can add any tags you like by specifying them in the TAGS field in the product page in Shopify. When assets are synced to Cloudinary these tags are also applied to the product assets in Cloudinary.
Metadata
The following structured metadata fields are automatically created and populated for the assets in Cloudinary that are uploaded from Shopify or added to a product using the Cloudinary Media Manager:
| Metadata field | Type | Value | Description |
|---|---|---|---|
| Image alt text | String | The alt text for the asset as defined in Shopify. | Used for alt-text in the gallery and wherever the image is displayed (e.g. product tile). |
| Image ID | Number | The ID of the asset in Shopify. | Can be used for searching in Cloudinary and other uses. |
| Image position | Number | The order of the asset in the Shopify product. | Used to position the asset in the Product Gallery. |
| Is image synced | Boolean | True or false. | States whether or not the image has been synced to Shopify. |
| Product handle | String | The Shopify product handle. | Can be used for searching in Cloudinary and other uses. |
| Product ID | String | The unique GraphQL ID for the Shopify product. | Can be used for searching in Cloudinary and other uses. |
| Product legacy ID | Number | The unique REST API ID for the Shopify product (legacy). | Can be used for searching in Cloudinary and other uses. |
Metafields
The following metafield definitions are added to your products and product variants in Shopify when the Cloudinary app is installed on Shopify. They are populated when media is uploaded from Shopify to Cloudinary or added to a product using the Cloudinary Media Manager.
| Metafield definition name | Type | Description |
|---|---|---|
| primaryimage_v1 | String | The URL of the primary image for the product in Cloudinary, including transformations. This is the image in position 1 in the product when the media is synced to Cloudinary. |
| productmedia_v1 | JSON | Information about the Cloudinary assets associated to a product. For example, the public ID and position. This information is returned from Cloudinary when media is synced to Cloudinary. |
| synced_v1 | Boolean | Shows whether the product media has been synced to Cloudinary. |

