SAP Commerce Extension
Last updated: Feb-20-2026
Overview
SAP is the market leader in enterprise application software, helping companies of all sizes and in all industries run at their best. The SAP Commerce solution simplifies selling and buying processes on a modern, agile e-commerce platform.
Cloudinary's SAP Commerce extension enables you to create rich media experiences on your storefront, whether B2B or B2C, by leveraging Cloudinary's automatic image and video optimization and transformation capabilities, and delivering responsive media through global content delivery networks.
SAP Commerce extension video tutorial
To get an idea of the functionality provided by Cloudinary's SAP Commerce extension, watch the following video:
This video is brought to you by Cloudinary's video player - embed your own!
Use the controls to set the playback speed, navigate to chapters of interest and select subtitles in your preferred language.
Tutorial contents
Installation and setup
The SAP Commerce Cloudinary extension is freely available from the SAP store and can also be downloaded directly from GitHub.
It supports the following SAP Commerce versions: 2005, 1905 and 1811, and both the Accelerator and Spartacus storefronts.
Download the following documents for installation and basic usage instructions:
-
SAP Commerce Cloudinary Extension Setup Guide, which covers:
- Setup steps for the SAP Commerce B2C Accelerator
- Setup steps for the SAP Commerce B2B Accelerator
-
SAP Commerce Cloudinary Extension Functional Guide, which covers:
- Configuration of the Cloudinary extension in the Backoffice
- Synchronization of media assets from SAP Commerce to Cloudinary
- Media creation and product association
- Enabling the Cloudinary Product Gallery
- Enabling the Cloudinary Video Player
- Bulk uploading of media for the product catalog
- Setting up Cloudinary transformations at different levels (product catalog, category, product and asset)
Main features
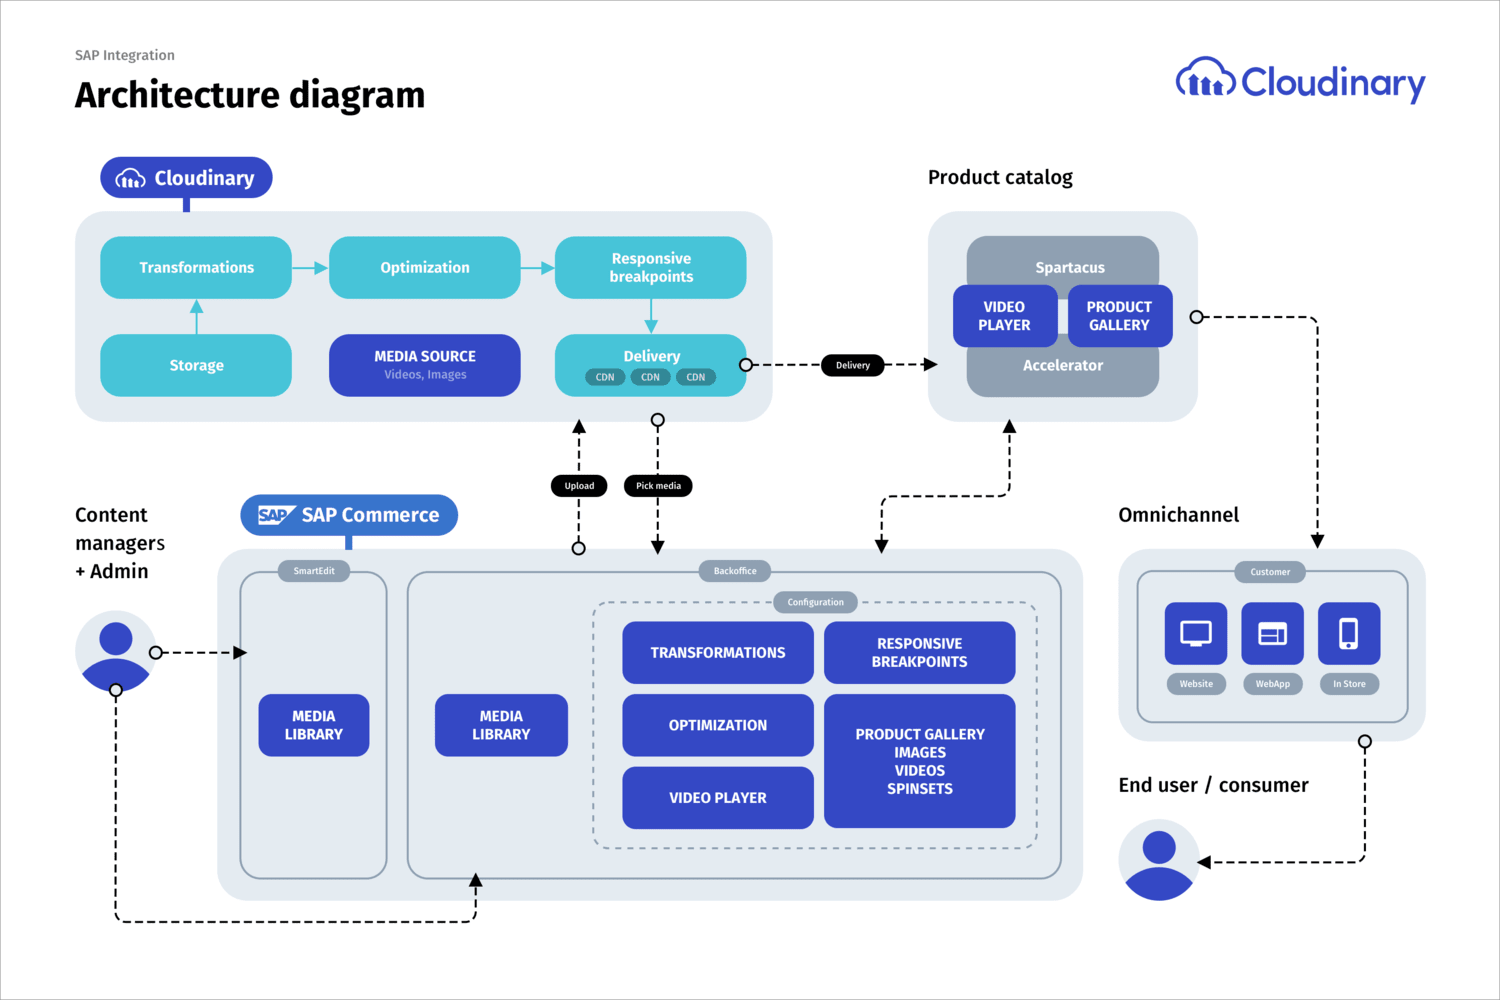
This architecture diagram shows how Cloudinary is integrated into various SAP Commerce platform components and the flow of media content around the system.
Store media in Cloudinary
Maintain a single source of truth for your media assets by syncing media from SAP Commerce to the Cloudinary Media Library and delivering all media from Cloudinary. Manage your assets using the commonly used Media Library features.
Use upload presets
Select one of your Cloudinary upload presets from the SAP Backoffice to use when uploading media from within SAP to Cloudinary. Upload presets specify a set of upload options, so, for example you could apply the same tags or metadata to every asset that you upload, or run specific add-ons on each upload.
Apply transformations and optimizations
Using the extension you can apply Cloudinary transformations to your media to optimize size, format and quality, add overlays, apply visual enhancements and more. Different Cloudinary image and video transformations can be applied to media based on whether it's contained in the product catalog or content catalog.
Set responsive breakpoints
The extension includes special functionality for adding responsive behavior to your images to make sure that the optimal image size is delivered to each user based on the available space on their viewing device.
Display the Product Gallery
Include images, videos and 360 spin sets on your product description pages using the highly customizable Cloudinary Product Gallery.
Embed the Video Player
Enable Cloudinary's customizable HTML5-based Video Player to display videos on your storefront in the way you want. Use the Video Player Studio to customize the player and copy the JSON required for the configuration in the SAP Backoffice.
Commonly used Media Library features
With the SAP Commerce Cloudinary extension installed, you can open your Cloudinary Media Library when selecting assets from Cloudinary. You can access almost all of the same functionality that is available in the full Media Library in your Cloudinary Console.
https://cloudinary.com) in their browser settings.Advanced Search
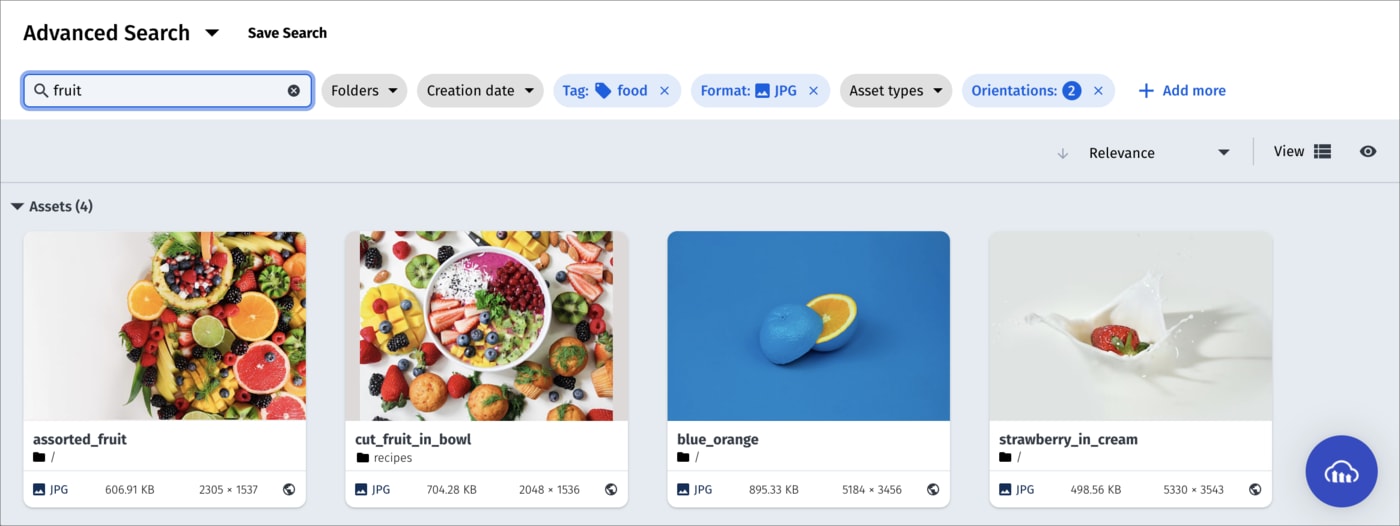
The Advanced Search feature lets you search by filters such as tags, metadata, format, orientation, resolution, or (if supported for your account), even by image analysis characteristics, such as prominent colors, presence of faces, or image location.
For more details, see Advanced Search in the Assets user guide.
Folders and collections
Folders and collections can be used for access control and collaboration. Organize assets into folders (fixed containers) and collections (virtual groupings), define user groups, and then share your folders and collections with user groups or individual users at different access permission levels.
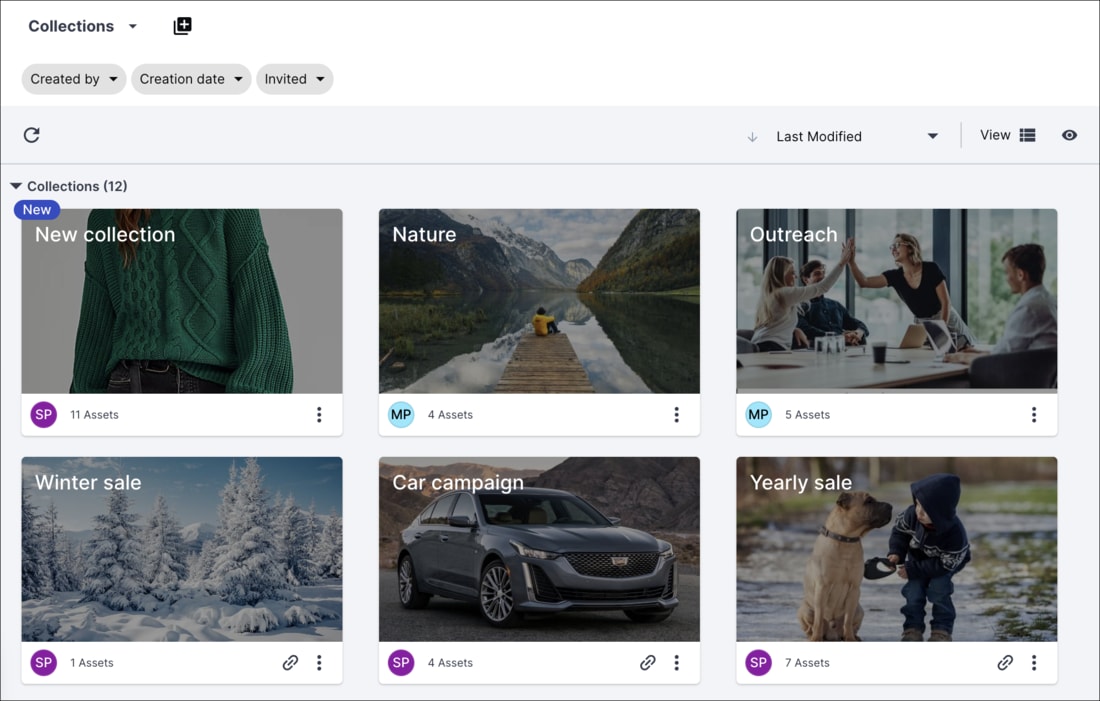
Collections are ad-hoc groupings of assets. Assets can be added to and from collections without affecting or moving the asset itself, and assets can be included in multiple collections. You can create your own collections (assuming you have the required permissions) or other Cloudinary users can share collections with you. You can also share collections with external stakeholders by sending a URL to a dedicated collection webpage, which is available to those with a link during an optionally specified date range.
Collections can often be a convenient way to group all assets that you might want to use on a particular project or campaign.
For more details, see Collection management in the Assets user guide.
Tagging and metadata
Assets that have tags and other metadata enable all Media Library users to better organize and search for assets in the Media Library.
In addition to the option to specify tags when you upload an image or video, you can also add or edit tags and other metadata after images and videos are uploaded via the embedded Media Library, and even set the same tags or metadata on multiple images and videos at once.
You can view and set this data using the Asset toolbar or in the Asset management page.
Asset toolbar
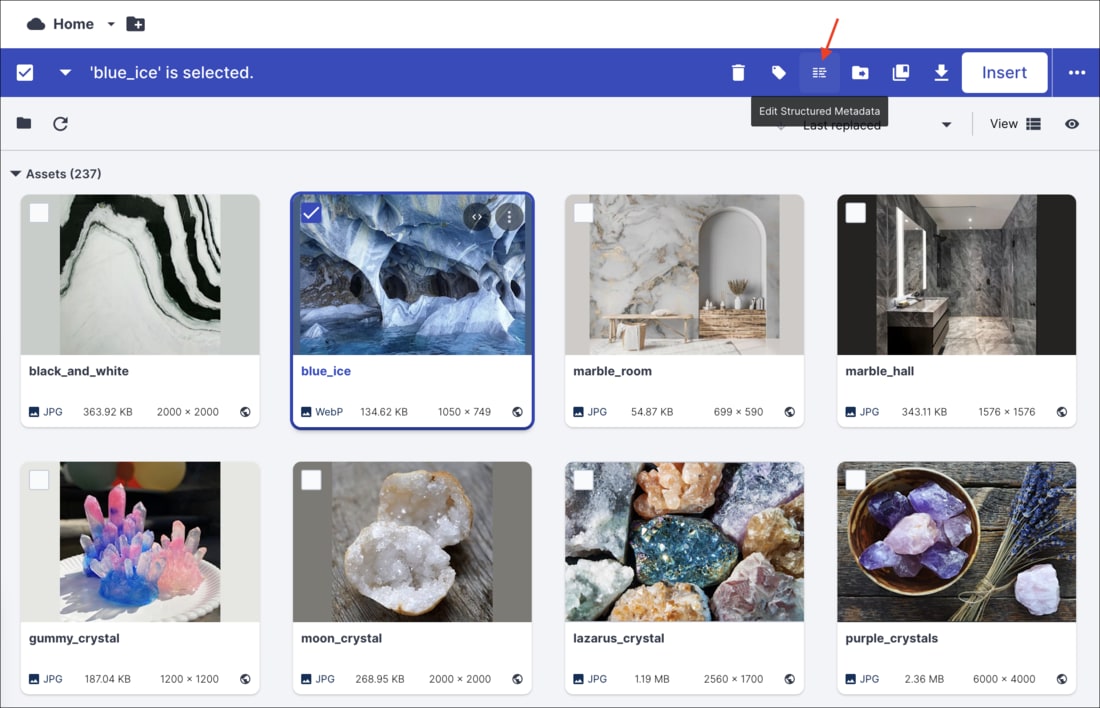
You can set tags and metadata for several selected assets at once from the Media Library using the Tag or Edit Structured Metadata options in the asset toolbar. You can Edit Contextual Metadata via the (3-dot) options menu. The type of metadata available for editing (contextual or structured) depends on the setup for your organization's account.
Asset management page
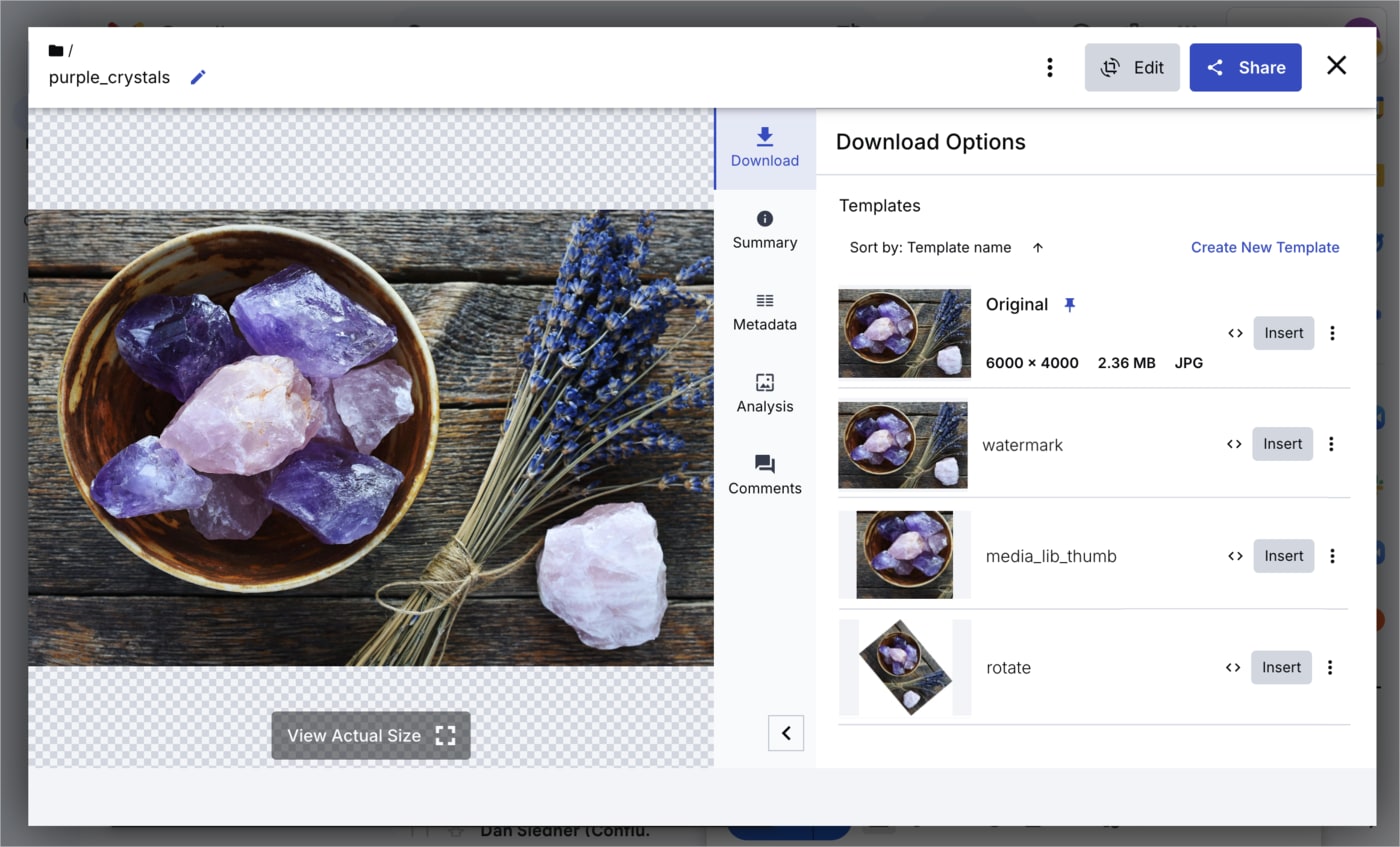
You can view or edit tags and metadata as well as view embedded image metadata for a specific asset from the Summary and Metadata tabs of the Asset management page.
To open the Asset management page either double-click the asset or select Open from the asset's context (right-click) menu.
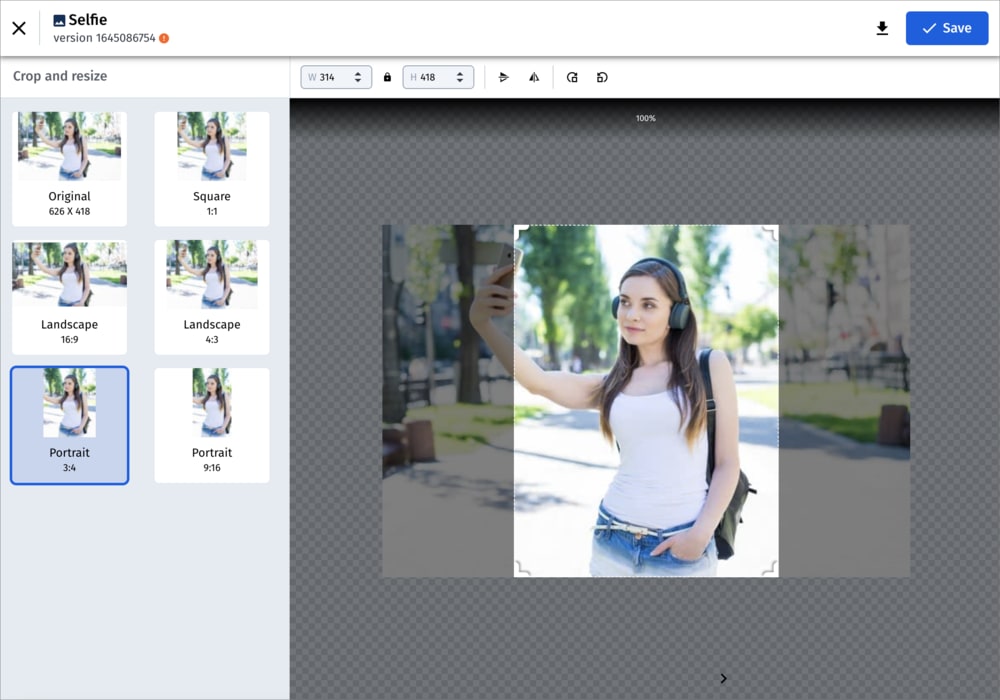
Media Editor
The Media Editor is only applicable to images and is accessible from the Asset management page, by clicking the Edit Image button.
In the Media Editor, you can crop and resize your image to suit your design. If you save the modified image, your current asset will be overwritten. You can retrieve the original if you have backups enabled. Otherwise, you may prefer to download the modified image and upload it as a new asset.
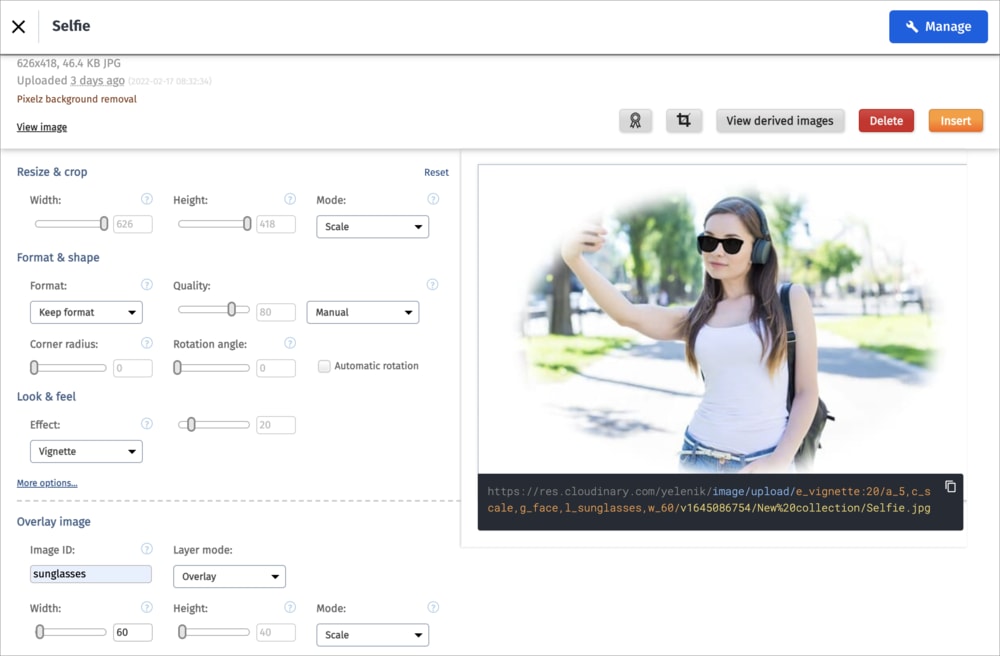
Transformation editor
The transformation editor is accessible from the Asset management page. To open it, select Edit Transformation from the kebab menu next to the original asset or the transformation you want to edit further.
In the transformation editor you can apply and preview various transformations. Once you are satisfied with the adjustments, click Insert to use this transformed asset as your media item. Unlike the Media Editor, your original asset remains unmodified.
For more details, see Asset and transformation editing in the Assets user guide.
Cloudinary Professional Services configuration support
The SAP Commerce Extension falls under Cloudinary's Premium Professional Services integrations.
If you need assistance setting up this integration, you can purchase configuration support for it at an additional cost.
Learn more: Cloudinary Professional Services packages
 Ask AI
