Many websites and mobile applications with user generated content allow you to upload all kinds of files. Images, PDFs, and Microsoft Office files, such as Word, Excel, and PowerPoint are all common types of uploads.
Web or mobile developers may want to build applications that allow users to download PDFs, support document previews, or embed image thumbnails of Office files. However, implementing these types of capabilities can be quite a challenging task.

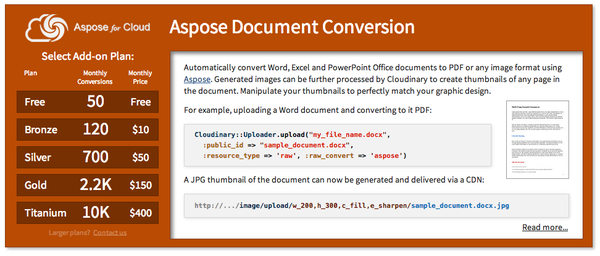
Aspose is one of the leading vendors that deals with file management APIs and conversion between different file formats. Having recently partnered with Aspose, we now offer an Aspose document conversion add-on. As a result, developers are able to upload Office files to Cloudinary, the same way as images, and convert them to PDF documents. Cloudinary can then convert the PDFs to images in order to display and embed them in websites, web applications or mobile apps. In addition, developers can use Cloudinary’s rich set of image manipulation capabilities to match the converted images to their sites’ graphic design

Cloudinary uses Aspose to convert Office files to PDFs. To break it down a bit, you can upload any raw files to Cloudinary, using the API and client libraries, by setting the resource_type upload parameter to raw. Then, in order to convert the files, just set the raw_convert parameter to aspose when uploading. That’s it!
Below is a code sample in multiple frameworks that shows how to upload a Word document and request a conversion to PDF using Cloudinary’s Aspose add-on.
Ruby:
Cloudinary::Uploader.upload("my_file_name.docx",
  :public_id => "sample_document.docx",
  :resource_type => 'raw', :raw_convert => 'aspose')
PHP:
\Cloudinary\Uploader::upload("my_file_name.docx",
  array(
    "public_id" => "sample_document.docx",
    "resource_type" => "raw",
    "raw_convert" => "aspose"
));
Python:
cloudinary.uploader.upload("my_file_name.docx",
  public_id = "sample_document.docx",
  resource_type = "raw",
  raw_convert = "aspose")
Node.js:
cloudinary.uploader.upload("my_file_name.docx",
  function(result) { console.log(result); },
    { public_id: "sample_document.docx",
      resource_type: "raw",
      raw_convert: "aspose"
});
Java:
cloudinary.uploader().upload("my_file_name.docx", Cloudinary.asMap(
  "public_id", "sample_document.docx",
  "resource_type", "raw",
  "raw_convert", "aspose"));
When the conversion is done, an image resource of the generated PDF is also created and stored in your Cloudinary account.
You can then deliver the PDF or further manipulate it as an image. For example, if a Word document was uploaded as a raw file, and was assigned with the public ID (the uploaded resource’s unique identifier) sample_document.docx, it would be available for CDN delivery using the following URL:
Ruby:
cl_image_tag("sample_document.docx")
PHP v1:
cl_image_tag("sample_document.docx")
PHP v2:
(new RawTag('sample_document.docx'));
Python:
CloudinaryImage("sample_document.docx").image()
Node.js:
cloudinary.image("sample_document.docx")
Java:
cloudinary.url().imageTag("sample_document.docx");
JS:
cloudinary.imageTag('sample_document.docx').toHtml();
jQuery:
$.cloudinary.image("sample_document.docx")
React:
<Image publicId="sample_document.docx" >

</Image>
Vue.js:
<cld-image publicId="sample_document.docx" >

</cld-image>
Angular:
<cl-image public-id="sample_document.docx" >

</cl-image>
.NET:
cloudinary.Api.UrlImgUp.BuildImageTag("sample_document.docx")
Android:
MediaManager.get().url().resourceType("raw").generate("sample_document.docx");
iOS:
cloudinary.createUrl().setResourceType("raw").generate("sample_document.docx")
Once the conversion is complete, a PDF 'image' file is available with a public ID same as the original document's file name (e.g., sample_document.docx). The delivery URL in our example would be as follows:
Ruby:
cl_image_tag("sample_document.docx.pdf")
PHP v1:
cl_image_tag("sample_document.docx.pdf")
PHP v2:
(new ImageTag('sample_document.docx.pdf'));
Python:
CloudinaryImage("sample_document.docx.pdf").image()
Node.js:
cloudinary.image("sample_document.docx.pdf")
Java:
cloudinary.url().imageTag("sample_document.docx.pdf");
JS:
cloudinary.imageTag('sample_document.docx.pdf').toHtml();
jQuery:
$.cloudinary.image("sample_document.docx.pdf")
React:
<Image publicId="sample_document.docx.pdf" >

</Image>
Vue.js:
<cld-image publicId="sample_document.docx.pdf" >

</cld-image>
Angular:
<cl-image public-id="sample_document.docx.pdf" >

</cl-image>
.NET:
cloudinary.Api.UrlImgUp.BuildImageTag("sample_document.docx.pdf")
Android:
MediaManager.get().url().generate("sample_document.docx.pdf");
iOS:
imageView.cldSetImage(cloudinary.createUrl().generate("sample_document.docx.pdf")!, cloudinary: cloudinary)
Note that the conversion process is the same for Excel and PowerPoint files, as well.
The URL above is an example of Cloudinary URLs that are used to access converted files. They are quickly delivered fully optimized with the appropriate cache settings via Akamai’s CDN.
By leveraging Cloudinary’s various image manipulation capabilities, you can convert and manipulate your generated PDF. Cloudinary supports manipulations, such as extracting certain pages, resizing, cropping, creating thumbnails, converting to other formats (i.e. PNG, JPG and more), applying filters or effects, and more. Check out Cloudinary’s capabilities here.
For example, you can use Cloudinary to generate different sizes of thumbnails of your newly created PDF. Depending on your needs, you can set certain dimensions to fit your graphic design, such as width and height.
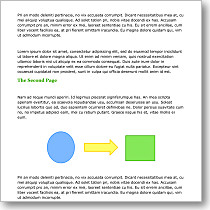
The 200x300 PNG thumbnail below was created using Cloudinary’s dynamic image manipulation URL for the first page of the PDF document:
Ruby:
cl_image_tag("sample_document.docx.png", :width=>200, :height=>300, :crop=>"fill")
PHP v1:
cl_image_tag("sample_document.docx.png", array("width"=>200, "height"=>300, "crop"=>"fill"))
PHP v2:
(new ImageTag('sample_document.docx.png'))
  ->resize(Resize::fill()->width(200)->height(300));
Python:
CloudinaryImage("sample_document.docx.png").image(width=200, height=300, crop="fill")
Node.js:
cloudinary.image("sample_document.docx.png", {width: 200, height: 300, crop: "fill"})
Java:
cloudinary.url().transformation(new Transformation().width(200).height(300).crop("fill")).imageTag("sample_document.docx.png");
JS:
cloudinary.imageTag('sample_document.docx.png', {width: 200, height: 300, crop: "fill"}).toHtml();
jQuery:
$.cloudinary.image("sample_document.docx.png", {width: 200, height: 300, crop: "fill"})
React:
<Image publicId="sample_document.docx.png" >
  <Transformation width="200" height="300" crop="fill" />
</Image>
Vue.js:
<cld-image publicId="sample_document.docx.png" >
  <cld-transformation width="200" height="300" crop="fill" />
</cld-image>
Angular:
<cl-image public-id="sample_document.docx.png" >
  <cl-transformation width="200" height="300" crop="fill">
  </cl-transformation>
</cl-image>
.NET:
cloudinary.Api.UrlImgUp.Transform(new Transformation().Width(200).Height(300).Crop("fill")).BuildImageTag("sample_document.docx.png")
Android:
MediaManager.get().url().transformation(new Transformation().width(200).height(300).crop("fill")).generate("sample_document.docx.png");
iOS:
imageView.cldSetImage(cloudinary.createUrl().setTransformation(CLDTransformation().setWidth(200).setHeight(300).setCrop("fill")).generate("sample_document.docx.png")!, cloudinary: cloudinary)

Another example, seen below, is a 200x200 JPEG thumbnail of the second page of the PDF document that was created, with increased saturation, sharpness, and a shadow:
Ruby:
cl_image_tag("sample_document.docx.jpg", :transformation=>[
  {:width=>200, :height=>200, :gravity=>"north", :page=>2, :effect=>"saturation:100", :crop=>"fill"},
  {:effect=>"sharpen"},
  {:border=>"1px_solid_rgb:bbb"},
  {:effect=>"shadow"}
  ])
PHP v1:
cl_image_tag("sample_document.docx.jpg", array("transformation"=>array(
  array("width"=>200, "height"=>200, "gravity"=>"north", "page"=>2, "effect"=>"saturation:100", "crop"=>"fill"),
  array("effect"=>"sharpen"),
  array("border"=>"1px_solid_rgb:bbb"),
  array("effect"=>"shadow")
  )))
PHP v2:
(new ImageTag('sample_document.docx.jpg'))
  ->resize(Resize::fill()->width(200)->height(200)->gravity(Gravity::compass(Compass::north())))
  ->adjust(Adjust::saturation()->level(100))
  ->extract(Extract::getPage()->byNumber(2))
  ->adjust(Adjust::sharpen())
  ->border(Border::solid(1, Color::rgb('bbb')))
  ->effect(Effect::shadow());
Python:
CloudinaryImage("sample_document.docx.jpg").image(transformation=[
  {'width': 200, 'height': 200, 'gravity': "north", 'page': 2, 'effect': "saturation:100", 'crop': "fill"},
  {'effect': "sharpen"},
  {'border': "1px_solid_rgb:bbb"},
  {'effect': "shadow"}
  ])
Node.js:
cloudinary.image("sample_document.docx.jpg", {transformation: [
  {width: 200, height: 200, gravity: "north", page: 2, effect: "saturation:100", crop: "fill"},
  {effect: "sharpen"},
  {border: "1px_solid_rgb:bbb"},
  {effect: "shadow"}
  ]})
Java:
cloudinary.url().transformation(new Transformation()
  .width(200).height(200).gravity("north").page(2).effect("saturation:100").crop("fill").chain()
  .effect("sharpen").chain()
  .border("1px_solid_rgb:bbb").chain()
  .effect("shadow")).imageTag("sample_document.docx.jpg");
JS:
cloudinary.imageTag('sample_document.docx.jpg', {transformation: [
  {width: 200, height: 200, gravity: "north", page: 2, effect: "saturation:100", crop: "fill"},
  {effect: "sharpen"},
  {border: "1px_solid_rgb:bbb"},
  {effect: "shadow"}
  ]}).toHtml();
jQuery:
$.cloudinary.image("sample_document.docx.jpg", {transformation: [
  {width: 200, height: 200, gravity: "north", page: 2, effect: "saturation:100", crop: "fill"},
  {effect: "sharpen"},
  {border: "1px_solid_rgb:bbb"},
  {effect: "shadow"}
  ]})
React:
<Image publicId="sample_document.docx.jpg" >
  <Transformation width="200" height="200" gravity="north" page="2" effect="saturation:100" crop="fill" />
  <Transformation effect="sharpen" />
  <Transformation border="1px_solid_rgb:bbb" />
  <Transformation effect="shadow" />
</Image>
Vue.js:
<cld-image publicId="sample_document.docx.jpg" >
  <cld-transformation width="200" height="200" gravity="north" page="2" effect="saturation:100" crop="fill" />
  <cld-transformation effect="sharpen" />
  <cld-transformation border="1px_solid_rgb:bbb" />
  <cld-transformation effect="shadow" />
</cld-image>
Angular:
<cl-image public-id="sample_document.docx.jpg" >
  <cl-transformation width="200" height="200" gravity="north" page="2" effect="saturation:100" crop="fill">
  </cl-transformation>
  <cl-transformation effect="sharpen">
  </cl-transformation>
  <cl-transformation border="1px_solid_rgb:bbb">
  </cl-transformation>
  <cl-transformation effect="shadow">
  </cl-transformation>
</cl-image>
.NET:
cloudinary.Api.UrlImgUp.Transform(new Transformation()
  .Width(200).Height(200).Gravity("north").Page(2).Effect("saturation:100").Crop("fill").Chain()
  .Effect("sharpen").Chain()
  .Border("1px_solid_rgb:bbb").Chain()
  .Effect("shadow")).BuildImageTag("sample_document.docx.jpg")
Android:
MediaManager.get().url().transformation(new Transformation()
  .width(200).height(200).gravity("north").page(2).effect("saturation:100").crop("fill").chain()
  .effect("sharpen").chain()
  .border("1px_solid_rgb:bbb").chain()
  .effect("shadow")).generate("sample_document.docx.jpg");
iOS:
imageView.cldSetImage(cloudinary.createUrl().setTransformation(CLDTransformation()
  .setWidth(200).setHeight(200).setGravity("north").setPage(2).setEffect("saturation:100").setCrop("fill").chain()
  .setEffect("sharpen").chain()
  .setBorder("1px_solid_rgb:bbb").chain()
  .setEffect("shadow")).generate("sample_document.docx.jpg")!, cloudinary: cloudinary)

Learn more about Cloudinary’s image manipulation capabilities.
Cloudinary’s Aspose document conversion add-on asynchronously converts MS Office documents to PDFs. This means that once the documents are uploaded to Cloudinary, and the upload API is complete, Aspose can complete the conversion. This can take up to a few minutes depending on the size and content of the file. Since the conversion runs in the background, you might want to be notified when it is complete. Therefore, Cloudinary has a background notifications and webhooks mechanism, that sends an HTTP POST request to a notification URL that you provide when the operation is done.
See our documentation for more details about how to use the Aspose add-on.
Developers can use Cloudinary to allow their apps' users to upload images and documents of any type. Together with the Aspose add-on you can now easily generate thumbnails from Office documents that can be embedded into your web or mobile applications. The Aspose add-on is available with all Cloudinary plans, including the free tier. You can try it out by subscribing to the free add-on plan.
Not using Cloudinary Yet? Sign up for a free Cloudinary account here.


