There are lots of images and videos all over the internet. A lot of applications these days demand that the user is able to manipulate files and upload to the server. Thankfully, PHP provides the functions to handle file uploads.
In this post, I’ll show you two ways of handling file uploads with PHP:
- The Barebones PHP way
- Using Cloudinary’s Cloud Service - Cloudinary is an end-to-end solution for all your image and video-related needs. It allows you to securely upload images or any other file at any scale from any source. Cloudinary also provides an API for fast upload directly from your users’ browsers or mobile apps. Check out Cloudinary’s documentation for more information on how to integrate it in your apps.
PHP upload - The barebones way
Let’s quickly get started on how to handle file upload with PHP, the barebones way. We need:
1. The HTML Form
You need to build up an HTML form that will contain the fields that the user will interact with to upload a file. Create an index.html file in your root directory and add the following code to it:
<!DOCTYPE html>
<html lang="en">
<head>
    <meta charset="UTF-8">
    <title>File Upload with PHP</title>
</head>
<body>
    <form action="fileUpload.php" method="post" enctype="multipart/form-data">
        Upload a File:
        <input type="file" name="file" id="fileToUpload">
        <input type="submit" name="submit" value="Upload File Now" >
    </form>
</body>
</html>
In the code above, we have a form with one input field and a submit button. The form tag has an action attribute that points to the script that will take care of the actual upload process. It also has a method attribute that specifies the kind of operation this form will undertake, which is a POST action.
The value of the enctype attribute is very important. It determines the content-type that the form submits. If we were not dealing with file uploads, then we would not specify the enctype attribute on the form in most cases.
Spin up your PHP server like so:

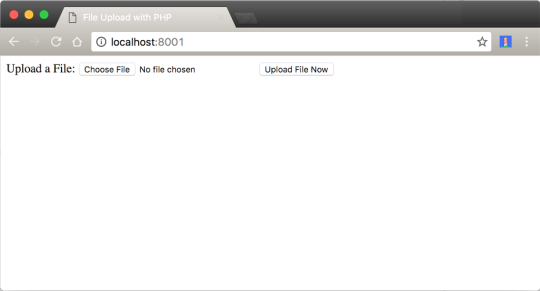
You should see something similar to this come up on your web page:
Note: Different browsers, such as Safari, Edge, Firefox and Chrome might display the form in different ways.
2. PHP Upload Script
There are lots of things to consider when dealing with file uploads. I’ll highlight the common ones in form of questions.
- In which directory will the files be stored?
- Is the directory writable?
- What type of files should the users be allowed to upload?
- What is the maximum file size that the server should allow?
- Should the user be allowed to upload the same image more than once?
Create a file, fileUpload.php, in the root directory and add this code to it:
<?php
    $currentDir = getcwd();
    $uploadDirectory = "/uploads/";

    $errors = []; // Store all foreseen and unforseen errors here

    $fileExtensions = ['jpeg','jpg','png']; // Get all the file extensions

    $fileName = $_FILES['myfile']['name'];
    $fileSize = $_FILES['myfile']['size'];
    $fileTmpName  = $_FILES['myfile']['tmp_name'];
    $fileType = $_FILES['myfile']['type'];
    $fileExtension = strtolower(end(explode('.',$fileName)));

    $uploadPath = $currentDir . $uploadDirectory . basename($fileName);

    if (isset($_POST['submit'])) {

        if (! in_array($fileExtension,$fileExtensions)) {
            $errors[] = "This file extension is not allowed. Please upload a JPEG or PNG file";
        }

        if ($fileSize > 2000000) {
            $errors[] = "This file is more than 2MB. Sorry, it has to be less than or equal to 2MB";
        }

        if (empty($errors)) {
            $didUpload = move_uploaded_file($fileTmpName, $uploadPath);

            if ($didUpload) {
                echo "The file " . basename($fileName) . " has been uploaded";
            } else {
                echo "An error occurred somewhere. Try again or contact the admin";
            }
        } else {
            foreach ($errors as $error) {
                echo $error . "These are the errors" . "\n";
            }
        }
    }


?>
Look at the code above.
- $fileName = $_FILES['myfile']['name']; This refers to the real name of the uploaded file.
- $fileSize = $_FILES['myfile']['size']; This refers to the size of the file.
- $fileTmpName = $_FILES['myfile']['tmp_name']; This is the temporary uploaded file that resides in the tmp/ directory of the web server.
- $fileType = $_FILES['myfile']['type']; This refers to the type of the file. Is it a jpeg or png or mp3 file?
- $fileExtension = strtolower(end(explode('.',$fileName))); This grabs the extension of the file.
- $uploadPath = $currentDir . $uploadDirectory . basename($fileName); This is the path where the files will be stored on the server. We grabbed the current working directory.
In the code, we are checking to ensure that only jpeg and png files can be uploaded.
if (! in_array($fileExtension,$fileExtensions)) {
            $errors[] = "This file extension is not allowed. Please upload a JPEG or PNG file";
        }
// Checks to ensure that only jpeg and png files can be uploaded.
We are also checking that only files less than or equal to 2MB can be uploaded.
if ($fileSize > 2000000) {
            $errors[] = "This file is larger than 2MB. It must be less than or equal to 2MB";
        }
// Checks to ensure the file is not more than 2MB
Note: Before you try out your code again, you need to ensure that there are some configurations in place.
- Make sure the
uploads/directory is writable. Run this command:chmod 0755 uploads/on your terminal to make the directory writable. Open your
php.inifile and ensure that these constants have correct values like:- max_file_uploads = 20
- upload_max_size = 2M
- post_max_size = 8M
Now, run the code again. Your file should upload successfully to the uploads directory.
Note: There are many checks you should consider when handling file uploads, including security precautions . You really don’t want someone uploading a virus to your web server. Do you? So by all means don’t use this exact code above in production. Add more valuable checks!
Also, it’s recommended that you upload your files to a dedicated file server, not just your web application server. Check out the source code for a tutorial.
Handling File Upload With Cloudinary
Cloudinary provides an API for uploading images and any other kind of file to the cloud. These files are safely stored in the cloud with secure backups and revision history.
Cloudinary provides a free tier where you can store up to 75,000 images & videos with a managed storage of 2GB. 7500 monthly transformations and 5GB monthly net viewing bandwidth.
Cloudinary already takes away the pain of having to write large amounts of code to interact with their API by providing an open source PHP library that ships with simple, easy-to-use helper methods for:
- Image uploading
- Image administration and sprite generation
- Embedding images
- Building URLs for image transformation and manipulation
The process is this simple!
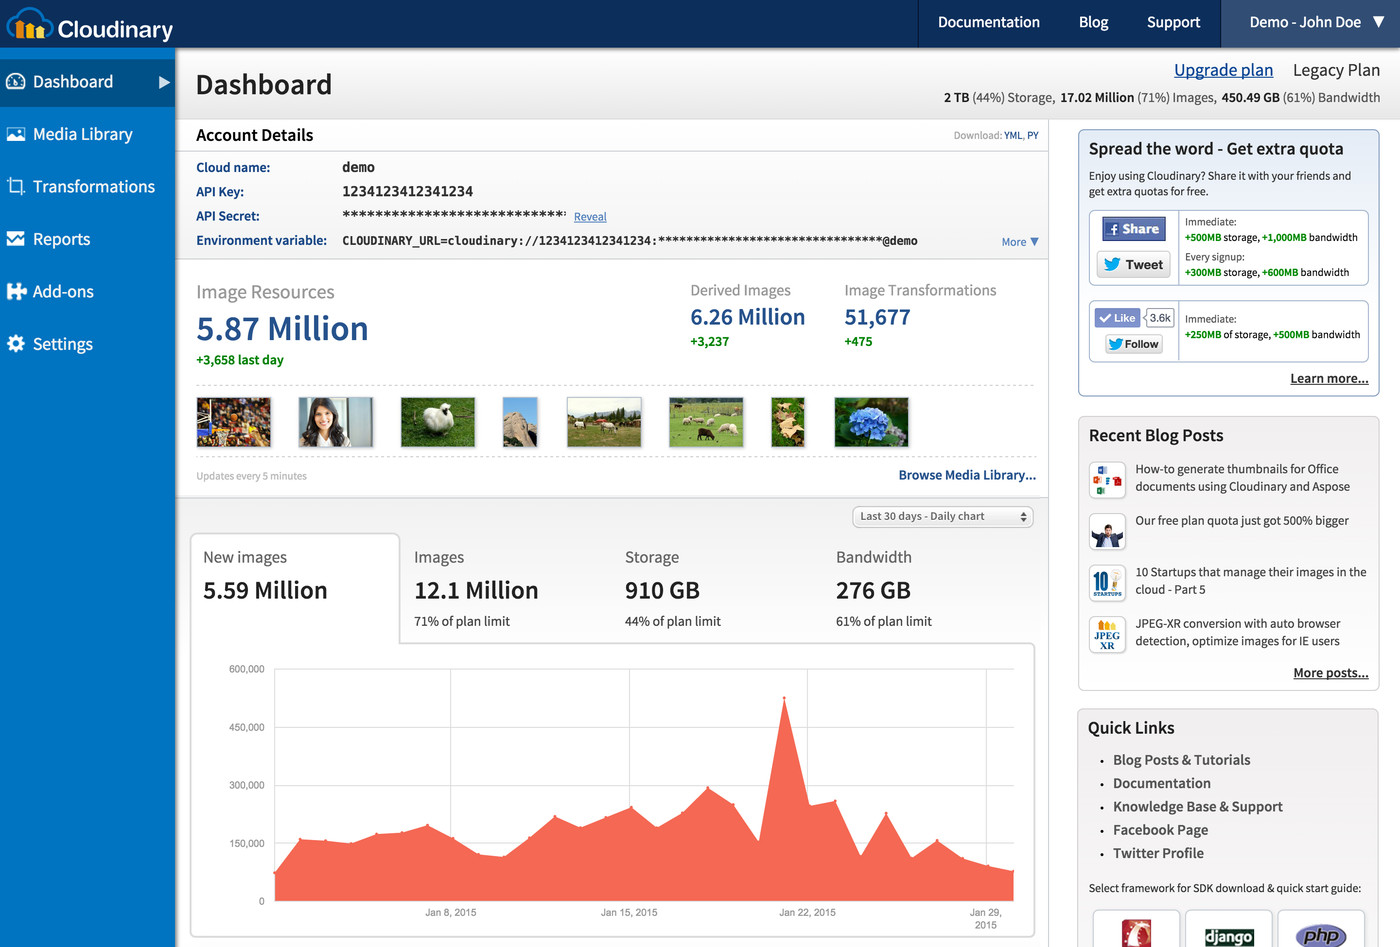
1. Sign up for a Cloudinary Account
 Cloudinary Dashboard - Your cloud name, API Key, Secret are key valuables to interact with Cloudinary functionalities.
2. Fetch the Cloudinary PHP library
 The second step to uploading your images to Cloudinary using PHP is fetching the library using composer.
If you don’t have composer, navigate here, make sure you copy all required files and paste them in your app, then reference them as follows in the script where you want to perform the upload:
// importing the necessary Cloudinary files
require 'Cloudinary.php';
require 'Uploader.php';
require 'Helpers.php';
require 'Api.php';
.....
3. Server-side upload
You can upload images or any file to Cloudinary from your PHP code running on at least a PHP 5.3 server. First, we have to set up our key valuables using the config method, so that Cloudinary can recognize that it’s a valid account:
\Cloudinary::config(array(
    "cloud_name" => "my_cloud_name",
    "api_key" => "my_api_key",
    "api_secret" => "my_api_secret"
));
Note: I recommend that you load these key valuables from an environment file (.env) to avoid people getting ahold of your config details.
You can put this in a file called settings.php and just include it in the script that performs the actual uploading.
Now you can use the following methods to upload images or files to Cloudinary’s cloud platform:
Uploading a local file:
Uploading a file from a remote HTTP(s) URL:
Uploading a file from an S3 bucket:
Note: Every file uploaded to Cloudinary is assigned a Public ID that can later be used for transformation and delivery.
The basic syntax for uploading your files with PHP to Cloudinary is:
Let’s cover a few examples of what can be passed to the $options array argument.
Specifying a custom Public ID:
You want to specify a custom Public ID? Here, you go:
Use the original name of the uploaded file:
You want to preserve and use the original name of the uploaded file? Here, you go:
Upload an image, video, or a raw file:
Not sure whether a user will upload an image, video, or a raw file? Here, you go:
\Cloudinary\Uploader::upload("spreadsheet.xls", array("resource_type" => "auto"));
Note: See here for all available upload options.
Conclusion
We have successfully covered how to handle file uploads with PHP. Now, the hassle associated with file uploads should be a thing of the past. Storing your files on your host server also should be a thing of the past. Offload files to dedicated cloud storage services like Cloudinary and let them bear the headache of serving the files securely to your web app via CDN!
 |
Prosper Otemuyiwa is a Food Ninja, Open Source Advocate & Self-acclaimed Developer Evangelist. |


