Cloudinary Blog

Cloudinary’s most popular image processing add-ons

Our most popular add-ons and how to utilize them

Perhaps some of you readers that have been around for a while remember our add-ons launch 2 years back, when we introduced a number of third party image processing products, fully integrated into the Cloudinary image management pipeline. Since then our add-ons marketplace has grown, both in our offerings and in usage. We now have 11 add-ons offering various capabilities and improvements.

I decided to take a peek and see which of our add-ons are most frequently used and popular amongst our customers.

Advanced Facial Attribute Detection

Firstly, we have our Advanced Facial Attribute Detection add-on. The ‘Face API' of Microsoft's Cognitive Services allows you to accurately and automatically detect eyes, nose and other facial attributes in your photos. An in depth blog post describing this powerful add-on is coming up in the next couple of weeks, so stay tuned :)

For example:

Ruby:
Copy to clipboard
cl_image_tag("cloudinary_team.jpg", :transformation=>[
  {:overlay=>"santa_hat", :effect=>"trim"},
  {:gravity=>"north_east", :width=>1.0, :height=>2.3, :crop=>"lpad"},
  {:gravity=>"adv_eyes", :flags=>["region_relative", "layer_apply"], :width=>2.6, :crop=>"scale"},
  {:width=>500, :crop=>"scale"}
  ])
PHP v1:
Copy to clipboard
cl_image_tag("cloudinary_team.jpg", array("transformation"=>array(
  array("overlay"=>"santa_hat", "effect"=>"trim"),
  array("gravity"=>"north_east", "width"=>"1.0", "height"=>"2.3", "crop"=>"lpad"),
  array("gravity"=>"adv_eyes", "flags"=>array("region_relative", "layer_apply"), "width"=>"2.6", "crop"=>"scale"),
  array("width"=>500, "crop"=>"scale")
  )))
PHP v2:
Copy to clipboard
(new ImageTag('cloudinary_team.jpg'))
  ->overlay(
      Overlay::source(Source::image('santa_hat')
        ->transformation((new ImageTransformation())
          ->reshape(Reshape::trim())
          ->resize(Resize::limitPad()->width(1.0)->height(2.3)->gravity(Gravity::compass(Compass::northEast())))
          ->resize(Resize::scale()->width(Expression::expression(2.6))
            ->regionRelative())))
      ->position((new Position())
        ->gravity(Gravity::focusOn(FocusOn::advancedEyes()))))
    ->resize(Resize::scale()->width(500));
Python:
Copy to clipboard
CloudinaryImage("cloudinary_team.jpg").image(transformation=[
  {'overlay': "santa_hat", 'effect': "trim"},
  {'gravity': "north_east", 'width': "1.0", 'height': "2.3", 'crop': "lpad"},
  {'gravity': "adv_eyes", 'flags': ["region_relative", "layer_apply"], 'width': "2.6", 'crop': "scale"},
  {'width': 500, 'crop': "scale"}
  ])
Node.js:
Copy to clipboard
cloudinary.image("cloudinary_team.jpg", {transformation: [
  {overlay: "santa_hat", effect: "trim"},
  {gravity: "north_east", width: "1.0", height: "2.3", crop: "lpad"},
  {gravity: "adv_eyes", flags: ["region_relative", "layer_apply"], width: "2.6", crop: "scale"},
  {width: 500, crop: "scale"}
  ]})
Java:
Copy to clipboard
cloudinary.url().transformation(new Transformation()
  .overlay(new Layer().publicId("santa_hat")).effect("trim").chain()
  .gravity("north_east").width(1.0).height(2.3).crop("lpad").chain()
  .gravity("adv_eyes").flags("region_relative", "layer_apply").width(2.6).crop("scale").chain()
  .width(500).crop("scale")).imageTag("cloudinary_team.jpg");
JS:
Copy to clipboard
cloudinary.imageTag('cloudinary_team.jpg', {transformation: [
  {overlay: new cloudinary.Layer().publicId("santa_hat"), effect: "trim"},
  {gravity: "north_east", width: "1.0", height: "2.3", crop: "lpad"},
  {gravity: "adv_eyes", flags: ["region_relative", "layer_apply"], width: "2.6", crop: "scale"},
  {width: 500, crop: "scale"}
  ]}).toHtml();
jQuery:
Copy to clipboard
$.cloudinary.image("cloudinary_team.jpg", {transformation: [
  {overlay: new cloudinary.Layer().publicId("santa_hat"), effect: "trim"},
  {gravity: "north_east", width: "1.0", height: "2.3", crop: "lpad"},
  {gravity: "adv_eyes", flags: ["region_relative", "layer_apply"], width: "2.6", crop: "scale"},
  {width: 500, crop: "scale"}
  ]})
React:
Copy to clipboard
<Image publicId="cloudinary_team.jpg" >
  <Transformation overlay="santa_hat" effect="trim" />
  <Transformation gravity="north_east" width="1.0" height="2.3" crop="lpad" />
  <Transformation gravity="adv_eyes" flags={["region_relative", "layer_apply"]} width="2.6" crop="scale" />
  <Transformation width="500" crop="scale" />
</Image>
Vue.js:
Copy to clipboard
<cld-image publicId="cloudinary_team.jpg" >
  <cld-transformation :overlay="santa_hat" effect="trim" />
  <cld-transformation gravity="north_east" width="1.0" height="2.3" crop="lpad" />
  <cld-transformation gravity="adv_eyes" flags={["region_relative", "layer_apply"]} width="2.6" crop="scale" />
  <cld-transformation width="500" crop="scale" />
</cld-image>
Angular:
Copy to clipboard
<cl-image public-id="cloudinary_team.jpg" >
  <cl-transformation overlay="santa_hat" effect="trim">
  </cl-transformation>
  <cl-transformation gravity="north_east" width="1.0" height="2.3" crop="lpad">
  </cl-transformation>
  <cl-transformation gravity="adv_eyes" flags={{["region_relative", "layer_apply"]}} width="2.6" crop="scale">
  </cl-transformation>
  <cl-transformation width="500" crop="scale">
  </cl-transformation>
</cl-image>
.NET:
Copy to clipboard
cloudinary.Api.UrlImgUp.Transform(new Transformation()
  .Overlay(new Layer().PublicId("santa_hat")).Effect("trim").Chain()
  .Gravity("north_east").Width(1.0).Height(2.3).Crop("lpad").Chain()
  .Gravity("adv_eyes").Flags("region_relative", "layer_apply").Width(2.6).Crop("scale").Chain()
  .Width(500).Crop("scale")).BuildImageTag("cloudinary_team.jpg")
Android:
Copy to clipboard
MediaManager.get().url().transformation(new Transformation()
  .overlay(new Layer().publicId("santa_hat")).effect("trim").chain()
  .gravity("north_east").width(1.0).height(2.3).crop("lpad").chain()
  .gravity("adv_eyes").flags("region_relative", "layer_apply").width(2.6).crop("scale").chain()
  .width(500).crop("scale")).generate("cloudinary_team.jpg");
iOS:
Copy to clipboard
imageView.cldSetImage(cloudinary.createUrl().setTransformation(CLDTransformation()
  .setOverlay("santa_hat").setEffect("trim").chain()
  .setGravity("north_east").setWidth(1.0).setHeight(2.3).setCrop("lpad").chain()
  .setGravity("adv_eyes").setFlags("region_relative", "layer_apply").setWidth(2.6).setCrop("scale").chain()
  .setWidth(500).setCrop("scale")).generate("cloudinary_team.jpg")!, cloudinary: cloudinary)

Image with hat overlay automatically placed above all faces detected

JPEGmini

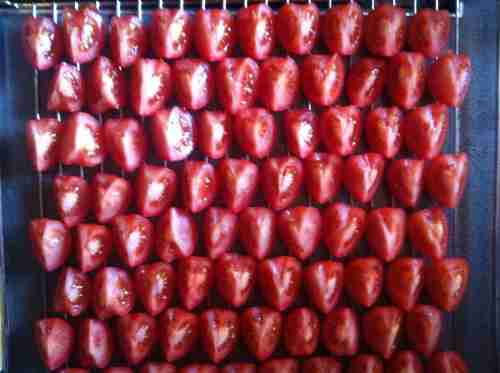
Our second most popular add-on, the JPEGmini image optimization add-on, is an add-on that helps reduce the file size of your photos by up to 5x, while keeping their original quality and JPEG format. Any Cloudinary image manipulation can be chained as well of course. When using the JPEGmini add-on, your images will be automatically optimized using advanced visual algorithms achieving maximum file size reduction while maintaining a very high visual quality. This seems like a no-brainer to me - who wouldn’t want their images automatically optimized in such a manner?? You can also read more about this add-on in this blog post.

For example:
Ruby:
Copy to clipboard
cl_image_tag("tomatoes_cooking.jpg", :quality=>"jpegmini:2", :width=>500, :crop=>"scale")
PHP v1:
Copy to clipboard
cl_image_tag("tomatoes_cooking.jpg", array("quality"=>"jpegmini:2", "width"=>500, "crop"=>"scale"))
PHP v2:
Copy to clipboard
(new ImageTag('tomatoes_cooking.jpg'))
  ->resize(Resize::scale()->width(500))
  ->delivery(Delivery::quality(Quality::jpegminiMedium()));
Python:
Copy to clipboard
CloudinaryImage("tomatoes_cooking.jpg").image(quality="jpegmini:2", width=500, crop="scale")
Node.js:
Copy to clipboard
cloudinary.image("tomatoes_cooking.jpg", {quality: "jpegmini:2", width: 500, crop: "scale"})
Java:
Copy to clipboard
cloudinary.url().transformation(new Transformation().quality("jpegmini:2").width(500).crop("scale")).imageTag("tomatoes_cooking.jpg");
JS:
Copy to clipboard
cloudinary.imageTag('tomatoes_cooking.jpg', {quality: "jpegmini:2", width: 500, crop: "scale"}).toHtml();
jQuery:
Copy to clipboard
$.cloudinary.image("tomatoes_cooking.jpg", {quality: "jpegmini:2", width: 500, crop: "scale"})
React:
Copy to clipboard
<Image publicId="tomatoes_cooking.jpg" >
  <Transformation quality="jpegmini:2" width="500" crop="scale" />
</Image>
Vue.js:
Copy to clipboard
<cld-image publicId="tomatoes_cooking.jpg" >
  <cld-transformation quality="jpegmini:2" width="500" crop="scale" />
</cld-image>
Angular:
Copy to clipboard
<cl-image public-id="tomatoes_cooking.jpg" >
  <cl-transformation quality="jpegmini:2" width="500" crop="scale">
  </cl-transformation>
</cl-image>
.NET:
Copy to clipboard
cloudinary.Api.UrlImgUp.Transform(new Transformation().Quality("jpegmini:2").Width(500).Crop("scale")).BuildImageTag("tomatoes_cooking.jpg")
Android:
Copy to clipboard
MediaManager.get().url().transformation(new Transformation().quality("jpegmini:2").width(500).crop("scale")).generate("tomatoes_cooking.jpg");
iOS:
Copy to clipboard
imageView.cldSetImage(cloudinary.createUrl().setTransformation(CLDTransformation().setQuality("jpegmini:2").setWidth(500).setCrop("scale")).generate("tomatoes_cooking.jpg")!, cloudinary: cloudinary)
Image automatically optimized with JPEGmini add-on

Imagga crop & scale

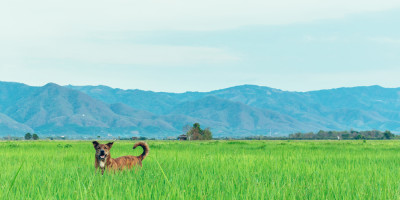
Imagga's crop & scale smart cropping technology automatically chooses the most visually appealing parts of your images and crops them accordingly, extending Cloudinary's powerful cropping capabilities with automatic cropping that is not only based on detected faces. When using the Imagga add-on, your images will be scaled and cropped based on automatically calculated areas of interest within each specific photo. This add-on was also described in this blog post.

For example:

  • Original image: Original image
  • Imagga scaled:
    Ruby:
    Copy to clipboard
    cl_image_tag("/dog_field.jpg", :height=>200, :width=>400, :crop=>"imagga_scale")
    PHP v1:
    Copy to clipboard
    cl_image_tag("/dog_field.jpg", array("height"=>200, "width"=>400, "crop"=>"imagga_scale"))
    PHP v2:
    Copy to clipboard
    (new ImageTag('/dog_field.jpg'))
      ->resize(Resize::imaggaScale()->width(400)->height(200));
    Python:
    Copy to clipboard
    CloudinaryImage("/dog_field.jpg").image(height=200, width=400, crop="imagga_scale")
    Node.js:
    Copy to clipboard
    cloudinary.image("/dog_field.jpg", {height: 200, width: 400, crop: "imagga_scale"})
    Java:
    Copy to clipboard
    cloudinary.url().transformation(new Transformation().height(200).width(400).crop("imagga_scale")).imageTag("/dog_field.jpg");
    JS:
    Copy to clipboard
    cloudinary.imageTag('/dog_field.jpg', {height: 200, width: 400, crop: "imagga_scale"}).toHtml();
    jQuery:
    Copy to clipboard
    $.cloudinary.image("/dog_field.jpg", {height: 200, width: 400, crop: "imagga_scale"})
    React:
    Copy to clipboard
    <Image publicId="/dog_field.jpg" >
      <Transformation height="200" width="400" crop="imagga_scale" />
    </Image>
    Vue.js:
    Copy to clipboard
    <cld-image publicId="/dog_field.jpg" >
      <cld-transformation height="200" width="400" crop="imagga_scale" />
    </cld-image>
    Angular:
    Copy to clipboard
    <cl-image public-id="/dog_field.jpg" >
      <cl-transformation height="200" width="400" crop="imagga_scale">
      </cl-transformation>
    </cl-image>
    .NET:
    Copy to clipboard
    cloudinary.Api.UrlImgUp.Transform(new Transformation().Height(200).Width(400).Crop("imagga_scale")).BuildImageTag("/dog_field.jpg")
    Android:
    Copy to clipboard
    MediaManager.get().url().transformation(new Transformation().height(200).width(400).crop("imagga_scale")).generate("/dog_field.jpg");
    iOS:
    Copy to clipboard
    imageView.cldSetImage(cloudinary.createUrl().setTransformation(CLDTransformation().setHeight(200).setWidth(400).setCrop("imagga_scale")).generate("/dog_field.jpg")!, cloudinary: cloudinary)
    Image automatically scaled with Imagga add-on

Imagga auto tagging

The Imagga auto tagging add-on automatically categorizes and tags images, according to the categories detected in each image. The Imagga add-on can automatically tell you what's in a photo by returning a list of detected categories and the confidence score for each of them. User uploaded images can now be fully categorized automatically! You can read more about it in this great blog post.

Other cool add-ons

Although the add-ons described above are statistically of the highest usage amongst our customers, there are a few more that are so useful and cool, I had to highlight them as well:

VIESUS image enhancement

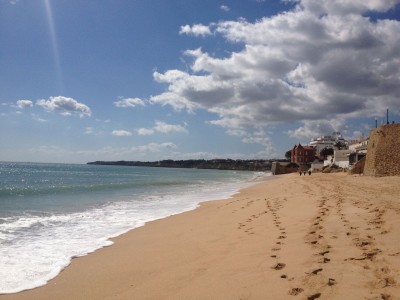
The VIESUS image enhancement add-on does just that, enhancing the visual quality of your photos, automatically adjusting brightness and color, restoring sharpness, removing noise and correcting for overexposure or underexposure. We speak in length about it here.

For example:

  • Original image: Original image
  • VIESUS enhanced:
    Ruby:
    Copy to clipboard
    cl_image_tag("beach_day.jpg", :effect=>"viesus_correct", :width=>400, :crop=>"scale")
    PHP v1:
    Copy to clipboard
    cl_image_tag("beach_day.jpg", array("effect"=>"viesus_correct", "width"=>400, "crop"=>"scale"))
    PHP v2:
    Copy to clipboard
    (new ImageTag('beach_day.jpg'))
      ->resize(Resize::scale()->width(400))
      ->adjust(Adjust::viesusCorrect());
    Python:
    Copy to clipboard
    CloudinaryImage("beach_day.jpg").image(effect="viesus_correct", width=400, crop="scale")
    Node.js:
    Copy to clipboard
    cloudinary.image("beach_day.jpg", {effect: "viesus_correct", width: 400, crop: "scale"})
    Java:
    Copy to clipboard
    cloudinary.url().transformation(new Transformation().effect("viesus_correct").width(400).crop("scale")).imageTag("beach_day.jpg");
    JS:
    Copy to clipboard
    cloudinary.imageTag('beach_day.jpg', {effect: "viesus_correct", width: 400, crop: "scale"}).toHtml();
    jQuery:
    Copy to clipboard
    $.cloudinary.image("beach_day.jpg", {effect: "viesus_correct", width: 400, crop: "scale"})
    React:
    Copy to clipboard
    <Image publicId="beach_day.jpg" >
      <Transformation effect="viesus_correct" width="400" crop="scale" />
    </Image>
    Vue.js:
    Copy to clipboard
    <cld-image publicId="beach_day.jpg" >
      <cld-transformation effect="viesus_correct" width="400" crop="scale" />
    </cld-image>
    Angular:
    Copy to clipboard
    <cl-image public-id="beach_day.jpg" >
      <cl-transformation effect="viesus_correct" width="400" crop="scale">
      </cl-transformation>
    </cl-image>
    .NET:
    Copy to clipboard
    cloudinary.Api.UrlImgUp.Transform(new Transformation().Effect("viesus_correct").Width(400).Crop("scale")).BuildImageTag("beach_day.jpg")
    Android:
    Copy to clipboard
    MediaManager.get().url().transformation(new Transformation().effect("viesus_correct").width(400).crop("scale")).generate("beach_day.jpg");
    iOS:
    Copy to clipboard
    imageView.cldSetImage(cloudinary.createUrl().setTransformation(CLDTransformation().setEffect("viesus_correct").setWidth(400).setCrop("scale")).generate("beach_day.jpg")!, cloudinary: cloudinary)
    Image automatically enhanced with VIESUS add-on

WebPurify

WebPurify image moderation comes in handy in various user generated content sites, by automatically moderating all photos uploaded to your application, thus preventing adult-oriented and inappropriate images from creeping into your websites or mobile applications. Custom moderation profiles can also be defined with our assistance, making sure that whatever images you don’t want appearing on your website - will be automatically screened out. You can read more about this add-on here.

Remove The Background

Remove The Background editing add-on automatically removes any background from your photos, resulting in a transparent-background image focusing only on the main object within your photo. This is especially common in e-commerce, media, and news sites in order to place the main element of the image on either white or color backgrounds. The final result better integrates an image into a site or specific page’s graphic design. This blog post describes this add-on in detail.

Which add-ons are your favorite? Are there any additional add-ons you wish we had? We would love to get your feedback and thoughts!

Recent Blog Posts

Generate Waveform Images from Audio with Cloudinary

This is a reposting of an article written by David Walsh. Check out his blog HERE!
I've been working a lot with visualizations lately, which is a far cry from your normal webpage element interaction coding; you need advanced geometry knowledge, render and performance knowledge, and much more. It's been a great learning experience but it can be challenging and isn't always an interest of all web developers. That's why we use apps and services specializing in complex tasks like Cloudinary: we need it done quickly and by a tool written by an expert.

Read more
Make All Images on Your Website Responsive in 3 Easy Steps

Images are crucial to website performance, but most still don't implement responsive images. It’s not just about fitting an image on the screen, but also making the the image size relatively rational to the device. The srcset and sizes options, which are your best hit are hard to implement. Cloudinary provides an easier way, which we will discuss in this article.

Read more

The Future of Audio and Video on the Web

By Prosper Otemuyiwa
The Future of Audio and Video on the Web

Web sites and platforms are becoming increasingly media-rich. Today, approximately 62 percent of internet traffic is made up of images, with audio and video constituting a growing percentage of the bytes.

Read more

Embed Images in Email Campaigns at Scale

By Sourav Kundu
Embed Images in Email Campaigns at Scale

tl;dr

Cloudinary is a powerful image hosting solution for email marketing campaigns of any size. With features such as advanced image optimization and on-the-fly image transformation, backed by a global CDN, Cloudinary provides the base for a seamless user experience in your email campaigns leading to increased conversion and performance.

Read more
Build the Back-End For Your Own Instagram-style App with Cloudinary

Github Repo

Managing media files (processing, storage and manipulation) is one of the biggest challenges we encounter as practical developers. These challenges include:

A great service called Cloudinary can help us overcome many of these challenges. Together with Cloudinary, let's work on solutions to these challenges and hopefully have a simpler mental model towards media management.

Read more

Build A Miniflix in 10 Minutes

By Prosper Otemuyiwa
Build A Miniflix in 10 Minutes

Developers are constantly faced with challenges of building complex products every single day. And there are constraints on the time needed to build out the features of these products.

Engineering and Product managers want to beat deadlines for projects daily. CEOs want to roll out new products as fast as possible. Entrepreneurs need their MVPs like yesterday. With this in mind, what should developers do?

Read more