If you intend to build a photo gallery online, you have to seriously consider how to protect the images from users who are not buying them. While visitors need to see the picture before purchasing, there needs to be a way to ensure that even serious buyers are not tempted to use the images without agreeing to your license terms.
One way to address this issue is to overlay bold transparent text or an image - called a watermark - on the image. By doing so, the image can not be used unless the user pays for the rights to use it. Adding watermarks is not a simple task. You could hire resources for manually watermarking using a photo editor . But, this process is not scalable for a massive photo gallery. Automating the process to add default watermarks to every image can make the process more efficient.
Cloudinary, an end-to-end media solution enables you to simplify the watermarking process. Cloudinary offers storage, manipulation and delivery of your images and videos as a service. Dynamic transformations enable you to manipulate media files either on upload or by adjusting the delivery URLs,. One of the transformations-- overlay -- can be used to watermark images.
To see this in action, let’s build a Vue app to upload images to Cloudinary and creating a new watermarked version .
Create a Cloudinary Account
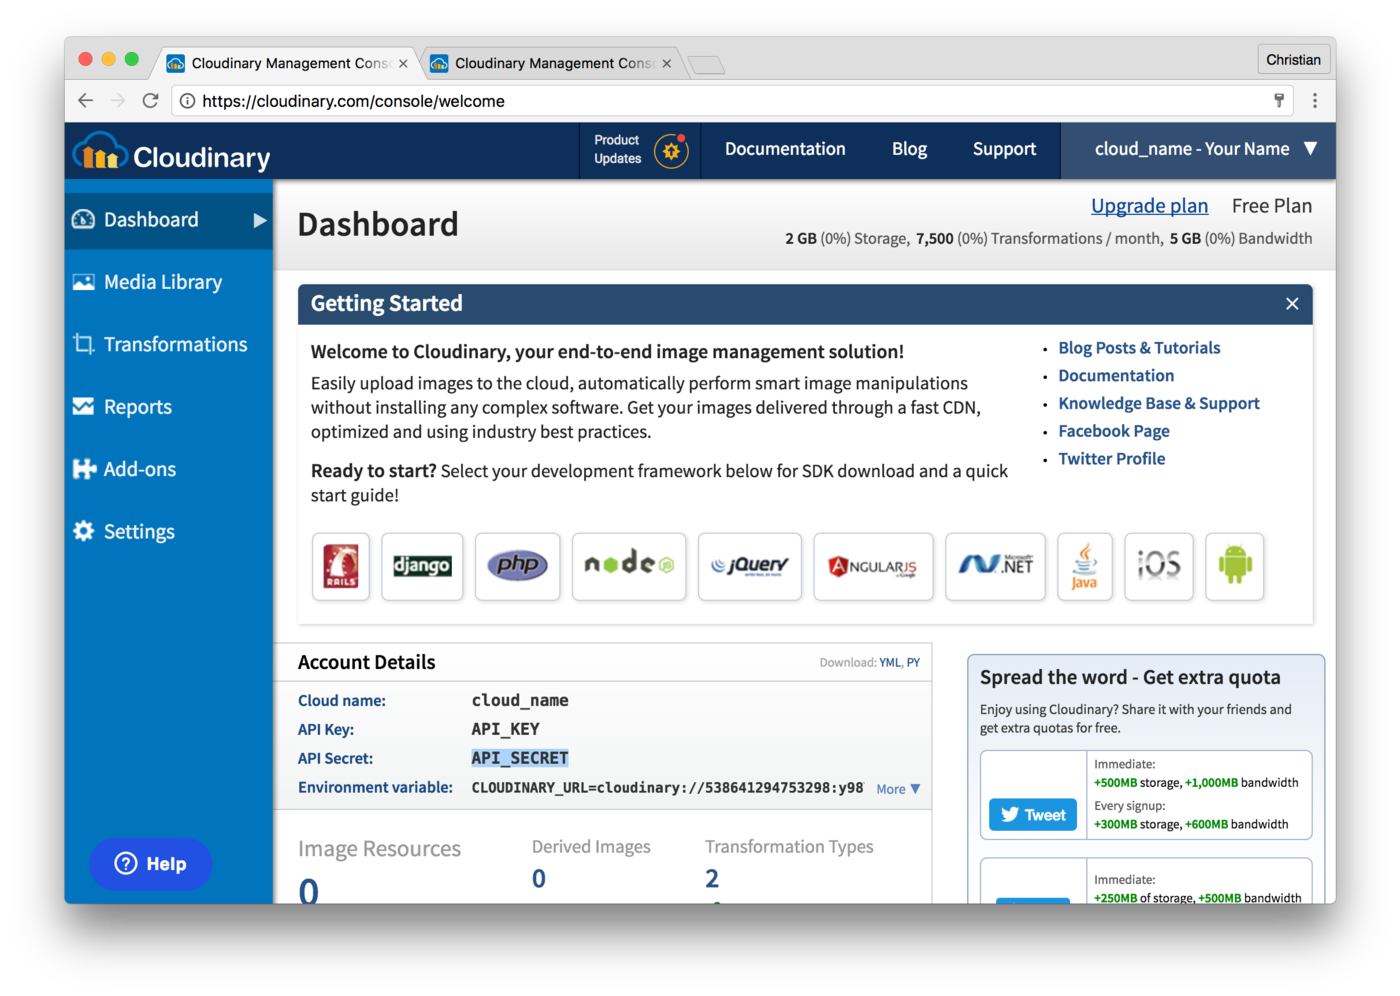
We can start start with creating an account on Cloudinary and retrieving our cloud credentials before building the app. Sign up on Cloudinary for a free account:

When you sign up successfully, you're presented with a dashboard that holds your cloud credentials. You can safely store them for future use:
Provision a Server
Before diving into the Vue app, we need to provision the server/API, which the Vue app depends on to upload images. A simple Node server will do; thankfully, Cloudinary has a Node SDK to make our lives much easier.
Setup a new Node Project with npm:
Install the following dependencies:
- Express: HTTP routing library for Node
- Body Parser: Attaches the request body on Express's
reqobject, hencereq.body - Connect Multiparty: Parse http requests with content-type multipart/form-data, also known as file uploads.
- Cloudinary: Node SDK for Cloudinary
- CORS: To enable CORS
Create an index.js file at the root of the project folder. This is the only file this project will have (except for the package.json and dependencies). Import the installed dependencies in this file:
const Express = require('express');
const multipart = require('connect-multiparty');
const bodyParser = require('body-parser')
const cloudinary = require('cloudinary');
const cors = require('cors');
Next, configure the body-parser and cors global middlewares:
app.use(cors());
app.use(bodyParser.urlencoded({ extended: false }))
app.use(bodyParser.json())
Configure Cloudinary with the credentials you retrieved from your dashboard after you created your account:
cloudinary.config({
    cloud_name: 'CLOUD_NAME',
    api_key: 'API_KEY',
    api_secret: 'SECRET'
});
Add a POST route to handle incoming requests:
// Multiparty middleware
const multipartMiddleware = multipart();

app.post('/upload', multipartMiddleware, function(req, res) {
  // Upload files to cloudinary
  cloudinary.v2.uploader.upload(
    // File to upload
    req.files.image.path,
    // Overlay Tranformation
    { width: 700, overlay: `text:Times_90_bold:${encodeURIComponent(req.body.watermark)}`, gravity: "south", y: 80, color: "#FFFF0080" },
    // Callback function
    function(error, result) {
      res.json({data: result})
  })
});
Above is a POST route pointing to /upload. The route is configured with the multiparty middleware to parse uploaded files and attach to the req object.
When this route is hit, we attempt to upload the image using Cloudinary's upload() method. It takes a file path, optional transformation argument and a callback function to be executed when the upload is successful.
The transformations provided are:
- Width: The width that the image should be scaled to
- Overlay: Content that should be placed on the image. In our case a Times font, 90px font size, bold text. This text is gotten from the request payload via
req.body - Gravity + y: Where the text should be placed. In this case, 80px from bottom
- Color + Opacity: Color of the text.
#FFFF00is the color, while 80 attached at the end is the opacity value in percentage.
You can start listening to port:
Run the following command to start the server while we head right to building the client:
Upload Client with Vue
Our front-end app will be built using Vue (a progressive JavaScript framework). To get started, install the Vue CLI tool:
Next, create a simple Vue project using the Vue CLI tool we installed:
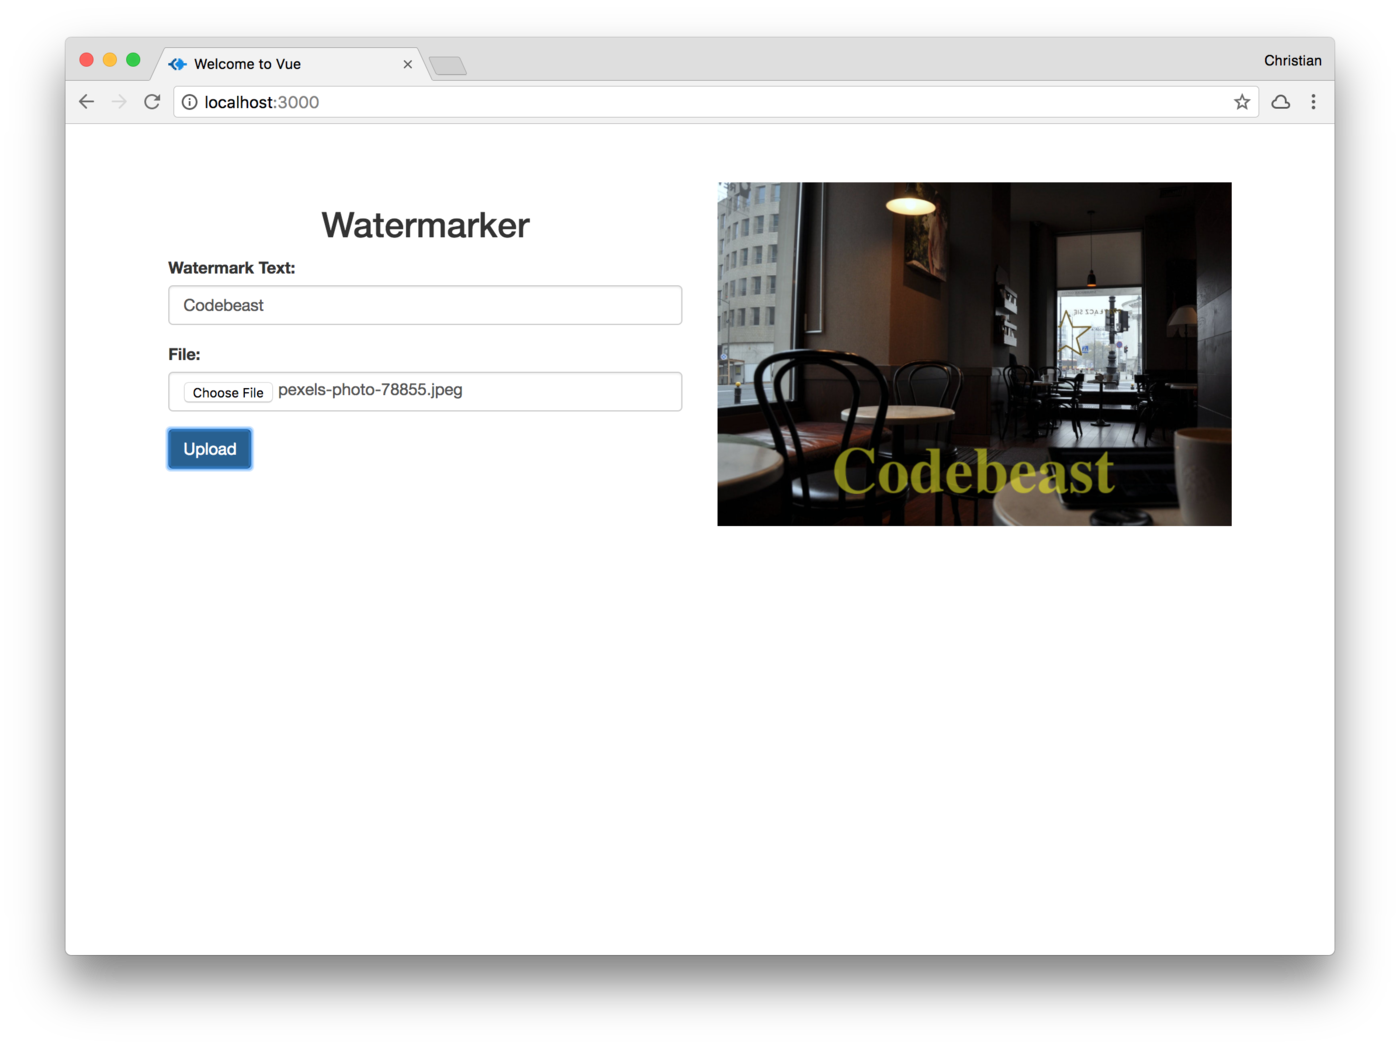
The index.html file found in the scaffold is enough for us to actualize our idea. Let's start by adding a basic template for a form that contains the upload and watermark text fields:
<h2 class="text-center">Watermarker</h2>
<form enctype="multipart/form-data" @submit.prevent="onSubmit">
  <div class="form-group">
    <label for="">Watermark Text:</label>
    <input type="text" class="form-control" name="text" v-model="model.text">
  </div>
  <div class="form-group">
    <label for="">File:</label>
    <input type="file" class="form-control" accept="image/*" name="image" v-on:change="upload($event.target.files)">
  </div>
  <div class="form-group">
    <button class="btn btn-primary">Upload</button>
  </div>
</form>

 <div class="col-md-6">
   <img:src="watermarked" class="img-responsive" alt="">
 </div>
The text is bound to a model, while the upload field is bound to an upload event handler. When the "Upload" button is clicked, the onSubmit method on our Vue instance will be called.
There is also an image at the bottom of the template that its src attribute is bound to watermarked. This will be where the watermarked images will be placed.
This is the model on our Vue instance:
data: function() {
   return {
     model: {
       text: '',
       image: null
     },
     watermarked: null
   }
 },
Because we cannot have a two-way binding on an upload field, we attach a change event. before and after properties will be updated with the URL of non-watermarked and watermarked images. When the field changes, the upload method is called, which should set the value of model.image:
Finally, when the form is submitted, we assemble the uploaded file, as well as the watermark text, using FormData:
methods: {
  onSubmit: function() {
    // Assemble for data
    const formData = new FormData()
    formData.append('image', this.model.image);
    formData.append('watermark', this.model.text);
    // Post to server
    axios.post('http://localhost:5000/upload', formData)
    .then(res => {
      // Update UI
      this.watermarked = res.data.data.url
    })
  },
  // ...
 }
You can launch the app and try to upload an image. You should get the following response:
Custom Font
Cloudinary enables you to use custom fonts. This comes handy when universally supported fonts do not suit your brand guidelines, and a custom font is required. Before using a custom font, you need to upload it with your chosen public ID:
cloudinary.v2.uploader.upload("fonts/AlexBrush-Regular.ttf",
    {resource_type: 'raw',
    type: 'authenticated',
    public_id: 'AlexBrush-Regular.ttf'}, callbackFunction)
Then you can use it as the font for the text overlay, while uploading an image to your Cloudinary server:
app.post('/upload', multipartMiddleware, function(req, res) {
  // Upload files to cloudinary
  cloudinary.v2.uploader.upload(
    // File to upload
    req.files.image.path,
    // Overlay Tranformation
    { width: 700, overlay: `text:AlexBrush-Regular.ttf_90_bold:${encodeURIComponent(req.body.watermark)}`, gravity: "south", y: 80, color: "#FFFF0080" },
    // Callback function
    function(error, result) {
      res.json({data: result})
  })
});
Note that the overlay transformation property has changed from text:Times_90_bold... to text:AlexBrush-Regular.ttf_90_bold....
To always get the expected behavior from custom fonts, it's important to follow these guidelines:
- .ttf and .otf font types are supported.
- Make sure to include the file extension when referencing the
public_idof the raw file. - To make use of bold or italic font styles, upload separate font files for each emphasis style and specify the relevant file in the overlay transformation.
- A custom font is available only to the specific account or sub-account where it was uploaded.
- Underscores are not supported in custom font names. When uploading the font as a raw file, make sure the
public_iddoes not include an underscore. - As with any resource you upload to Cloudinary, it is your responsibility to make sure you have the necessary license and redistribution rights for any custom fonts you use.
Conclusion
There are various techniques you could use for adding your brand logo or custom text as watermarks. Cloudinary makes it easy to implement, automate and scale your watermarking requirements. Learn more overlay docs about different styling techniques and take it for a spin (for free).
 |
Christian Nwamba (CodeBeast), is a JavaScript Preacher, Community Builder and Developer Evangelist. In his next life, Chris hopes to remain a computer programmer. |